
Taking screenshots is handy and can be a time-saver, especially when you need to demonstrate something that would otherwise be difficult to explain in words. On Windows 11, there are various ways to capture a screenshot. Here are some of them.
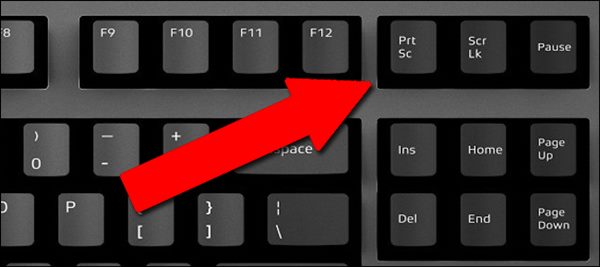
1. Take a Screenshot using the PrtSc key
Regardless of which Windows version you use, you can instantly press the PrtSc key to capture a screenshot.
The only drawback of the PrtSc function is that it only captures the items displayed on your current screen.
To take a screenshot, open the screen you want to capture and press the PrtSc key. This will capture the screenshot; next, open the Paint app and press the CTRL + V button to paste the screenshot.
2. Take a Screenshot using Windows + PrtSc Key Combination
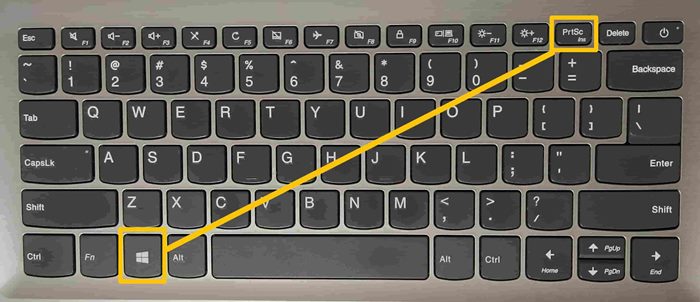
If you don’t want PrtSc to save screenshots to the clipboard, use this key combination. Pressing the Windows + PrtSc Key together captures the screenshot, which is then saved to the Pictures > Screenshot folder.
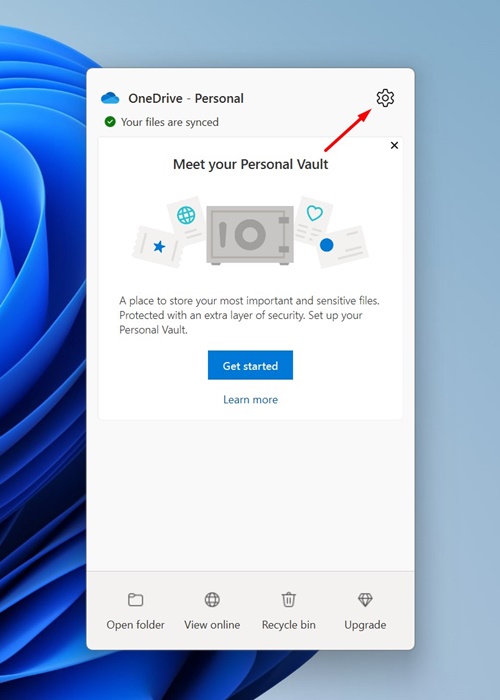
3. Use the PrtScn with OneDrive
The OneDrive client for Windows has a feature that automatically saves screenshots in the OneDrive cloud folder.
1. Right-click on the OneDrive client on the taskbar.
2. Select Settings.
3. Switch to Sync and Backup.
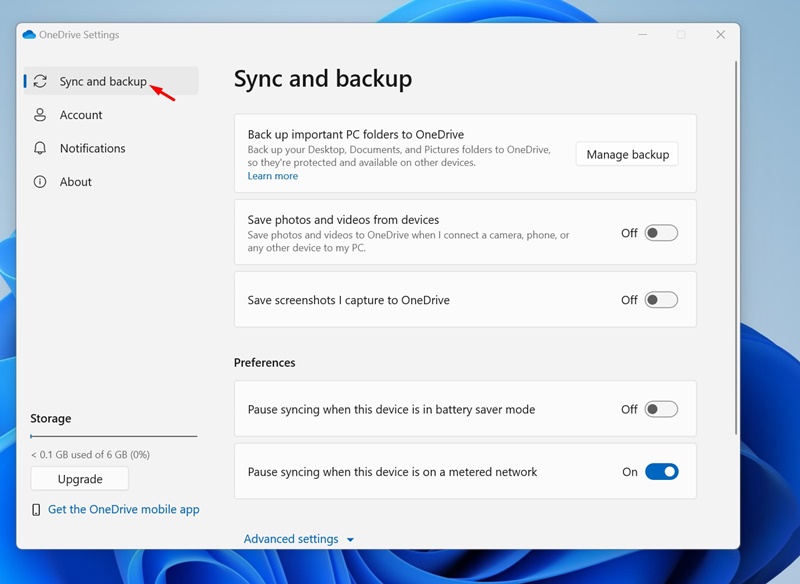
4. Enable the toggle next to Save screenshots i capture to OneDrive.
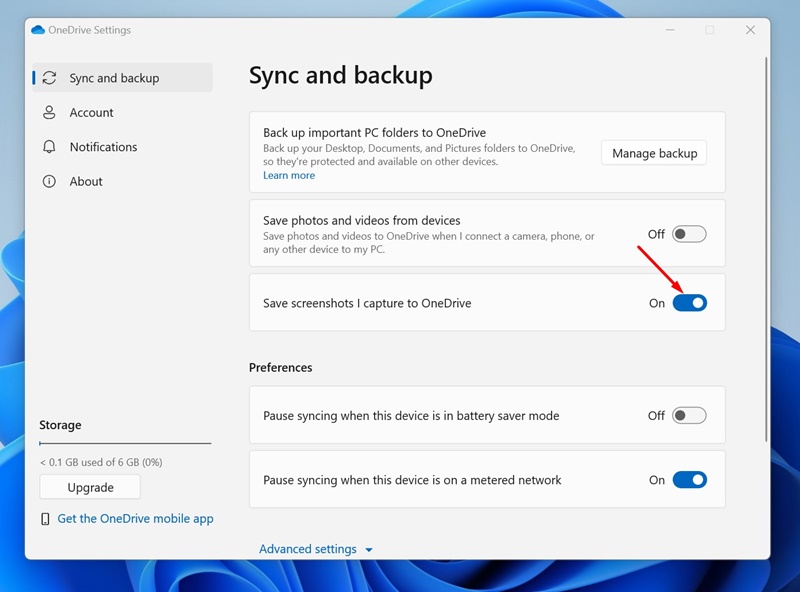
After making the change, press the Print Screen key to capture a screenshot. Once captured, the screenshot will be automatically saved to OneDrive. You can access the saved screenshots from any device.
4. Using Snipping Tool
Snipping Tool is a built-in utility for taking screenshots.
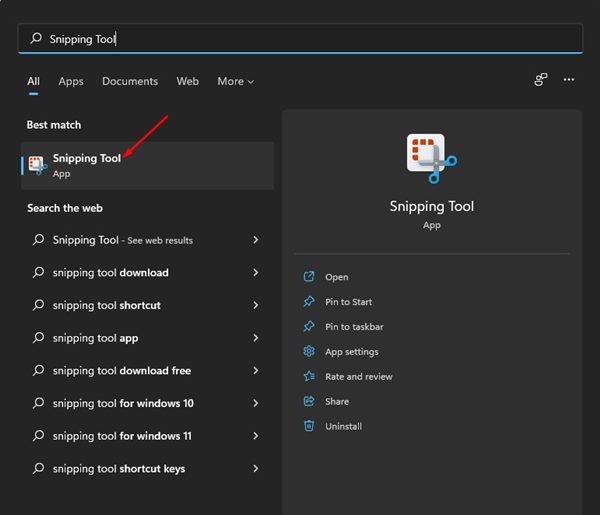
1. Type Snipping Tool in the Windows search and open it.
2. You can also press the Windows + Shift + S key on your keyboard to launch the Windows Snipping Tool.
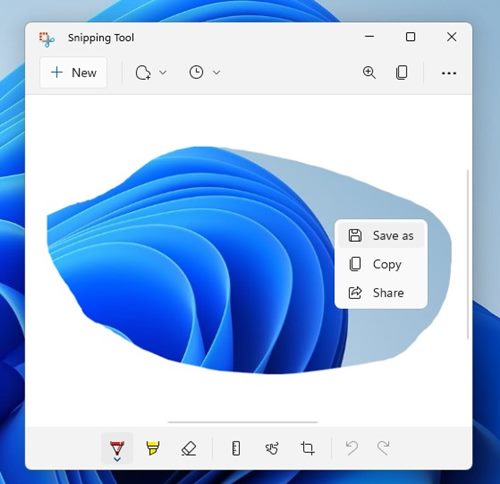
3. You will find four screen capture options: Rectangular Snip, Freeform Snip, Window Snip, and Fullscreen Snip.

4. Depending on the type of screenshot you want to capture, select the option and capture the screen.

5. You can now view the screenshot. Right-click on the image and select Save as to save it on your storage device.
5. Capture a Screenshot using the Xbox Game Bar
We will use the Xbox Game Bar to take a screenshot in Windows 11.
1. Press the Windows + G key on your keyboard. This will open the Xbox Game Bar on your device.
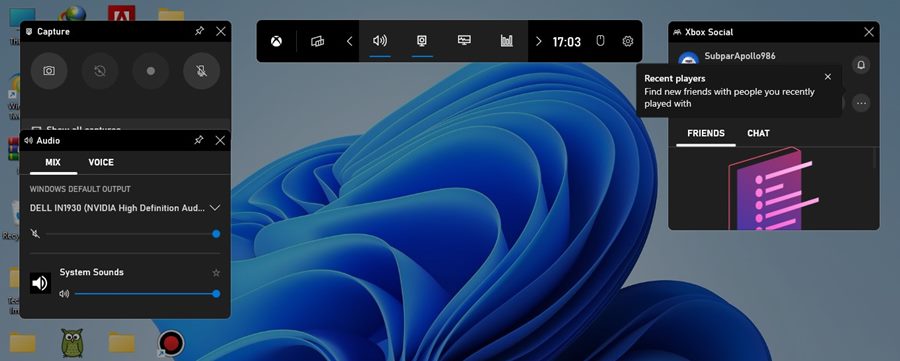
2. Click the Widgets option and select the Capture Widget.
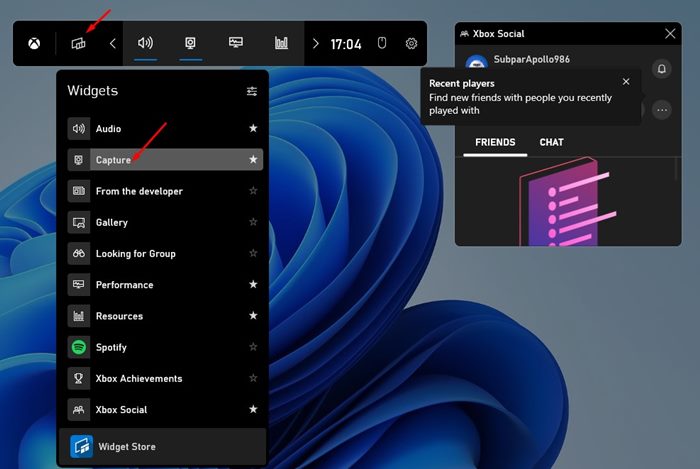
3. Click the camera icon to capture the current app or desktop.
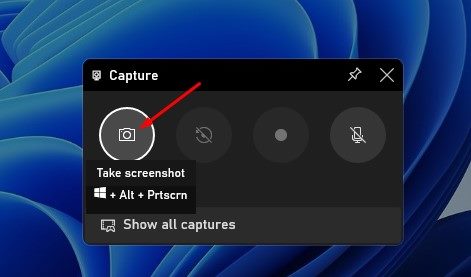
4. The captured screenshot will be saved to C:\Users\[username]\Videos\Captures folder. Browse the folder, and you will find your screenshot there.
6. Capture a screenshot using Lightshot
You can rely on the Lightshot tool to capture screenshots and annotate the images. Here’s how to use Lightshot.
1. Download & install Lightshot.

2. The Lightshot app icon will be added to the system tray.
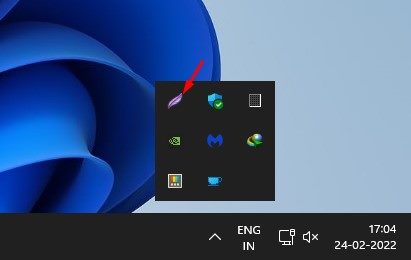
3. Click on the Lightshot icon and select the area you want to capture.
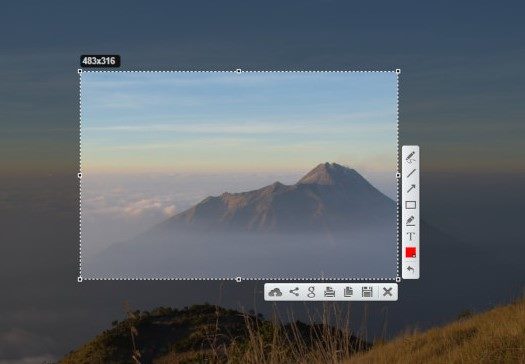
4. Once done, you can edit the image or create an instant shareable link.
7. Use Third-Party Screenshot Utilities
Lightshot is not the only third-party screenshot tool available for Windows. There are many other options. Third-party screenshot tools for Windows allow you to control your screenshots more effectively. For example, you can draw on screenshots, add texts, and more immediately after capturing them.
Also, several Windows screen recording tools let you capture screenshots. For a list of the best screenshot tools, check our guide – Best Windows Screenshot Tools.
Also Read: 10 Best Screen Recorder for Windows 11
You get plenty of ways to capture screenshots in Windows 11. You can even use other third-party screenshot tools to capture screenshots. If you have any doubts, let us know in the comment box below.
The post 7 Best Ways to Take Screenshots on Windows 11 appeared first on TechViral.
from TechViral


0 Comments