
If you see the ‘Vmmem’ process in the Task Manager, one thing is sure: Virtualization technology is enabled on your device, and some processes or tasks are run by virtual machines using the resources. So, if Vmmem high Memory and CPU usage is the problem, you can blame your virtual machine.
If you don’t have any Virtual machines installed, Windows runs specific processes in Hyper-V Manager or WSL to run Linux binary executables.
Vmmem High Memory and CPU Usage – How to Fix?
Most of the problems related to the Vmmem process will be fixed if you identify which virtual machine is consuming the CPU/Memory resources.
If you can’t identify the virtual machine or program behind Vmmem’s high memory and CPU usage, follow these methods.
1. End all resource hogging processes
Since you don’t know what virtual machine or program is behind the Vmmem High Memory and CPU usage, it’s best to end all resource-hogging processes. You need to end all resources not linked to the system.
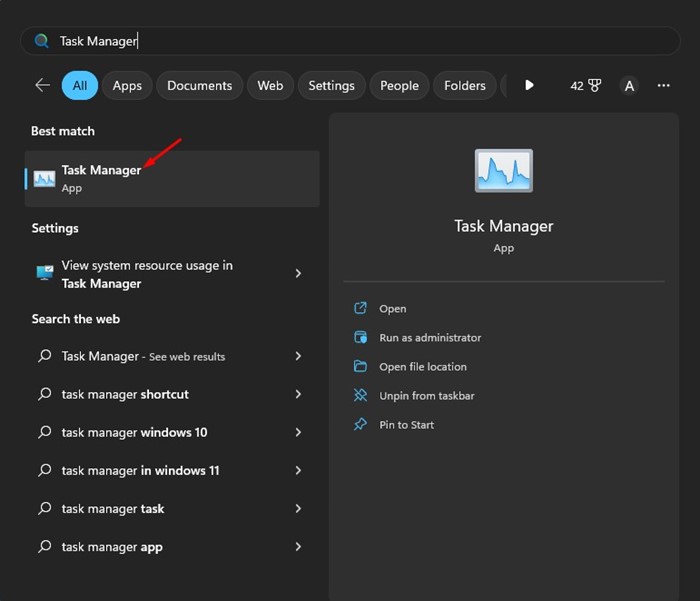
1. Open the Task Manager app from the Windows Search.
2. Click on Processes.
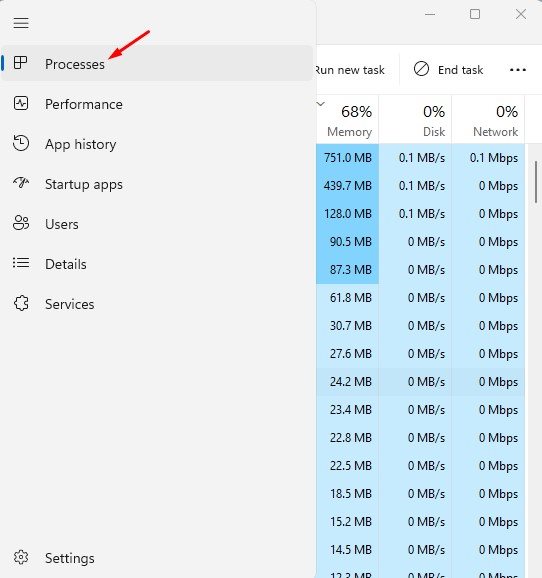
3. Monitor the processes and apps using the most memory and CPU resources.
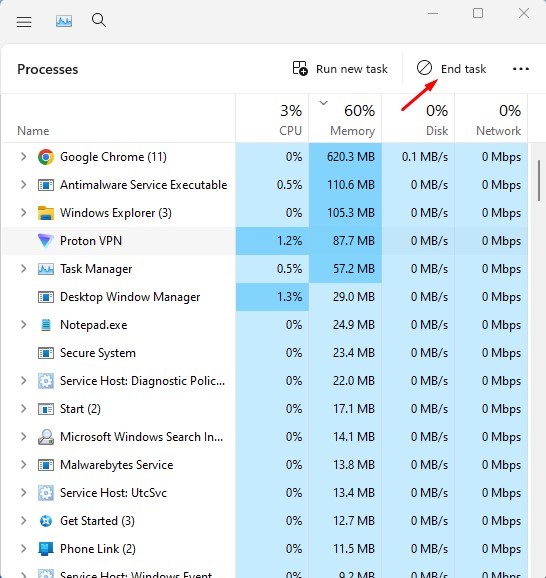
4. Right-click on them and select End task.
2. Restart the WSL
Using WSL (Windows Subsystem for Linux) to run Linux binary executables could be the reason for the Vmmem process’s high resource consumption. You can fix this by restarting the WSL.
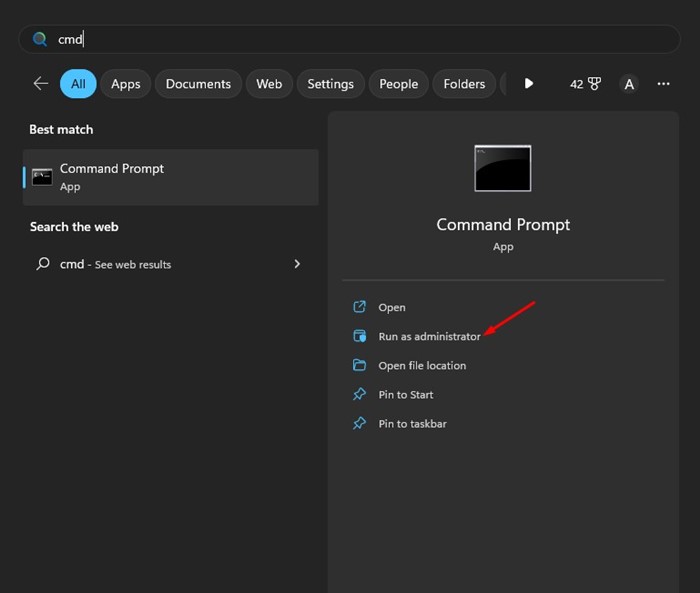
1. Click on Windows search and type in CMD. Right-click on the Command Prompt and select Run as administrator.
2. Type the given command on the command prompt and press Enter.
wsl --shutdown
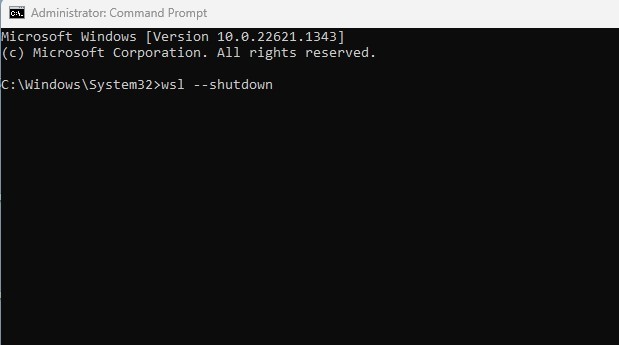
This will shut down the WSL. However, it will start again when you restart the computer.
3. Make Changes to the Wslconfig File
If the command prompt method fails to execute or returns with an error, you need to follow this method.
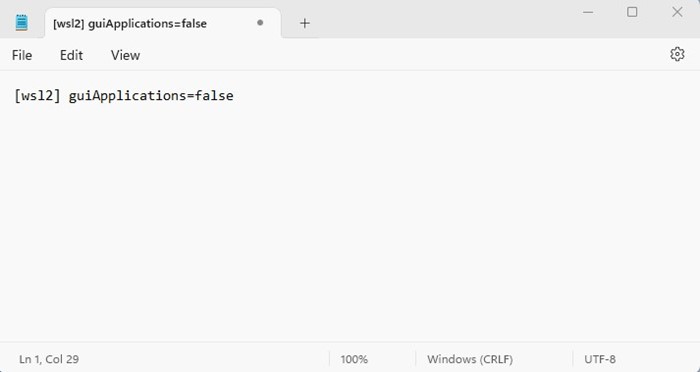
1. Open your File Explorer and navigate to this path:
C:\Users\your-username\.wslconfig
2. Double-click on the .wslconfig file. The file will open in Notepad.
3. Paste these lines into the file.
[wsl2]
guiApplications=false
4. Click on the File button and select Save.
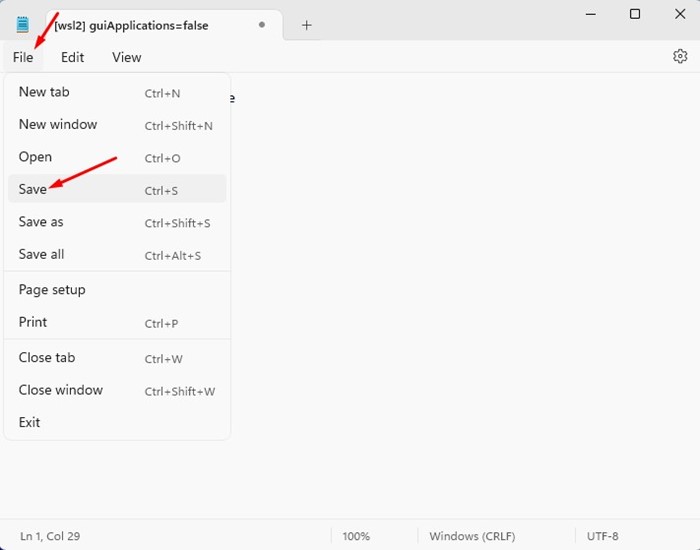
After making the changes, make sure to restart your Windows PC. This would fix vmmem high Memory and CPU usage on your computer.
4. Disable Hyper-V on Windows 11
You also need to disable Hyper-V, a Microsoft product that allows creating and running multiple virtual machines on a single device.
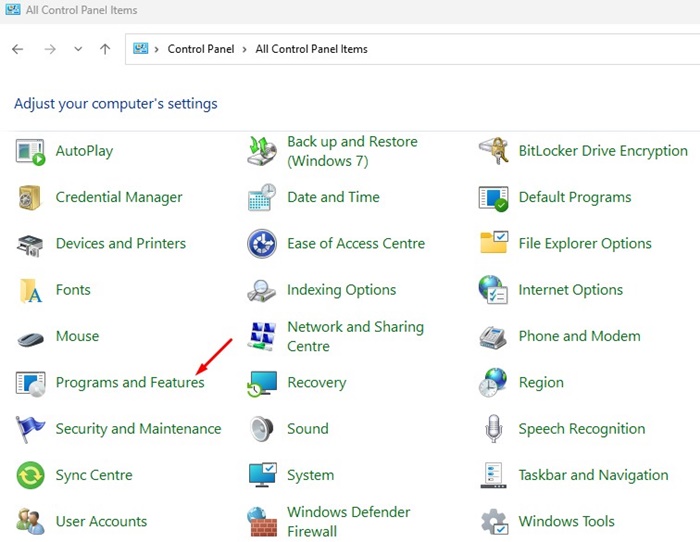
1. Open the Control Panel app from the Windows Search.
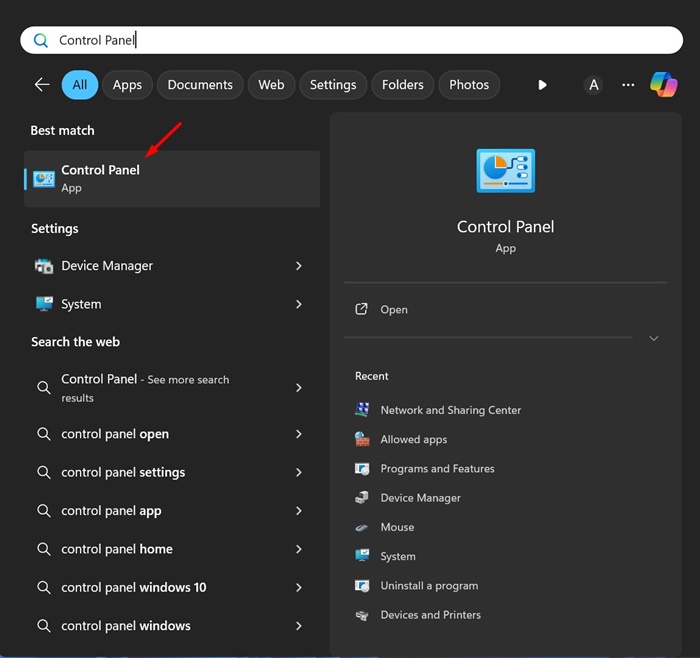
2. Select Programs and Features.
3. Click on Turn Windows Features on or off.

4. Uncheck Hyper-V and click OK.

5. Uninstall your Virtual Machine
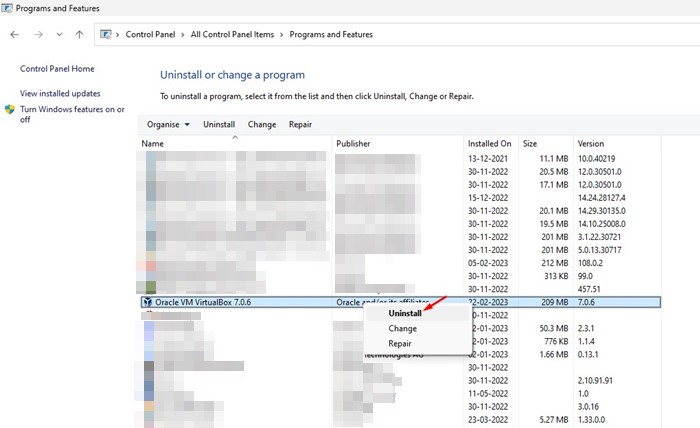
As we all know, the Vmmemm process usually appears when Windows detects a virtual machine. Virtual Machines could be anything; it could be VirtualBox or Hyper-V Manager.
If you recently installed a virtual machine or a Sandbox virtual machine on your device to test programs or an OS, it’s best to uninstall it. Keeping them disabled won’t help; you need to uninstall them completely.
To uninstall the virtual machine, open the Control Panel, right-click on the Virtual machine you’ve installed recently, and select Uninstall.
6. Disable Virtualization on your computer
If virtualization is not enabled on your PC, you won’t be able to run any virtual machine on your device. Virtualization is probably enabled if you have run any virtual machine. The goal here is to turn off your computer’s virtualization feature. Disabling virtualization is difficult; you must boot into BIOS or UEFI and turn off the feature.
If you don’t know how to open BIOS or UEFI, you can try searching terms like ‘Disable Virtualization in or SVM in ASUS BIOS/UEFI’, ‘Disable virtualization in Gigabyte Motherboard’, etc.
Besides these methods, a few things can help you deal with the Vmmem Process High CPU usage problem. You can update your operating system, run an antivirus scan, or roll back your Windows Version using the System Restore functionality.
Fix Vmmem high CPU Docker?
Vmmem high CPU usage is reported by users who have installed Docker using Windows Subsystem for Linux2. Users have reported that the memory usage is capped at 99%, and sometimes the CPU resource consumption touches the 100% mark.
The only known method to fix high CPU usage for the vmmem process on Windows is to restart the entire computer. Another thing you can try is to limit memory usage for WSL.
Reinstalling the WSL has also helped many users, but it’s difficult to reinstall WSL, and it isn’t a sure-shot fix to the problem.
Also read: How to Fix High CPU Usage in Windows
These are the best ways to fix the Vmmem Process high CPU usage in Windows. If you need more help fixing Vmmem high memory usage, let us know in the comments.
The post How to Fix Vmmem High Memory and CPU Usage in Windows appeared first on TechViral.
from TechViral


0 Comments