
By default, Windows 11 assigns specific letters, such as E:, F:, G:, etc., to the hard disk drive, but you can change them easily. If you want, you can utilize the Disk Management tool to change the drive letters.
Important: Some software that relies on drive letters to work might not run after changing the drive letter. The change mainly affects the desktop shortcut of your Windows 11.
1. Change the Drive Letter from the Settings
You can change the drive letter using Windows 11’s Settings app. Here’s what you need to do.
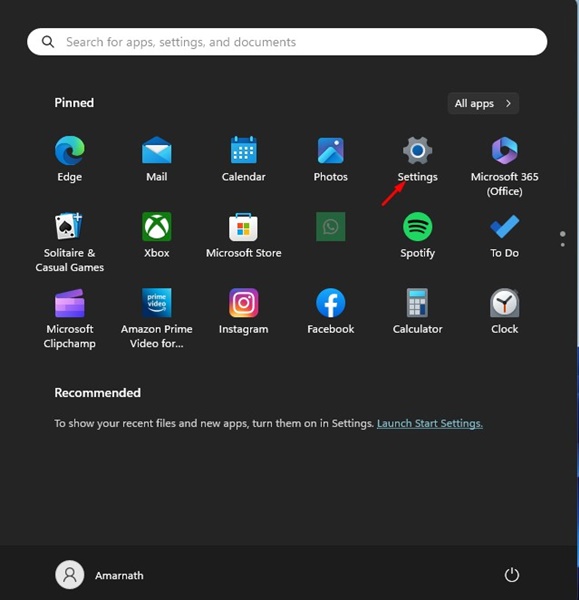
1. Click on the Windows 11 Start button and select Settings.
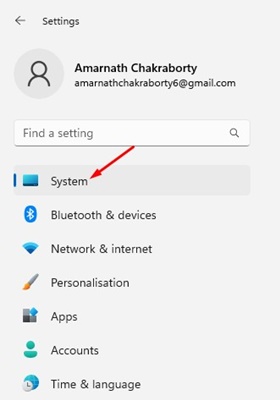
2. Switch to the System.
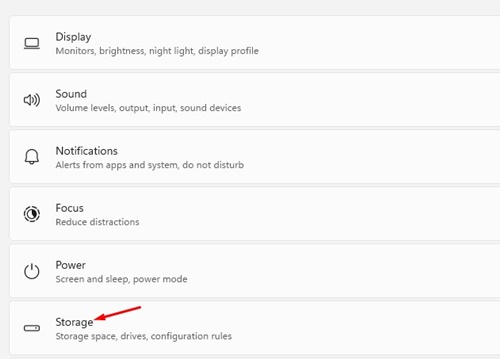
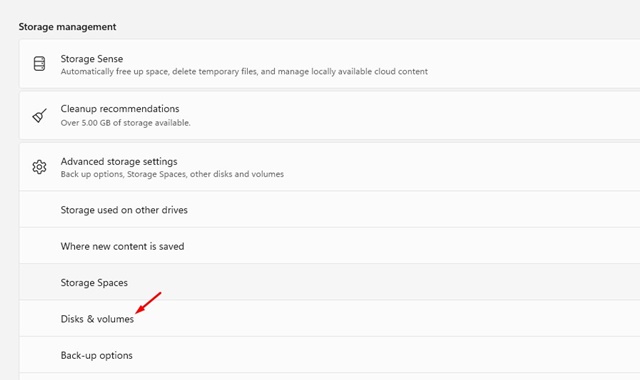
3. Click on Storage.
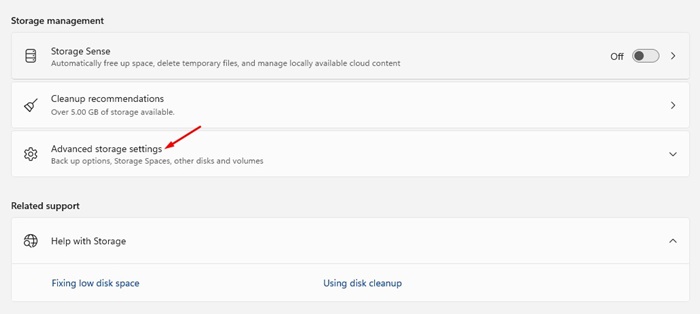
4. Scroll down and expand the Advanced Storage Settings.
5. Select Disks & Volumes.
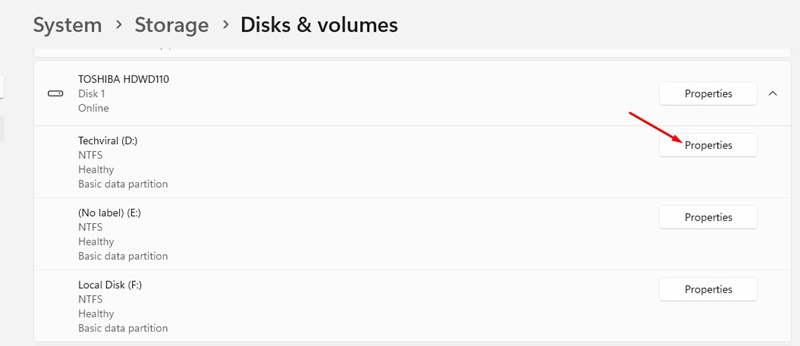
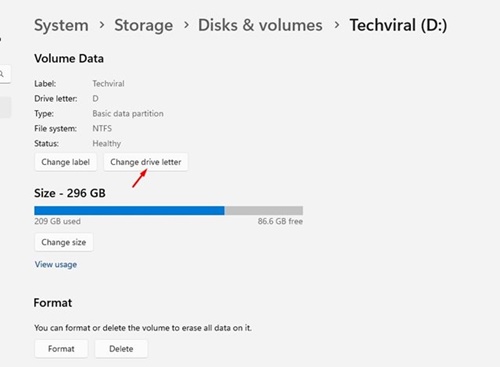
6. Click Properties beside the disk partition whose letter you want to change.
7. Click Change Drive Letter.
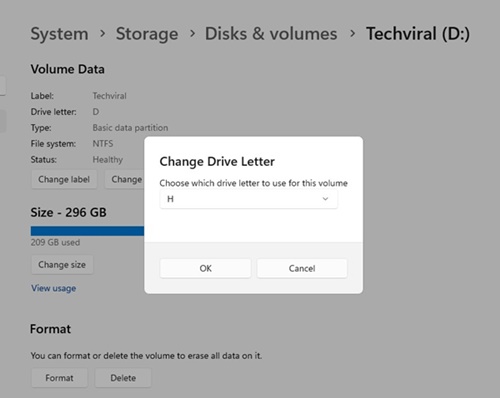
8. Use the drop-down menu to select the new drive letter and click Ok.
2. Change Drive Letter from the Disk Management Tool
You can even use the Disk Management utility to change the drive letter. Here’s what you need to do.
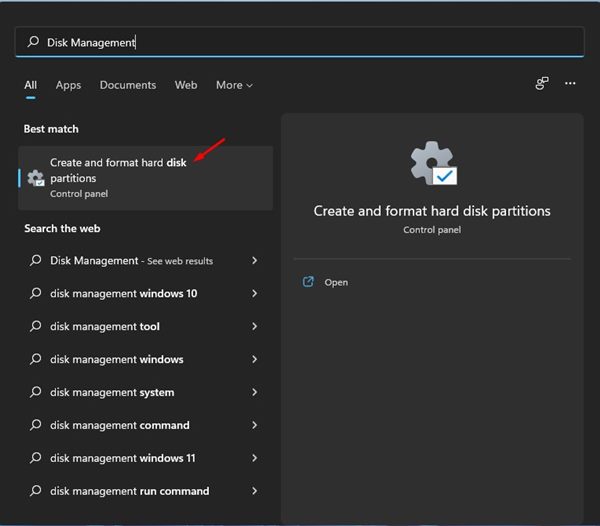
1. Open Windows 11 Search and type in Disk Management.
2. Open the Create and format hard disk partitions from the list of options.
3. This will open the Disk Management utility on your Windows 11 computer.
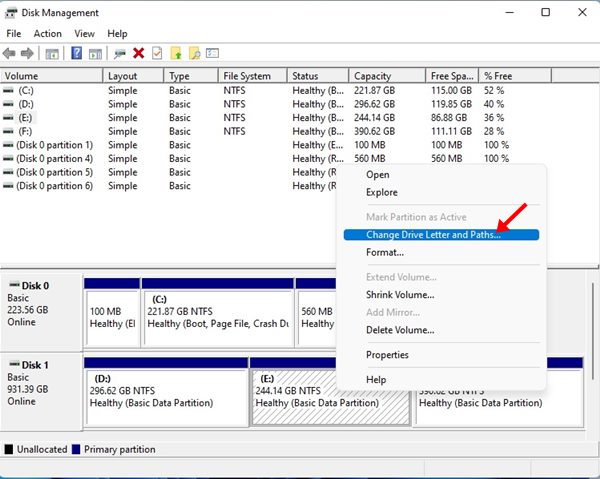
4. Right-click on the hard drive whose letter you want to change and select Change Drive Letters and Paths.
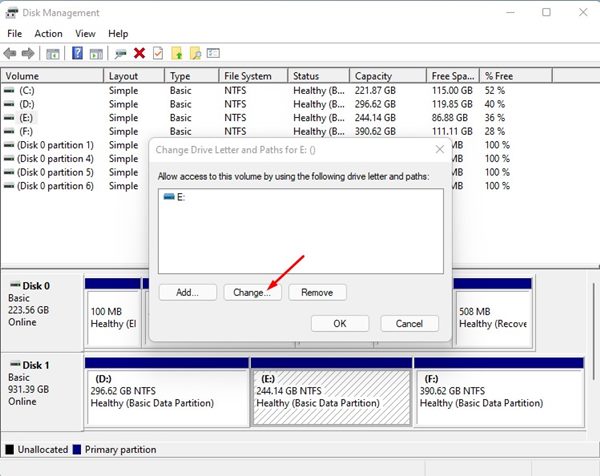
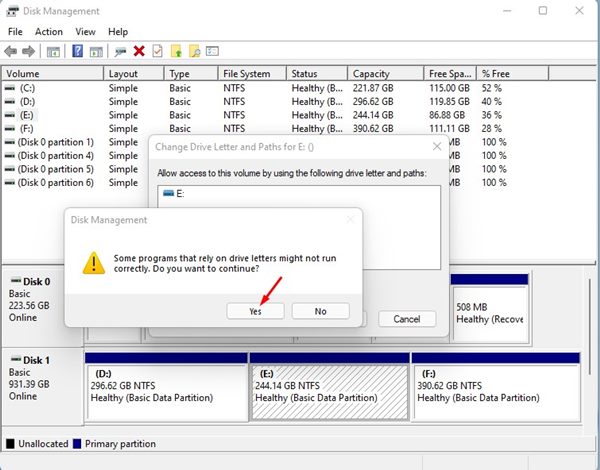
5. On the Change Drive Letters and Path dialog box, click the Change button.
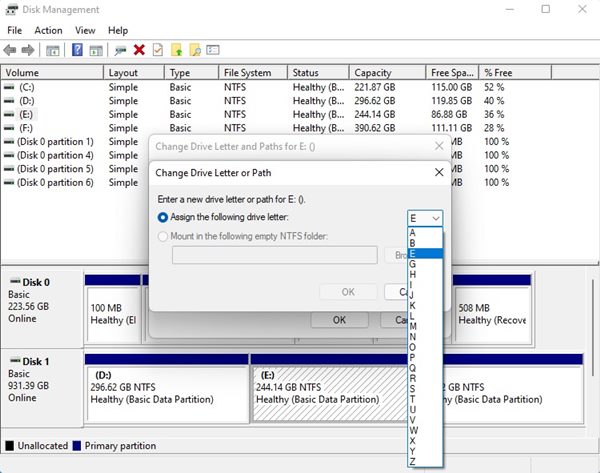
6. Utilize the drop-down menu next to Assign the following drive letter and select the letter. Once done, click Ok.
7. You will see a confirmation pop-up; click Yes to apply the changes.
8. The new drive letter should appear on the Disk Management utility.
9. Open the File Explorer, and you will find that the drive letter has been changed.
Fix Programs Not Working After Changing Drive Letter
Some software that relies on drive letters to work might not run after changing the drive letter. Follow these steps to fix the programs that were not opening.
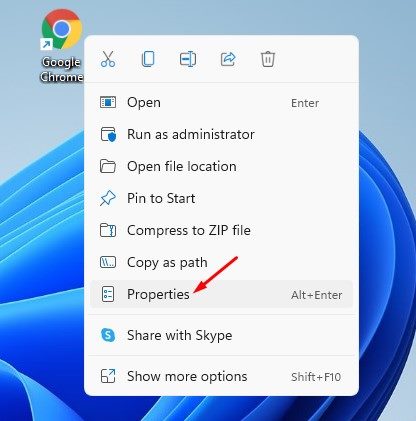
1. Right-click on the shortcut file for the app that’s broken. Select Properties.
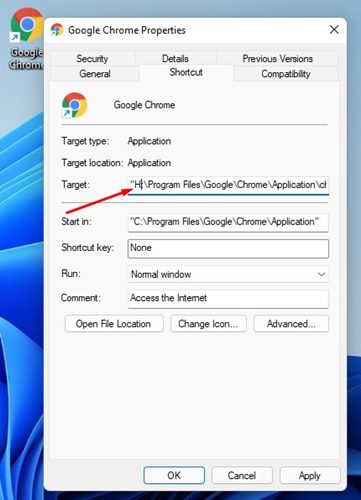
2. On the target field, change the target of the shortcut to the new drive letter.
For example, if Chrome was previously installed on “E:\Program Files\Google\Chrome\Application\chrome.exe”, and you changed the E drive to H, you need to change the target field to “H:\Program Files\Google\Chrome\Application\chrome.exe”
3. After making the changes, click Apply and then Ok.
This will fix the broken shortcut on Windows 11. If the programs still don’t work, you must reinstall them or change the drive letter.
Changing the drive letter is pretty easy, especially on the Windows 11 operating system. If you have any doubts, let us know in the comment box below.
The post How to Change Drive Letter in Windows 11 appeared first on TechViral.
from TechViral


0 Comments