

Sometimes, users accidentally turn off the Windows Installer services, which prevents new program installation. Third-party apps or malware can also disable the Windows Installer services. You may also receive the error message due to a corrupt installer file, incorrect registry settings, misconfigured system policy, or other reasons.
Whatever the reason, the ‘This Installation Is Forbidden by System Policy’ error can be fixed by doing these things.
1. Restart your computer
Restarting gives your system much-needed time to cool down and install several apps and system updates.
If you haven’t restarted your computer or laptop for a while, click on the Power Menu and select Restart. After restarting, rerun the installer. This time, you won’t get the error message.
2. Use Another Installer File
Due to a corrupted installer file, you may encounter the ‘This Installation Is Forbidden by System Policy’ error message. If this message keeps appearing, you must download another installer file and complete the installation.
Open your web browser and download the app’s installer file from its official website. Once you have done so, double-click the Installer file and follow the on-screen instructions to complete the installation process.
3. Run the Installer as Administrator
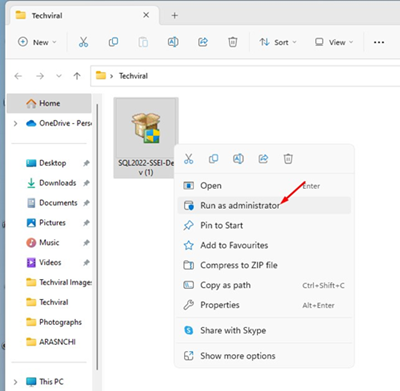
Running the Installer file as an administrator will prevent all third-party processes & apps from conflicting with the installation. It will also overlook the incorrect system policy settings and continue with the installation.
Running the installer file as an administrator is easy; right-click on the installer file and select ‘Run as administrator’. You will now encounter a UAC Prompt; click on Yes.
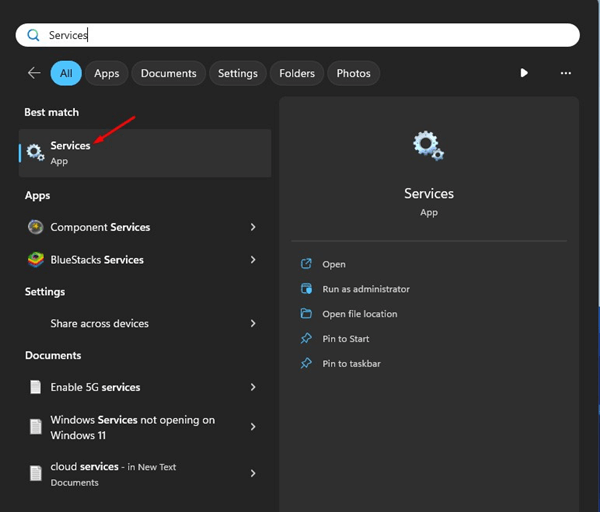
4. Enable the Windows Installer Service
If the Windows Installer is disabled, you will face various installation issues. You will also encounter installation issues while downloading apps from the Microsoft Store. The best you can do to resolve all installation issues is to check whether the Windows Installer Service is enabled.
1. Open the Services app from the Windows Search.
2. Find the Windows Installer Service.
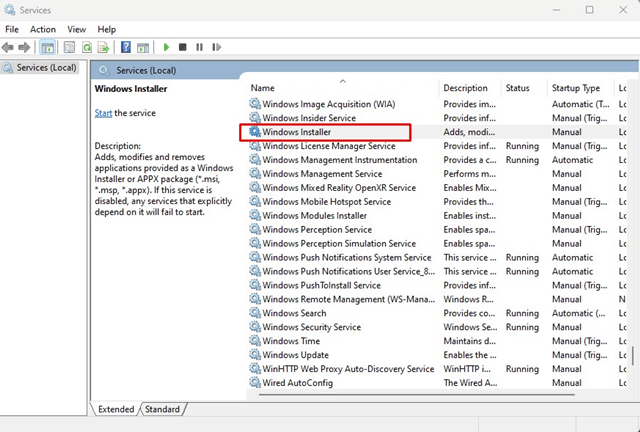
3. Double-click on the Windows Installer Service. Next, click on the Startup type drop-down and select Manual.
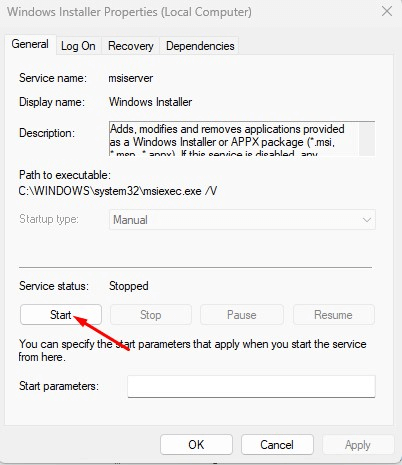
4. Click the Start button to enable the Windows Installer Service. Once done, click the Apply button to put the changes into effect.
5. Modify the Local Group Policy Editor
Another best option to fix ‘This Installation Is Forbidden by System Policy’ is to modify the Local Group Policy Editor.
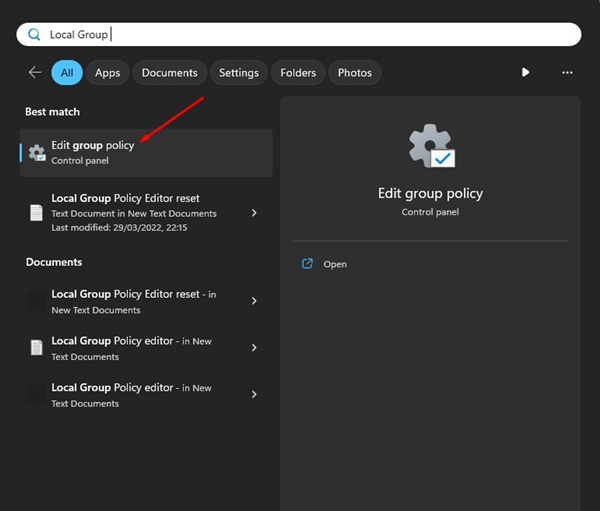
1. Open the Local Group Policy editor from the Windows Search.
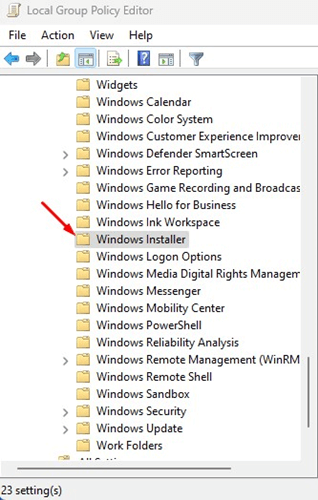
2. Navigate to this path.
Computer Configuration > Administrative Templates > Windows Components > Windows Installer.
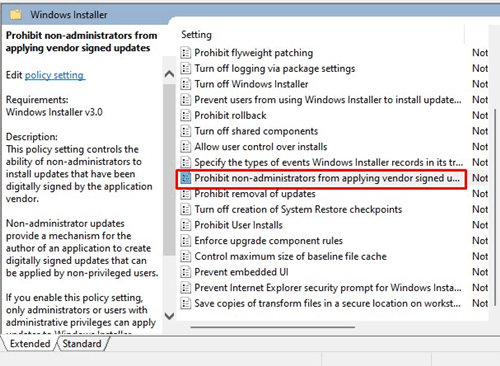
3. Find & double-click on the Prohibit non-administrators from applying vendor signed updates.
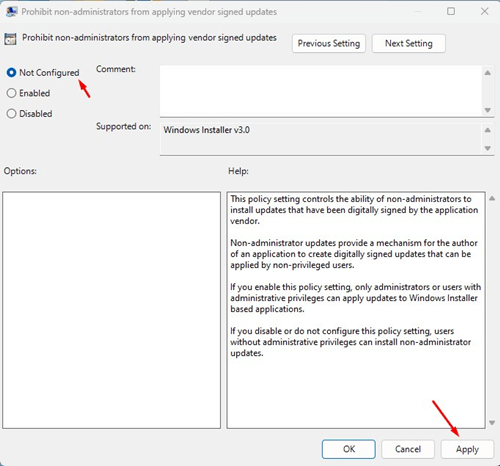
4. In the top left corner, select Disabled or Not Configured. Once done, click Apply and then OK.
6. Disable the User Account Control
Many users have claimed to resolve the ‘This Installation Is Forbidden by System Policy’ error by turning off the user account control. You can try disabling it temporarily to see if the error is fixed.
1. Type Change User Account Control Settings on Windows 11 Search. Next, open the Change User Account Control Settings app from the list.
2. On the User Account Control Settings prompt, set the slider to Never Notify.
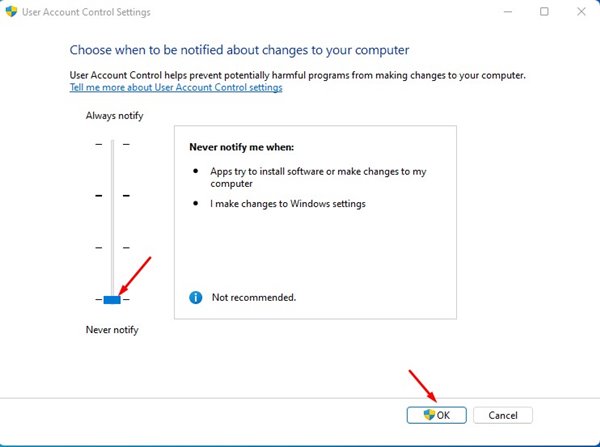
3. After making the changes, click OK.
4. The UAC prompt will pop up; click Yes.
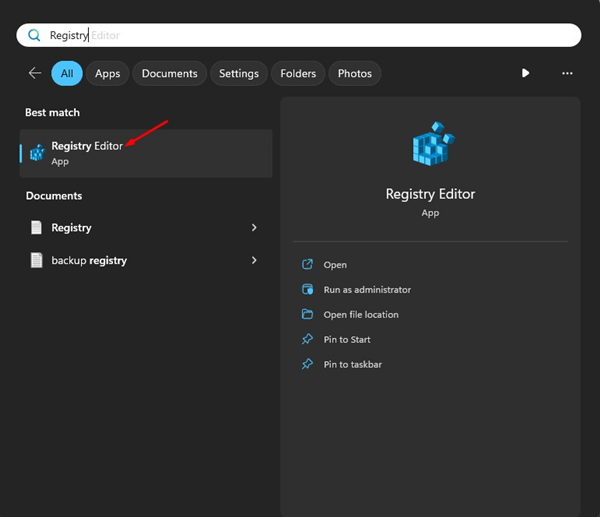
7. Modify the System Registry
If you still get the ‘This Installation Is Forbidden by System Policy’ error message, the next best option is to tweak the system registry file.
1. Open Registry Editor from the Windows Search.
2. Navigate to this path:
Computer\HKEY_LOCAL_MACHINE\SOFTWARE\Policies\Microsoft\Windows
3. Right-click on the Windows and select New > Key.
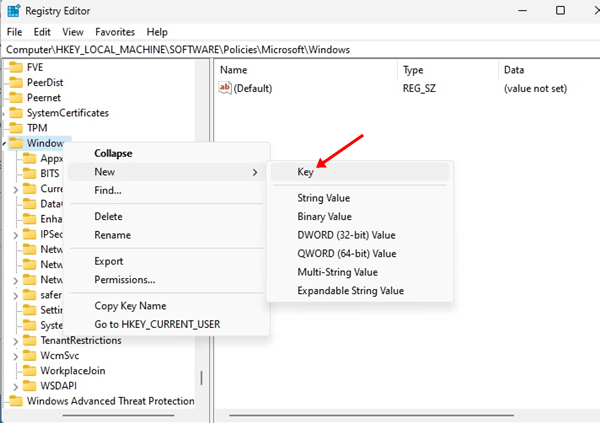
4. Name the new key as Installer and press Enter.
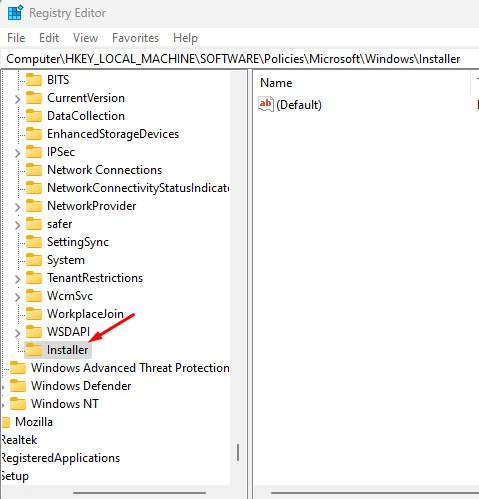
5. Select the Installer key. On the right side, right-click and select New > DWORD (32-bit) Value.
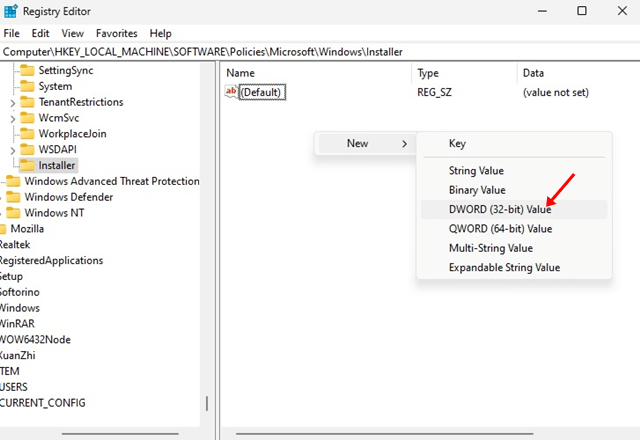
6. Name the new key as DisableLUAPatching
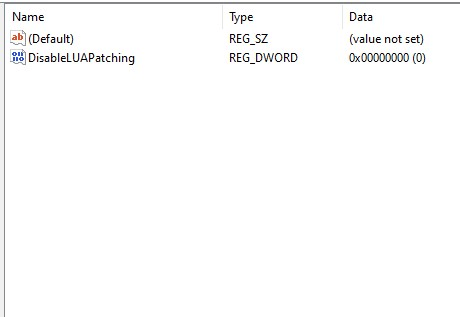
7. Double-click on the newly created DWORD Value. In the Value Data field, type 1 and click OK.

Close the Registry Editor and restart your Windows PC. This will fix the Installation error on the Windows operating system.
8. Re-register the Windows Installer Services
If nothing has worked, the ultimate option is to re-register the Windows Installer Service. Re-registering the Windows Installer service will likely fix the ‘This Installation Is Forbidden by System Policy’ error message.
1. Type in CMD on the Windows Search. Right-click on the CMD and select Run as administrator.

2. Execute these commands one by one.
%windir%\system32\msiexec.exe /unregister
%windir%\system32\msiexec.exe /regserver
%windir%\syswow64\msiexec.exe /unregister
%windir%\syswow64\msiexec.exe /regserver
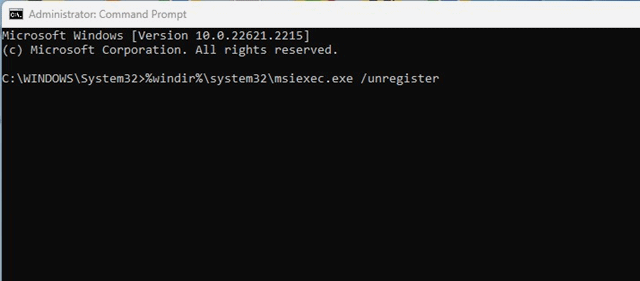
After executing these commands, restart your Windows computer. This should fix the ‘This Installation Is Forbidden by System Policy’ error message.
These are some of the best & working methods to resolve the ‘This Installation Is Forbidden by System Policy’ error message on Windows 11. Please let us know which method worked for you to resolve the This Installation Is Forbidden by System Policy error message.
The post How to Fix ‘This Installation Is Forbidden by System Policy’ Error on Windows appeared first on TechViral.
from TechViral


0 Comments