

The ‘Unfortunately Settings Has Stopped’ error is not always related to the software update; sometimes, corrupted apps also trigger the error. If you keep getting the error code even after a restart, here’s what you should do.
1. Restart Your Device
In most cases, a simple restart can fix the ‘Unfortunately, Settings has stopped’ error on your Android. So, restart your device.
- Press and hold your device’s Power Button
- It will show you a pop-up where you need to tap on Restart/Reboot
- Wait until your phone restarts.
After the restart, use the smartphone; you won’t get the error anymore. If you still get the error after the restart, follow the next methods.
2. Clear Your Phone’s RAM
Clearing a phone’s RAM is easy; you can do it without using any third-party app. Usually, smartphones come with a default RAM manager app, which helps to clear RAM in just one tap.
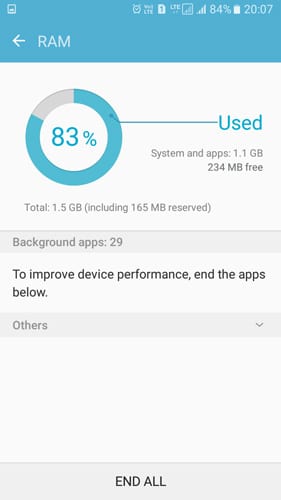
- Locate the device’s built-in RAM Manager. On Samsung, the RAM manager is located in Smart Manager
- On the RAM Manager, you will see how much RAM your device is using right now.
- Now tap on Clear RAM to free up some RAM.
Start using the smartphone as usual and see whether the error still appears.
3. Clear The Cache Of Settings
If your Settings app’s cache is corrupted, it may trigger unusual problems. You must follow these steps to check the Settings app cache.
1. Head to Settings > Apps.
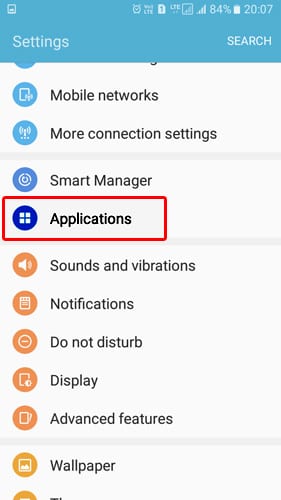
2. You will now see the list of apps installed on your device.
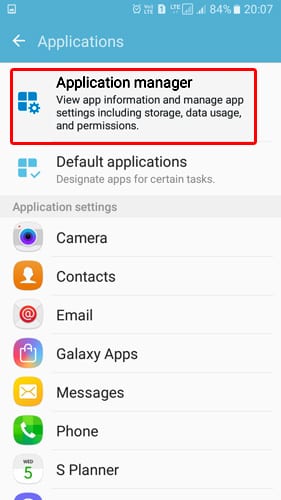
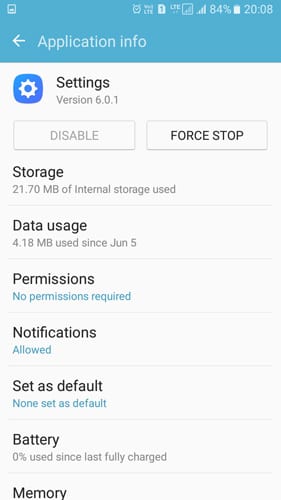
3. Find the Settings app and then tap on it.
4. Tap on the Force Stop. Then tap on Clear Cache and restart your phone.
After the restart, use your Android smartphone normally to check whether the error persists. If the above method fails to fix the error, follow the next.
4. Clear Your Device’s Cache
We need to clear the cache of all applications installed on your device. After clearing the cache, the phone might behave unusually, but it will settle down within a few minutes of usage.
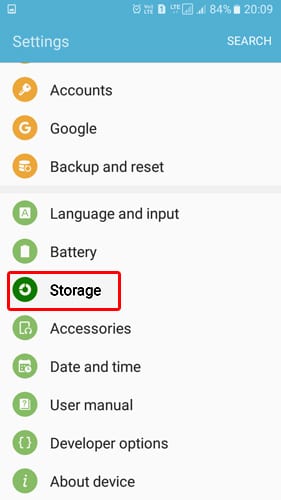
1. Open the Settings app.
2. Find and tap Storage.
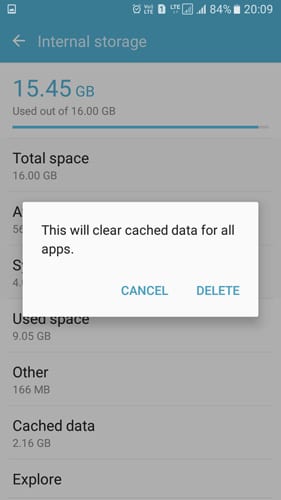
3. Tap on the Cached Data.
4. You will now receive a ‘Clear Cached Data’ pop-up. Tap on Delete to clear the cache file.
This will clear all the cached data from your Android smartphone. Restart your Android device and use it. You won’t get the Unfortunately Settings has stopped error anymore.
5. Uninstall the Recently Installed App
Android or app updates trigger the Unfortunately Settings has stopped error on Android. So, if you get the error after installing any third-party app, you need to uninstall that particular third-party app.
If there’s nothing wrong with the installed apps, you can try to boot into safe mode. Safe mode turns off all third-party apps installed on your Android smartphone. So, if the error occurred because of an app, you won’t get the error in Safe mode.
6. Factory Reset
If all of the above methods have failed to fix the error, the last option is to factory reset your Android. Create a proper data backup file before performing the Factory Reset.
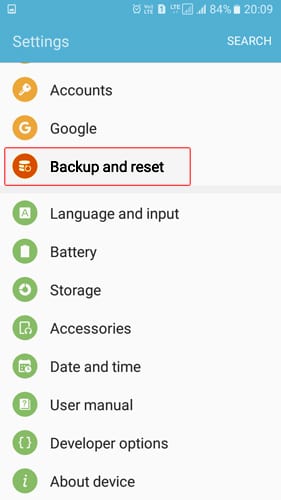
1. Open Settings on your Android smartphone
2. Find and tap on the Backup & Reset.
3. Tap Factory Data Reset.
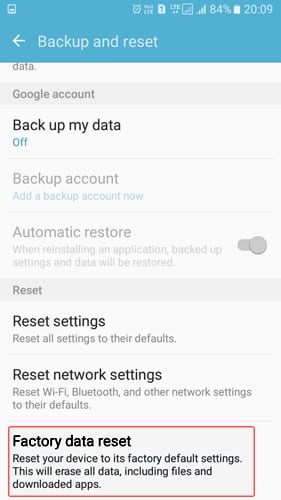
4. Tap the Reset Phone.
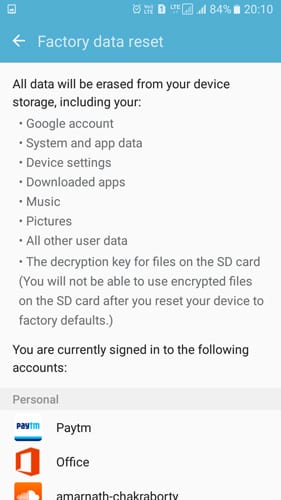
This will erase all the files stored on your Android’s internal storage. After the reset, your device will work fine, and you won’t get the ‘Unfortunately Settings has stopped’ error anymore.
7. Clear the Google Play Store & Services Cache
Many users have claimed to resolve the ‘Unfortunately Settings has stopped’ error on Android by clearing the Google Play Store & Services cache.
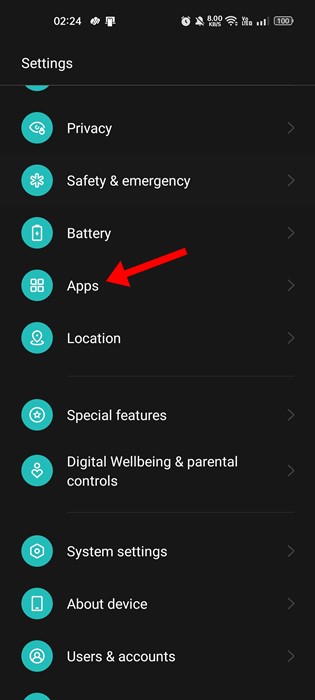
1. Open the Settings app on your Android and tap on Apps.
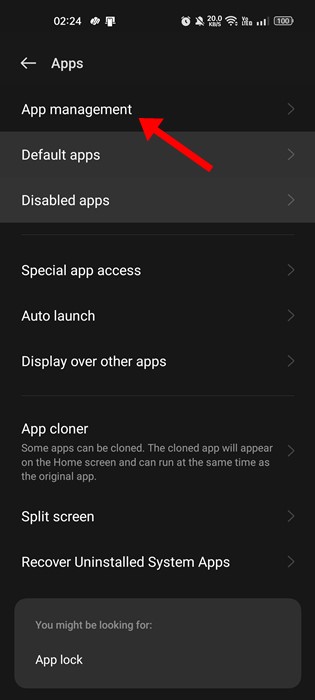
2. Tap on App Management.
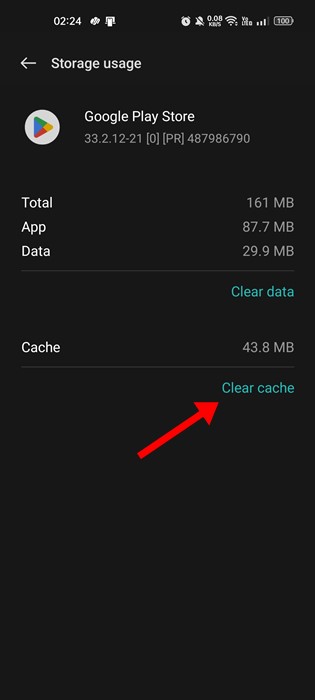
3. Find and tap the Google Play Store. Next, tap on the Storage usage.
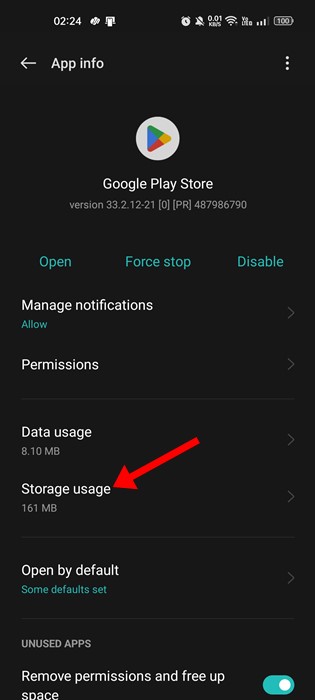
4. Tap on Clear Cache.
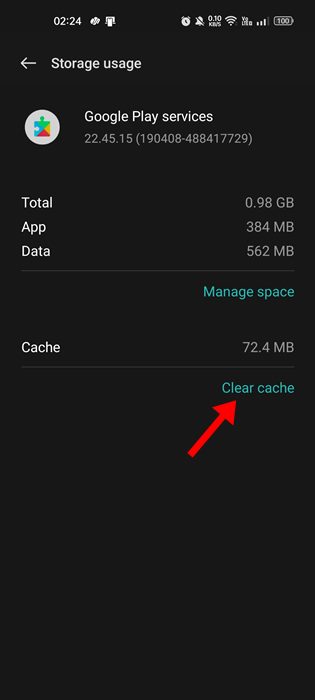
5. You also need to do the same for the Google Play Services app. Tap on the Google Play Services > Storage Usage. On the Storage usage, tap on the Clear Cache.
8. Uninstall and reinstall Google Play Store Updates
We understand Google Play Store might have nothing to do with the Unfortunately Settings has Stopped error, but these methods sometimes fix the error. All you need to do is clear the Cache for Google Play and uninstall the Google Play Store Update.
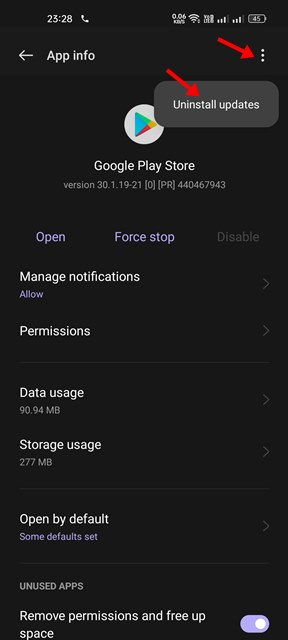
To do that, head to Settings > Apps. Now, under the Apps, find and tap on the ‘Google Play Store’. Clear its cache and uninstall the previous updates. Once done, restart your device, and the Unfortunately Settings has stopped error will be gone.
9. Wipe Cache Partition
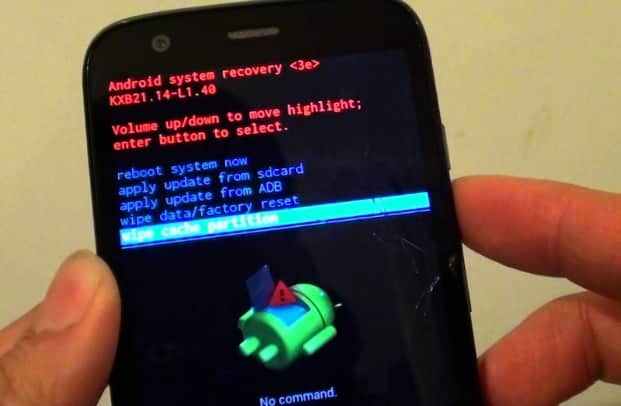
You will have to enter the Recovery Mode to wipe the Cache Partition. These things will clear all your system cache, including the app’s cache.
However, you must know the key combination to enter the Recovery Mode. You can search for your device’s recovery mode option online.
To wipe the cache partition, power off your smartphone and press the key combination to enter Recovery Mode. Now, from the Recovery Menu, use the volume button to navigate to the Wipe Cache Partition Option. Select the Wipe Cache Partition option by using the Power Button.
This article shares every method to fix the Unfortunately Settings has stopped error on your Android Smartphone. Let us know if you need more help resolving this error in the comments.
The post How To Fix ‘Unfortunately Settings Has Stopped’ Error On Android appeared first on TechViral.
from TechViral


0 Comments