
On Windows 11, you can create a full system backup, which is the best way to secure your Windows installation and files. Whenever your system encounters a problem, you can use this backup file to restore the operating system to its previous state.
Create a Full System Backup of Your Windows 11 PC
Here’s how you can create a full system backup of Windows 11.
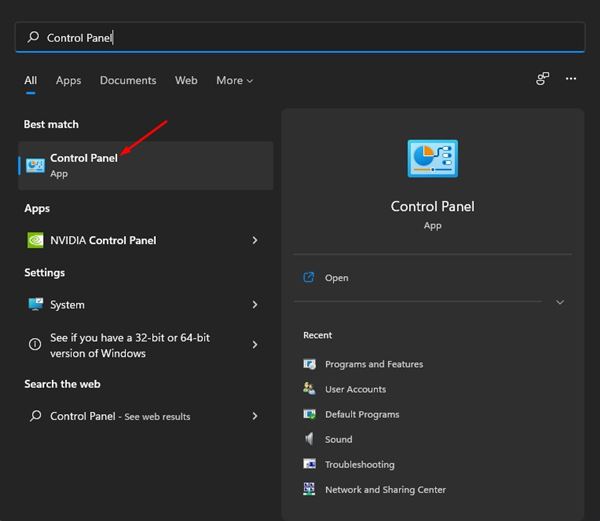
1. Open Control Panel from the Windows Search.
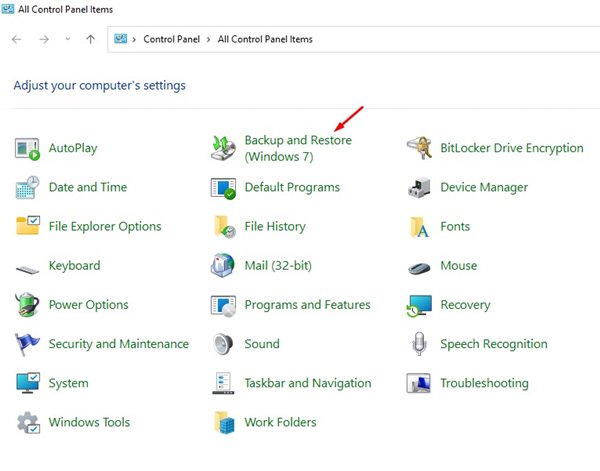
2. Click on the Backup and Restore (Windows 7).
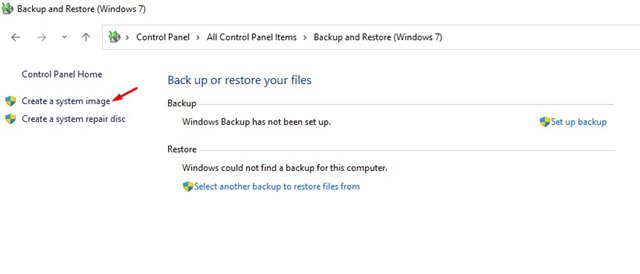
3. Click on Create a system image.
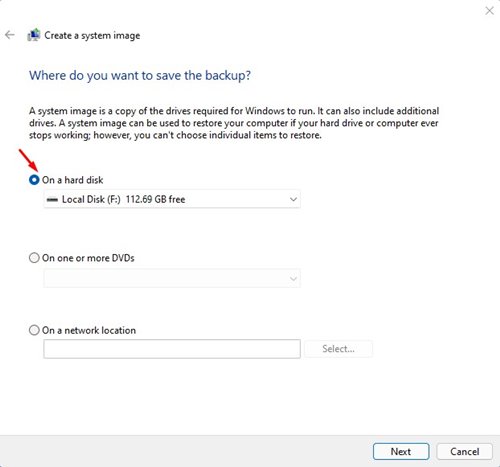
4. This will open the File History menu. Click System Image Backup.
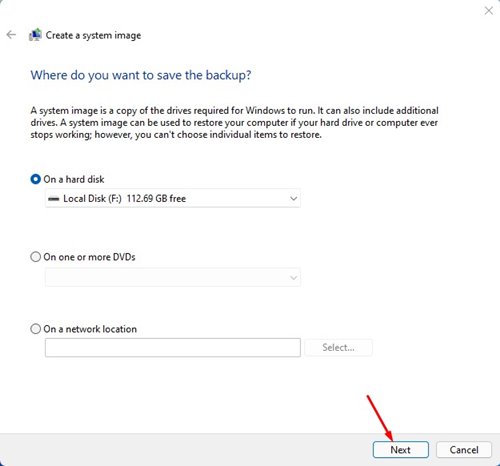
5. Windows will scan for the available drive. On the Where do you want to save the backup Window, select On a hard disk.
6. Select a drive. Once done, click Next.
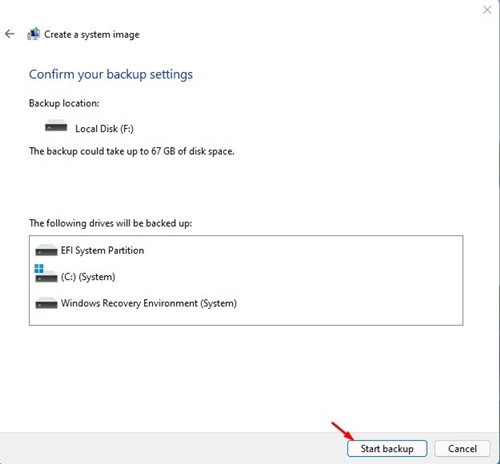
7. On the Windows Backup confirmation prompt, click Ok.
8. Confirm the changes and click Start backup.
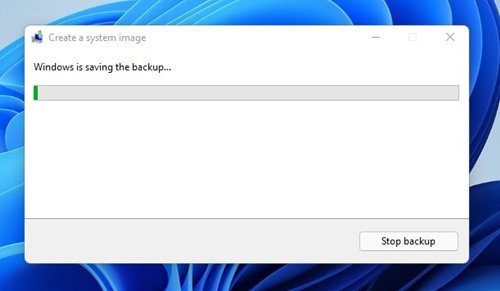
9. The backup process will begin. Depending on the amount of data you have, it will take some time.
After creating a complete backup system image, you can use it whenever your system files get corrupted. If you have any doubts related to this, let us know in the comment box below.
The post How to Create Full System Backup of Your Windows 11 PC appeared first on TechViral.
from TechViral


0 Comments