
If you made a mistake during the initial setup of Windows 11 or the laptop you purchased shipped with the wrong language, you can easily change it through Settings. Here’s how you can change System Language on Windows 11.
Change System Language on Windows 11
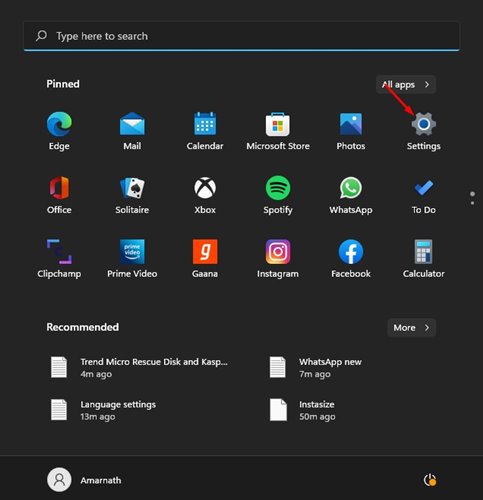
1. Click on the Windows Start button and select Settings.
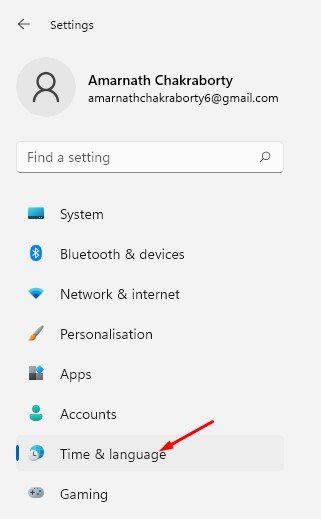
2. Click Time & Language.
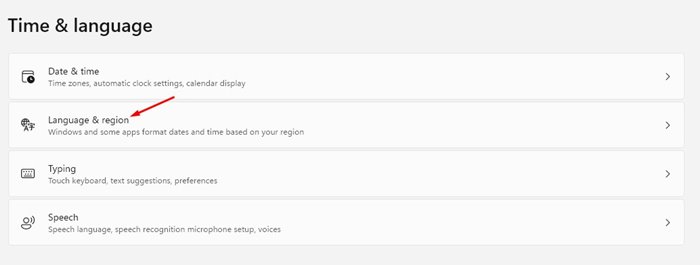
3. Click on Language & region.
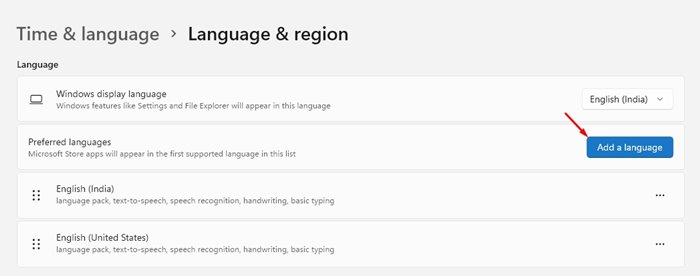
4. Click Add a Language.
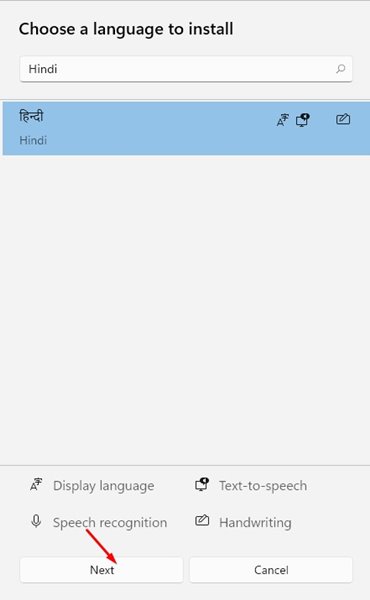
5. Choose a language to install the pop-up and search for the Language you want to install.
6. Select the language you want to install and click Next.
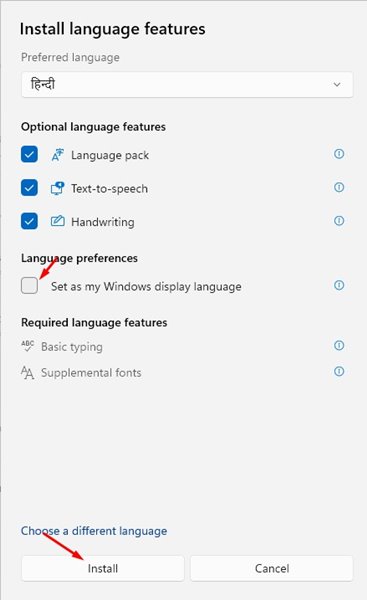
7. If you want to set the new Language as the default, check the Set as my Windows display language option and click Install.
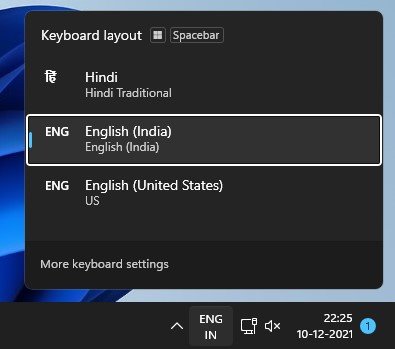
8. To change the Language, click on the language button at the bottom right of the taskbar. Click on the language you want to switch to on your keyboard.
How to Change the Default Language?
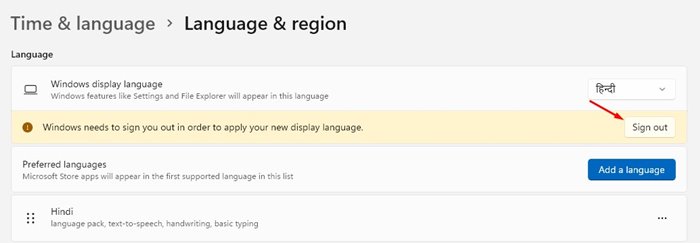
Changing the default language is pretty easy. After making the above changes, head to Settings > Time & Language > Language & Region.
Under Language & region, click the Sign out button. You will now see the lock screen of your PC. Log in, and you will see the new Language.
Disable the Language Sync to your Microsoft Account
If you prefer to use a different language on your other devices, you need to disable the Language Sync to your Microsoft Account.
1. Open the Settings app.
2. Switch to Accounts.

3. Click Windows Backup.

4. Expand the Remember My Preferences.

5. Uncheck the Language preferences and dictionary.

We are sure that after following our steps, you can change the default language on your Windows 11 system. If you have any doubts related to this, let us know in the comment box below.
The post How to Change System Language on Windows 11 appeared first on TechViral.
from TechViral


0 Comments