
Windows 11 installing the same update could be very frustrating, especially if your PC has limited resources. You can do a few things to prevent Windows 11 from installing the same update. Here’s what you should do.
1. Restart your PC
When Windows 11 fails to install an update, it attempts to install again after a few minutes or a restart.
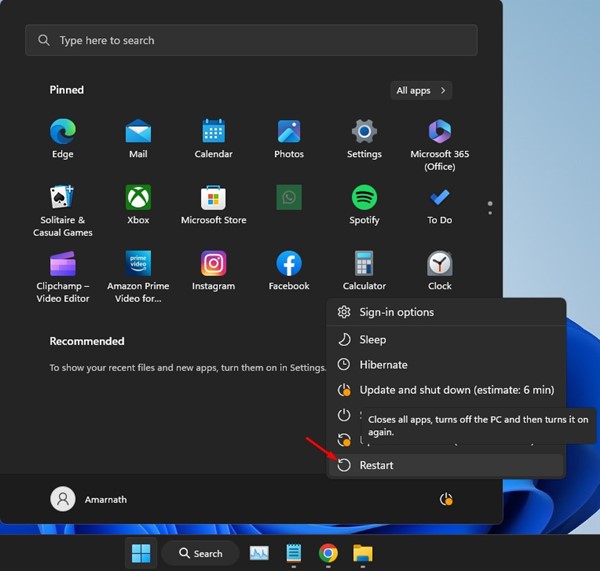
Restart your Windows 11 computer to rule out all possible bugs & glitches. Restarting a Windows 11 computer is easy; click the Windows 11 Start button and select Power Menu > Restart.
2. Run the Windows Update Troubleshooter
You must run the Windows Update Troubleshooter even after the restart.
1. Open the Troubleshoot Settings from the Windows Search.
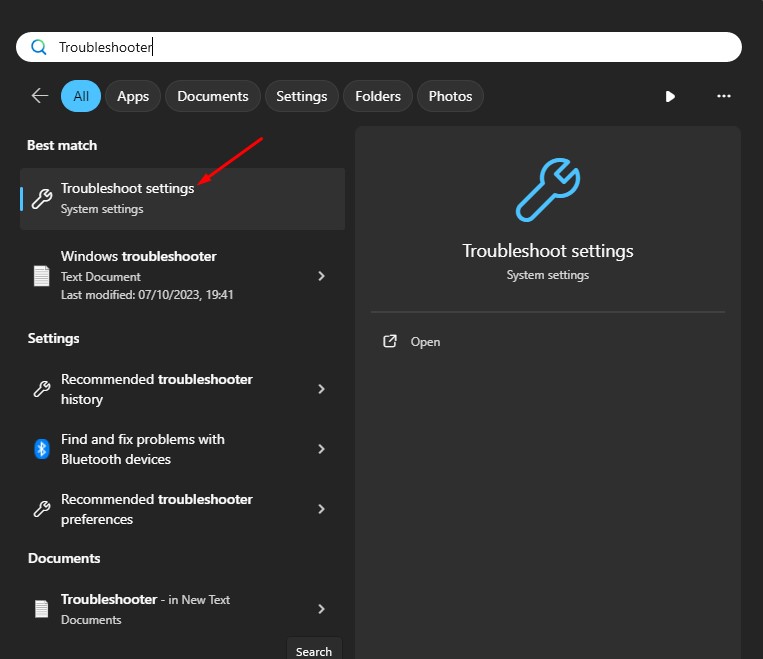
2. Click on Other troubleshooters.

3. Click the Run button beside Windows Update.
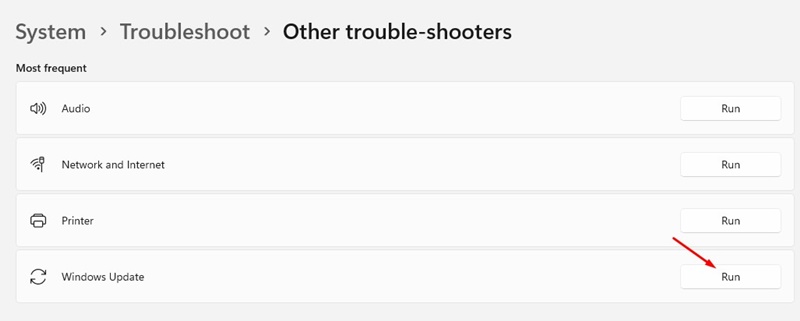
Follow the on-screen instructions to complete the Windows Update Troubleshoot process.
3. Clear the Software Distribution Folder
Software Distribution is a folder where Windows 11 stores the updates that have been downloaded but are pending installation. If you don’t want Windows 11 to install a specific update, clear the Software Distribution Folder on your PC.
1. Type Command Prompt in the Windows Search. Right-click on Command Prompt and select Run as administrator.
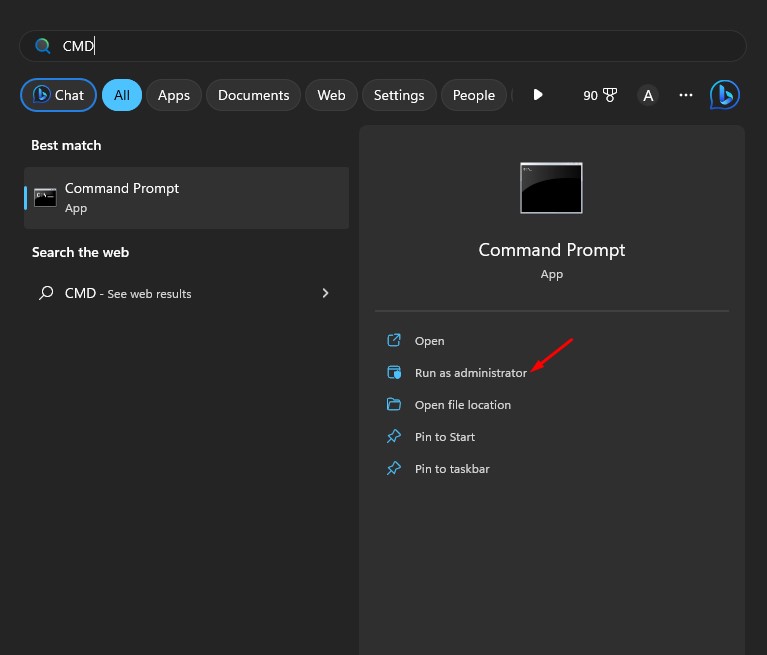
2. Execute these two commands one by one.
net stop wuauserv
net stop bits
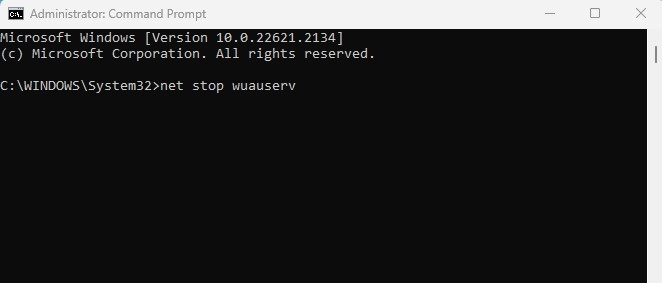
3. Press the Windows Key + R button on your keyboard. This will open the Run dialog box. In the RUN dialog box, type the following path and press Enter.
C:\Windows\SoftwareDistribution
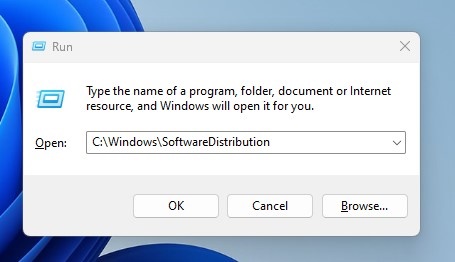
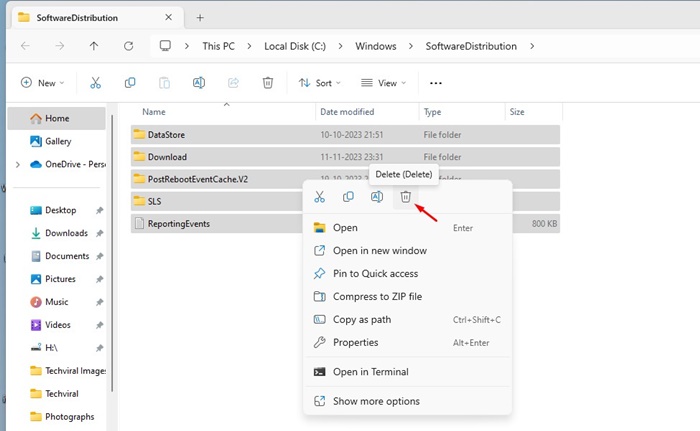
4. You will see the SoftwareDistribution folder. Select all files and delete them.
5. Open Command Prompt with administrative rights and execute these two commands:
net start wuauserv
net start bits
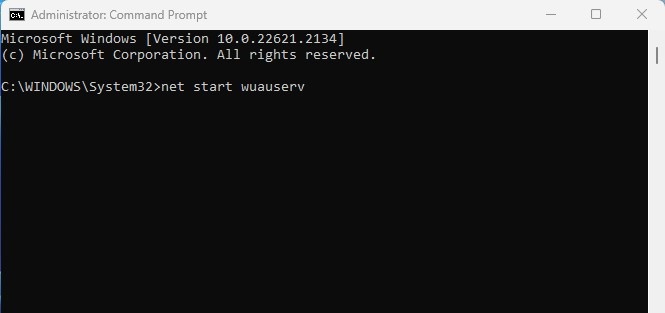
After making the changes, restart your Windows 11 computer. This should fix Windows 11, which keeps installing the same update repeatedly.
4. Uninstall & Reinstall the Problematic Update
If there’s a technical error with the previous software update you installed on your PC, you can uninstall the problematic update and reinstall it.
1. Click on the Windows Start button and select Settings.
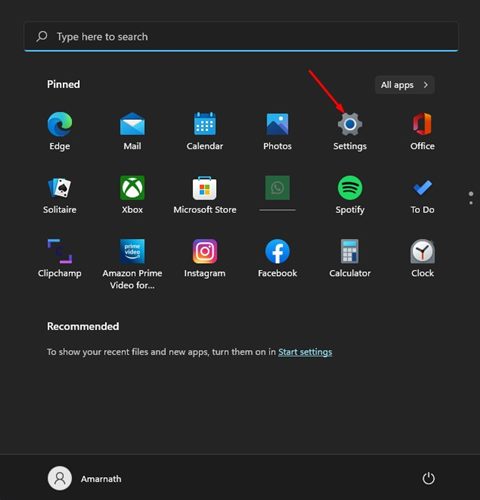
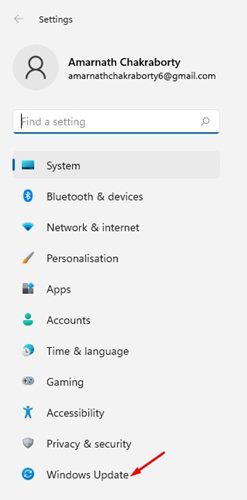
2. Switch to Windows Update.
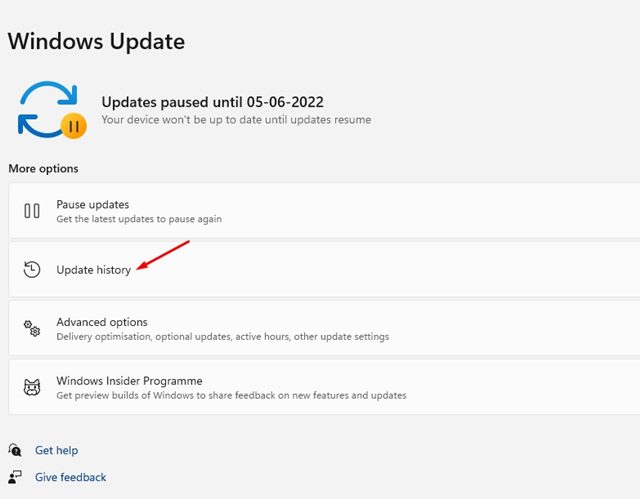
3. Click on Update History.
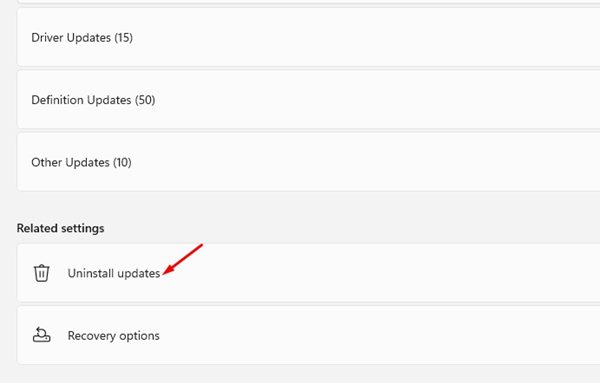
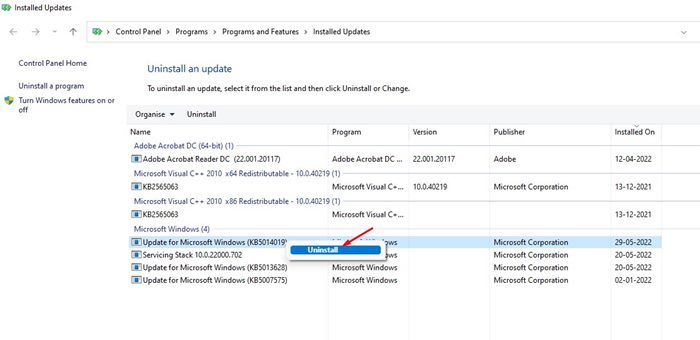
4. Scroll down to the Related Settings and click Uninstall updates.
5. Find the problematic update and click the Uninstall button beside it.
6. Move to the Windows Update screen and click Check for updates.
5. Reset the Windows Update Components
Next, you should reset the Windows Update Components. Here’s what you should do.
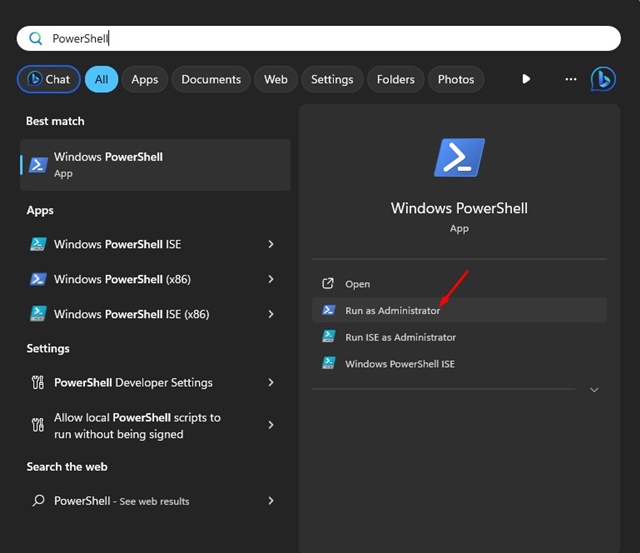
1. Type in Windows PowerShell on the Windows 11 Search. Next, right-click on PowerShell and select Run as administrator.
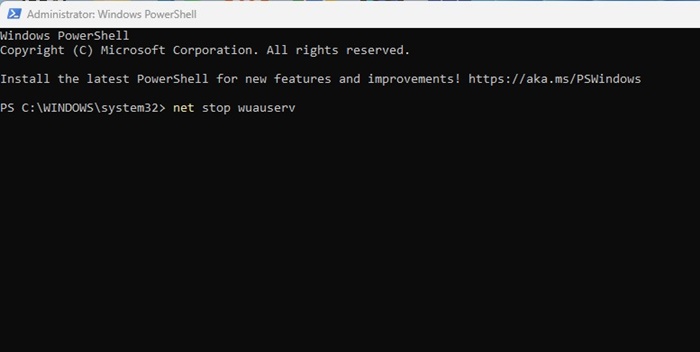
2. Execute these commands one by one.
net stop wuauserv

net stop cryptSvc

net stop bits

net stop msiserver

ren C:\Windows\SoftwareDistribution SoftwareDistribution.old

ren C:\Windows\System32\catroot2 catroot2.old

net start wuauserv

net start cryptSvc

net start bits

net start msiserver
3. After executing all these commands, restart your Windows 11 PC.
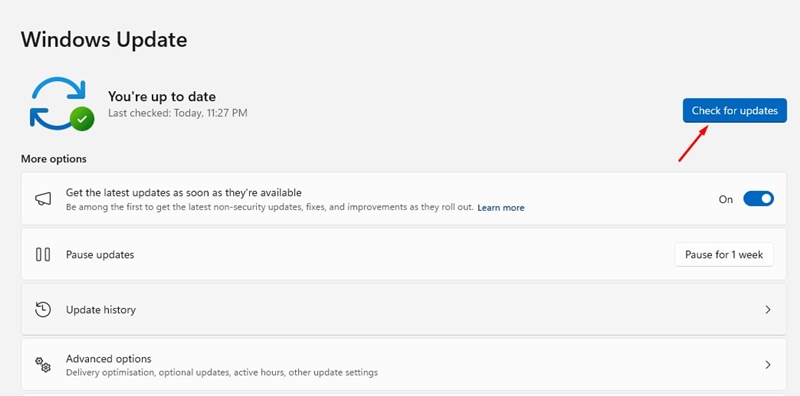
4. After the restart, open the Windows 11 update tool and check for updates.
6. Run the System File Checker Utility
If Windows 11 still installs the same update, your system files are likely corrupted. You can run the System File Checker utility to fix corrupted system files.
1. Type Command Prompt in Windows 11 Search. Next, right-click on the Command Prompt and select Run as administrator.
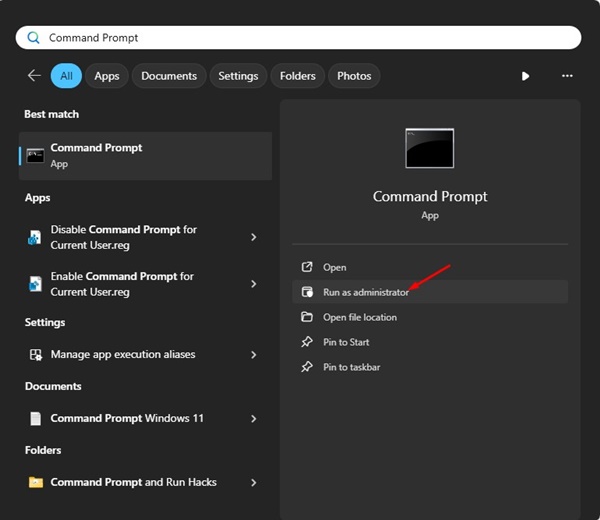
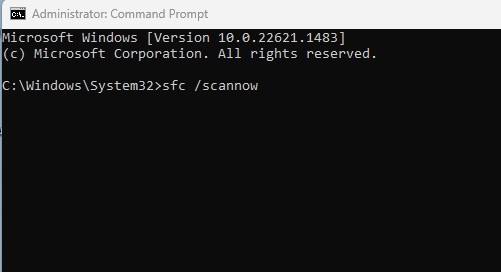
2. Type in the given command and press Enter.
sfc /scannow
3. If the System File Checker utility returns an error, execute the DISM Commands:
DISM /Online /Cleanup-Image /CheckHealth
DISM /Online /Cleanup-Image /ScanHealth
DISM /Online /Cleanup-Image /RestoreHealth
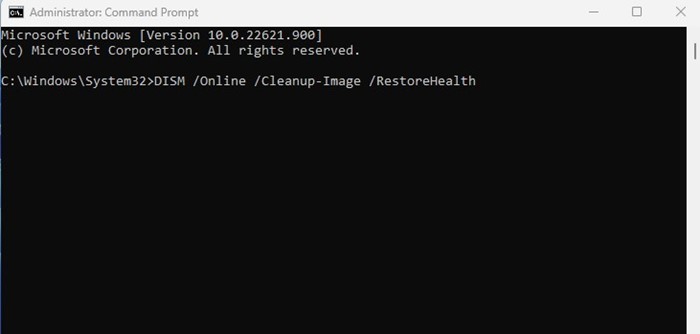
After executing all these commands, restart your Windows 11 PC. After the restart, run the Windows Update tool again. This should fix the Windows 11 keeps installing the same update issue.
These are the best methods to fix Windows 11 keeps installing the same update. If you have followed all methods, the problem is likely fixed. Let us know if you need more help fixing this problem.
The post Windows 11 Keeps Installing the Same Update? 6 Ways to Fix it appeared first on TechViral.
from TechViral


0 Comments