
Several users have recently reported that the Windows Defender application is not opening after upgrading to Windows 11. If you are using Windows 11 and the security app is not working, here’s what you should do.
1. Restart your Windows 11
If you are experiencing problems like Windows Security not opening or unable to run a scan, the first step is to restart your computer. A system restart is often overlooked, but it can fix most problems.
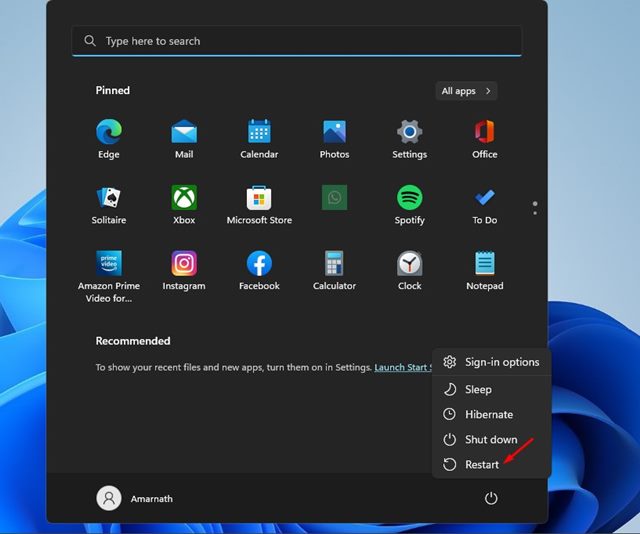
To restart your Windows 11 PC, click on the Start button > Power Menu and select Restart.
2. Close other Security Programs
If Windows 11 detects a third-party security tool, it automatically turns off Windows Security. If you have just installed a new security program on your Windows 11, you can’t enable the security protection offered by Windows Security.
To run a full scan or activate the real-time protection of Windows Security, you need to disable your other third-party security software.
3. Restart the Security Center Service
The Security Center service is responsible for the real-time protection provided by the Windows Security app. If this service is disabled, the app won’t work. You can restart the Security Center service to fix the problem.
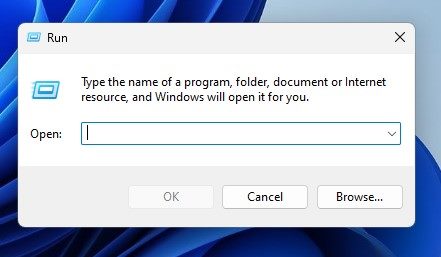
1. Press the Windows Key + R button on your Keyboard. This will open the RUN dialog box.
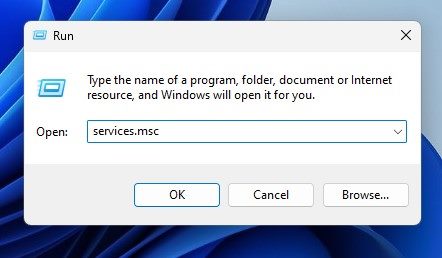
2. Type in services.msc and press Enter.
3. Search for Security Center.
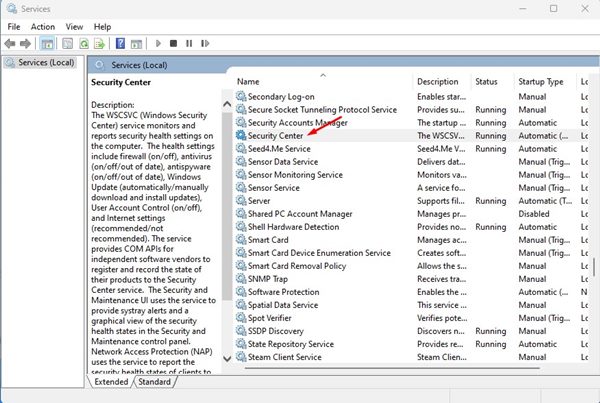
4. Right-click on the Security Center and select Restart.
4. Run the SFC and DISM Scan
System file corruption can prevent Windows Security from functioning properly. SFC (System File Checker) and DISM (Deployment Image Service and Management) are command-line tools to find and fix corrupted system files. Here’s how to run it.
1. Click the Windows 11 search and type in Command Prompt. Right-click on the Command Prompt and select Run as administrator.

2. Enter sfc/ scannow and press Enter.
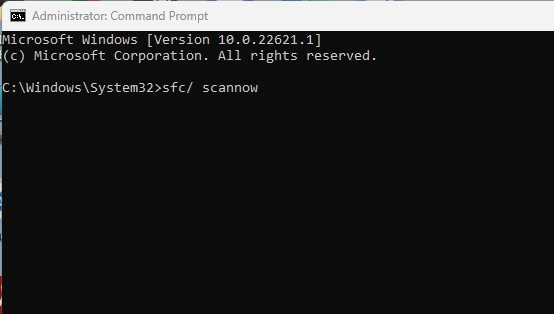
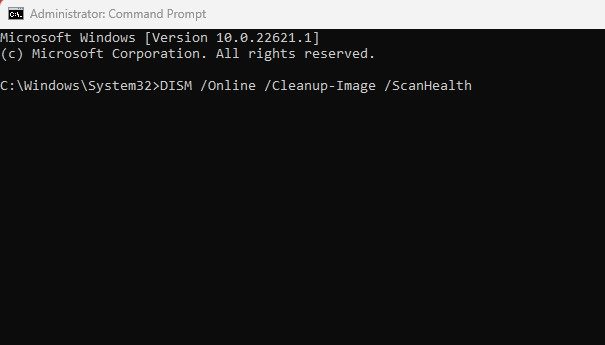
3. The System file checker utility will run and attempt to replace the corrupted system files. If it returns with an error, you need to execute another command:
DISM /Online /Cleanup-Image /ScanHealth
These two commands will most probably fix the Windows Security app not working problem on your Windows 11 PC.
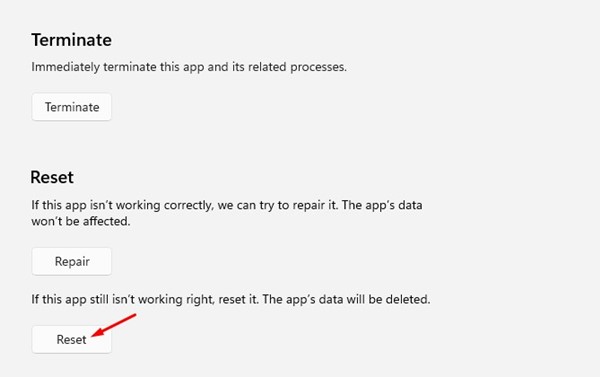
5. Reset the Windows Security App
Even though Windows Security is a system app, you can still reset it if it’s not working properly.
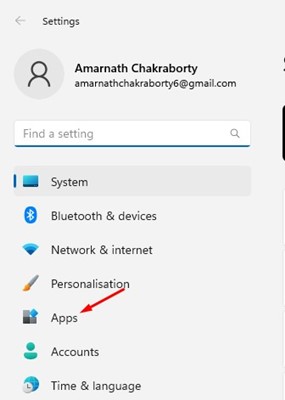
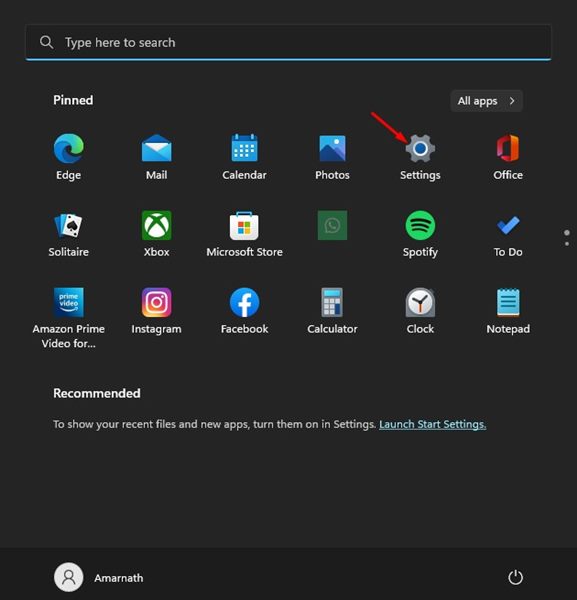
1. Launch the Settings app and click on Apps.
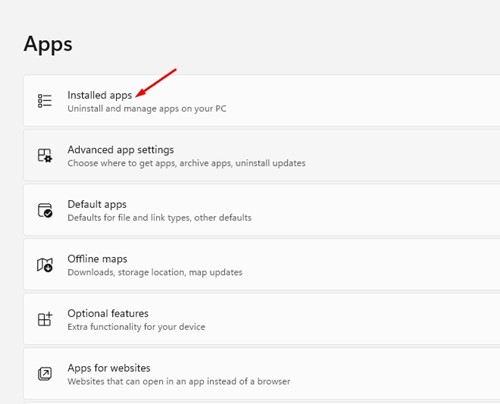
2. Click on Installed Apps.
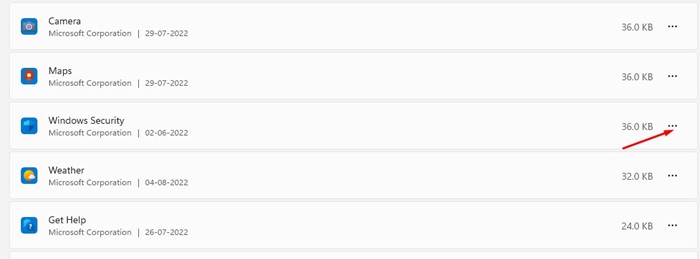
3. Find the Windows Security app and click on the three dots next to it.
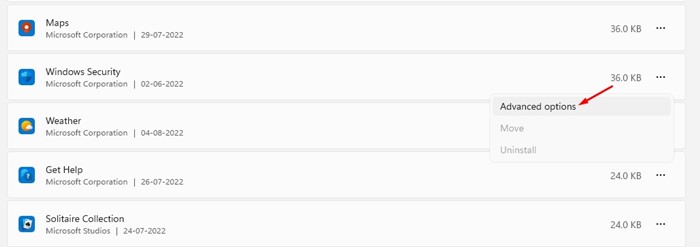
4. On the menu that appears, select Advanced options.
5. Click on Reset.
6. Reset Your Windows 11 PC
Resetting Windows 11 will restore your PC to its factory default state, but it will also remove all apps installed on your device. Back up your essential apps and files before resetting Windows 11. This will prevent data loss.
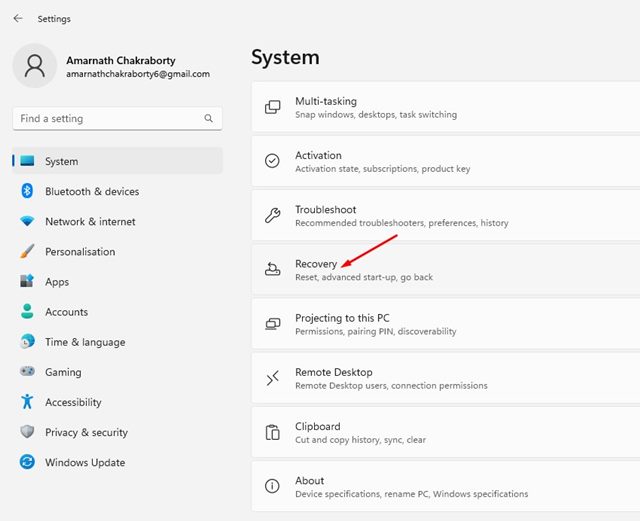
1. Click on the Windows 11 Start menu and select Settings.
2. Navigate to the System > Recovery.
3. Click on the Reset PC option.
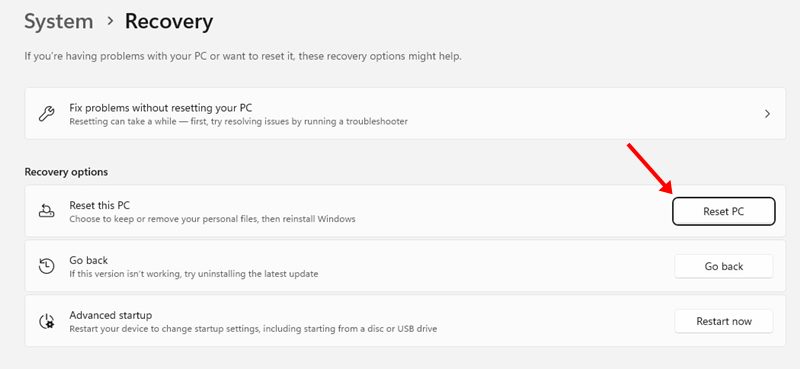
4. Select whether you want to keep your files or remove everything on the next prompt. It’s recommended to pick the Keep my files option.

After the reset, try running the Windows Security app again. This time, the app will run fine. Now, follow the on-screen instructions to complete the reset process.
These are some of the best ways to fix the Windows Security app not working on Windows 11. These methods will surely fix Windows Security app-related problems on your PC. Let us know if you have any doubts about the Windows security app.
The post How to Fix Windows Security Not Working in Windows 11 appeared first on TechViral.
from TechViral


0 Comments