

Some users have reported that Windows 11’s display brightness automatically increases and decreases. If you’ve been facing the same problem recently, here’s what you should do.
1. Restart your Windows 11 PC
The first thing you should do to resolve the Windows 11 Brightness Control Not Working issue is to restart the PC. Restarting Windows 11 will possibly remove the bugs & glitches that may be preventing the brightness control from working.
Open the Windows 11 Start Menu and click the Power Option. On the Power Option, select Restart.
2. Adjust the Display Brightness from the Action Center
If you use the keyboard shortcut to adjust the brightness, but it’s not working, you can try changing the display brightness from the Action Center.
To open the Action Center on Windows 11, press the Windows + A button. When the Action Center opens, adjust the brightness by moving the slider to the left or right.
3. Make Sure Your Device Has Enough Battery
Whenever a Windows 11 device runs low on battery, it dims the screen’s brightness to preserve the remaining battery life. If your device is low on battery power, the brightness slider will likely not work because you are not allowed to adjust the brightness.
However, that restriction can be lifted by disabling Windows 11’s Power Saver mode through Settings. Otherwise, you can recharge your device to regain brightness.
4. Update the Display Driver
Display Driver is the first you should update if the brightness control is not working. Sometimes, the brightness control doesn’t work due to an outdated or buggy display driver.
Before trying anything else, make sure to update the Display Driver of your PC to fix the Windows 11 brightness control, which is not working.
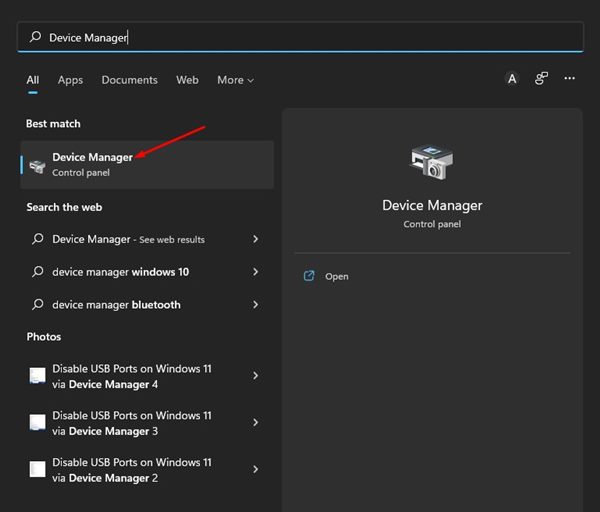
1. Open Device Manager from the Windows Search.
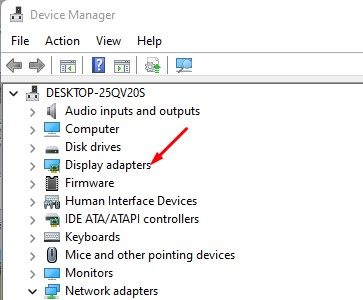
2. Expand the Display Adapters.
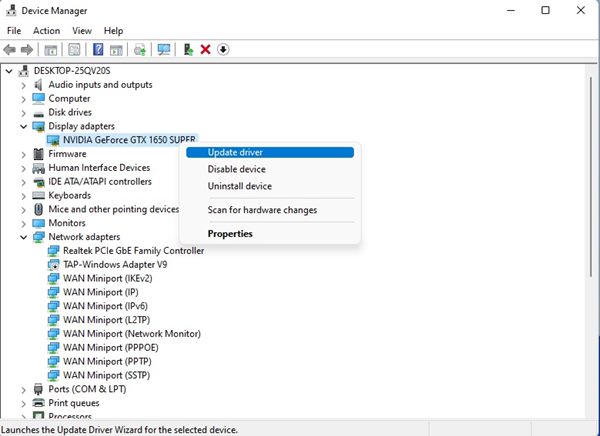
3. Right-click on your GPU or display adapter that powers your display and select Update Driver.
4. Click on the Search automatically for the updated driver software.
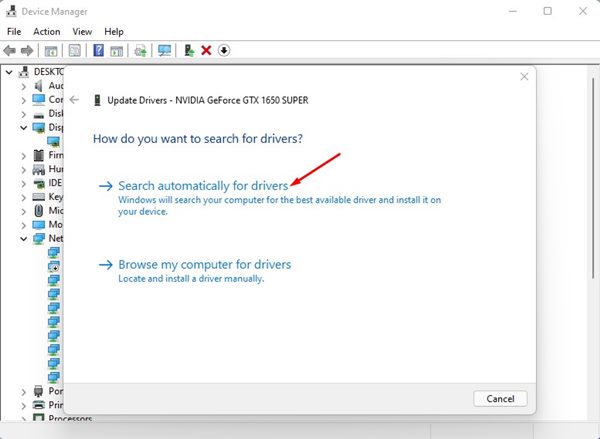
Windows 11 will automatically search for available updates and install them on your device if it finds one.
5. Use Microsoft’s Basic Display Adapter
Many users have reported fixing the Windows 11 brightness control not working issue by switching to Microsoft’s Basic Display Adapter. Here’s how to use Microsoft’s Basic Display Adapter.
1. Open Device Manager from the Windows Search.
2. On the Device Manager, right-click on the Display driver and select Update Driver.
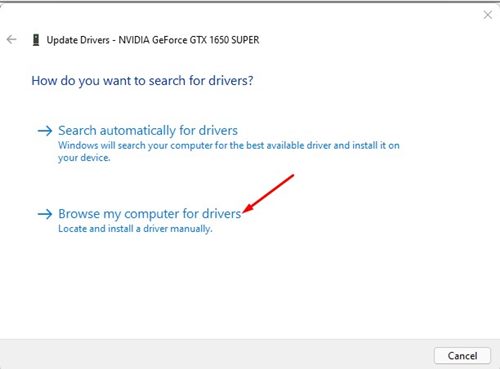
3. Select Browse my computer for driver software.
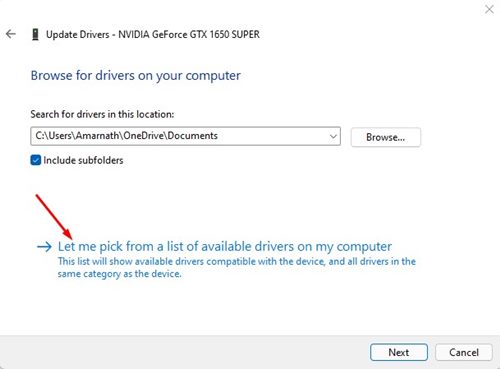
4. Click the Let me pick from a list of device drivers on my computer option and select Next.
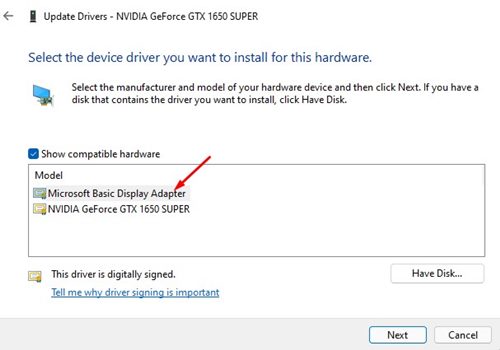
5. Select Microsoft Basic Display Adapter and click Next.
After making the above changes, restart your computer. This will most probably fix the Windows 11 brightness control not working issue.
6. Rollback Display Driver to the Previous version
Rolling back the display drivers to the previous Windows 11 operating system version is easy. Here’s how to do it.
1. Open Device Manager from the Windows Search.
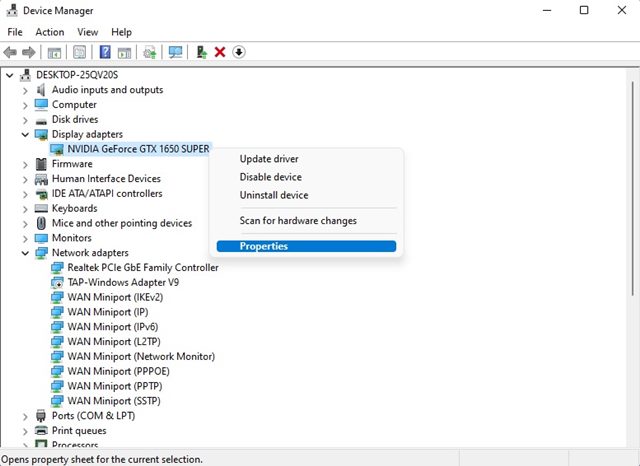
2. Right-click on your display adapter and select Properties.
3. Click the Roll back driver button (if available).

This is how you can fix the Windows 11 brightness control not working issue on a laptop or computer.
7. Disable Auto Brightness on Windows 11
The next best thing you can do is disable the auto brightness feature of your Windows 11 computer. If auto brightness is enabled on Windows 11, your laptop may prevent you from adjusting the brightness level manually.
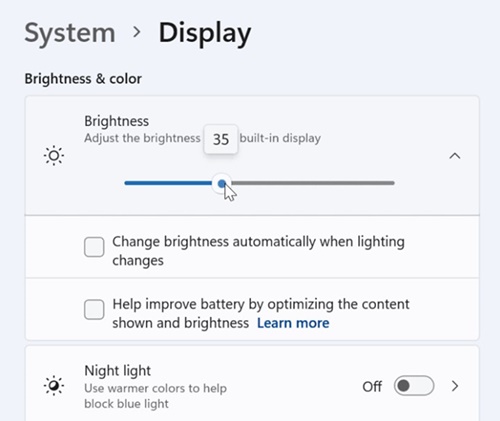
- Click on the Windows 11 Start button and select Settings.
- When the Settings app opens, switch to the System tab.
- Click on the Display.
- Expand the brightness & uncheck the Change brightness automatically when lighting changes option.
After making the above change, restart your Windows 11 computer. This should fix the brightness control not working on the Windows 11 issue.
8. Run SFC Command
If the above methods have failed to fix the Brightness issue on Windows 11, you need to run the SFC Command. Brightness control not working or users unable to adjust the display brightness are often a result of system file corruption.
The SFC or system file checker tool will find and fix corrupted system files and probably fix every brightness-related problem on your PC.
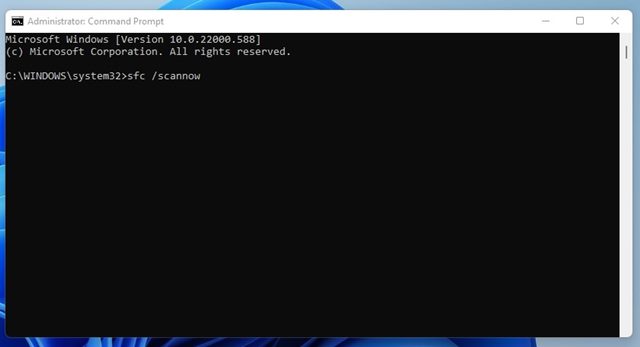
- Open the Windows 11 search and type in Command Prompt. Next, right-click on the CMD and select Run as administrator.
- Type in sfc /scannow on the Command prompt and hit Enter.
- Wait until Windows 11 completes the scan. Once the scan is finished, close the command prompt and restart your PC.
9. Update your Windows 11
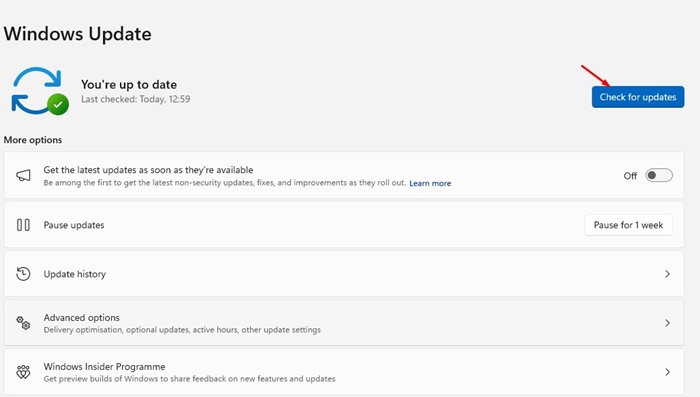
Sometimes, bugs in the operating system may prevent you from controlling the brightness manually. The best way to eliminate such bugs is to update your Windows 11 to the latest version.
To update Windows 11, navigate to Settings > Windows Update > Check for Updates. This will launch the Windows 11 update tool and will update your operating system.
These are some simple ways to fix the Windows 11 brightness control not working issue. I hope this article helped you! Please share it with your friends.
The post 9 Ways to Fix Brightness Control Not Working on Windows 11 appeared first on TechViral.
from TechViral


0 Comments