

Ethernet not working in Windows 11 is a common problem, but there are a few ways to fix it. Below, we have shared some of the best ways to resolve it.
1. Restart your Windows Computer
Restarting your Windows 11 PC will likely rule out the temporary bugs on your system, which may prevent Ethernet from working.
Hence, click the Windows 11 Start button and select Power Options. On the Power Menu, select ‘Restart’
2. Check the Ethernet Port and Cable
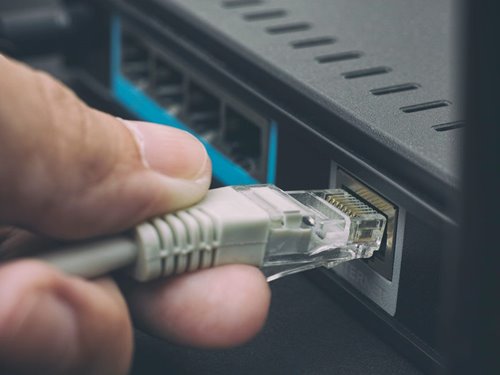
First, you need to check the basics. Check whether the Ethernet cable is plugged in properly, inspect its condition, and check other things.
Modern PCs have an LED indicator that shows whether the Ethernet connection is active. If the LED light is not blinking, check for a loose connection. The goal here is to rule out the hardware issues.
3. Use a different port on the router
Modern routers have multiple Ethernet ports, which allow you to share the internet on multiple devices.
So, if one port shows Ethernet is unavailable, you can try connecting the cable to a different port on your router.
4. Power Reset Your Router
If your router is faulty, you are bound to face connectivity issues. It doesn’t matter whether you are supposed to connect via WiFi or the Internet; if the router is faulty, you must fix it first.
The best way to fix the router issue is by power-resetting the router. You simply need to turn off the router and turn it back on after a few minutes.
Some router also has a reset switch/button which can be used as well. While this isn’t a sure-shot fix, sometimes it works.
5. Reinstall the Ethernet Drivers
After ruling out the router issue, the next best thing you can do to fix the Ethernet not working in Windows 11 is to reinstall the Ethernet drivers.
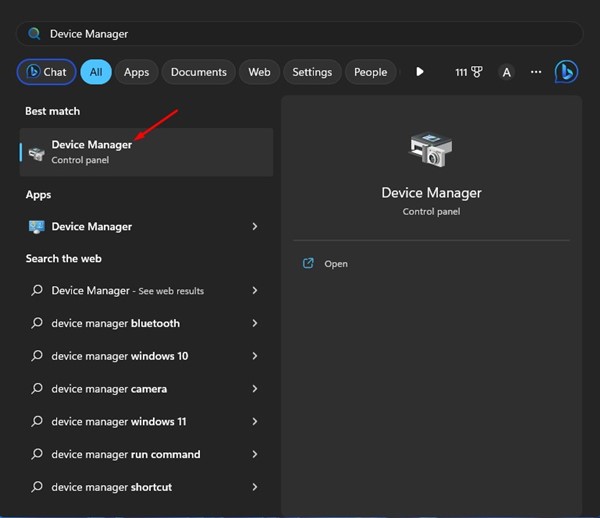
1. Launch Device Manager from the Windows Search.
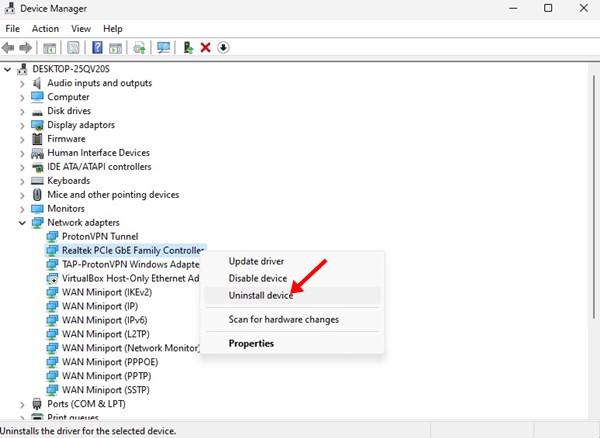
2. Expand the Network Adapters.
3. Right-click on the Network adapter you are using and select Uninstall Device.
4. Once uninstalled, you need to restart your Windows 11 computer.
Make sure your Ethernet cable is plugged in as you restart your computer.
6. Run the Network Troubleshooter
Maybe your Ethernet connection is all fine, but you have internet problems, which is why Windows 11 is not detecting the Ethernet connection. You can easily rule out network-related issues just by running the Network troubleshooter in Windows.
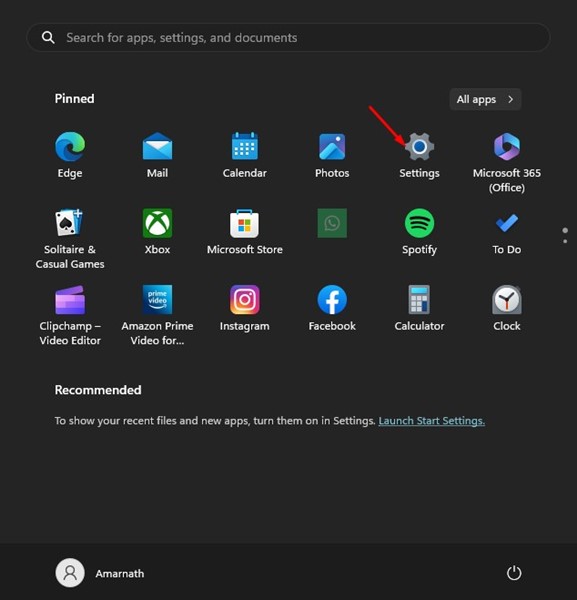
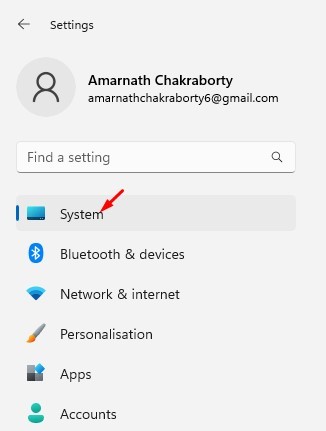
1. Click the Windows 11 Start button and select Settings.
2. Click on the System tab on the left side.
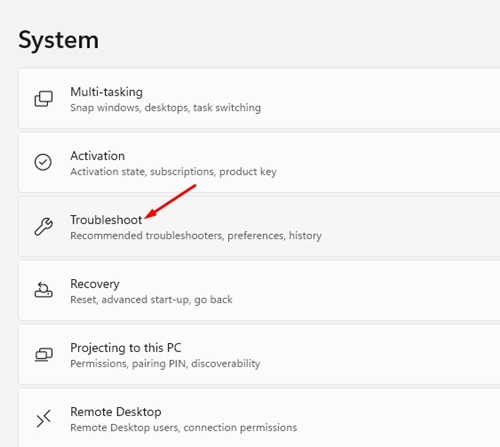
3. Click the Troubleshoot button.
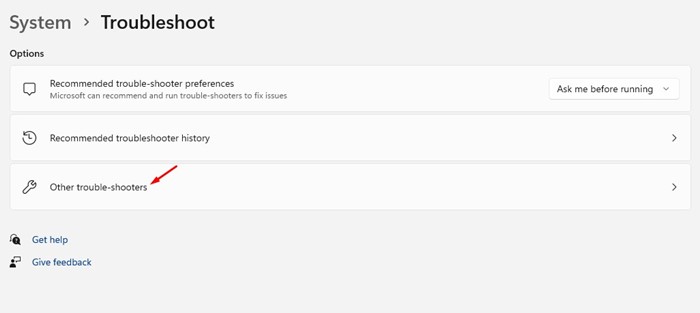
4. Click on the Other trouble-shooters.
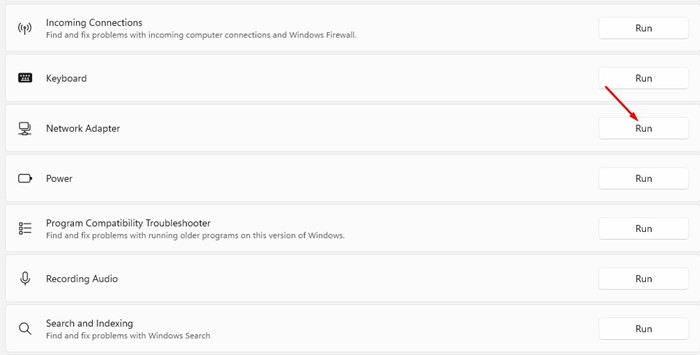
5. Click the Run button beside the Network Adapter.
Follow the on-screen instructions to complete the troubleshooting process. Once the troubleshooting complete, restart your Windows 11 computer.
7. Make Changes to the Ethernet Adapter’s Power Management Settings
Windows 11 can turn off the connected devices that aren’t active for a while. This feature is supposed to save battery life and reduce power consumption. You need to make changes to the Ethernet Adapter’s power management settings to fix this issue.
1. Press Windows Key + R to open the RUN dialog box. Type devmgmt.msc and press Enter.
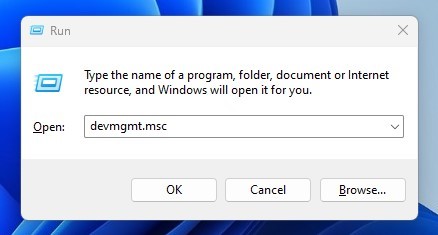
2. Expand the Network adapter tree, right click on your Ethernet card, and select Properties.
3. Switch to Power Management and uncheck the ‘Allow the computer to turn off this device to save power’ option.

4. Once done, click OK.
8. Disable the Proxy Server Settings
If Windows 11 is already set to use a proxy service instead of LAN, the Ethernet connection won’t work. Hence, you must ensure the Proxy settings are disabled to enable the Ethernet connection again.
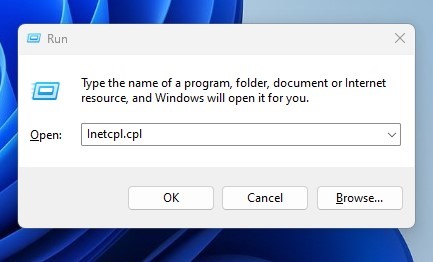
1. Press the Windows Key + R button on your keyboard. This will open the RUN dialog box.
2. Type inetcpl.cpl and press the Enter button.
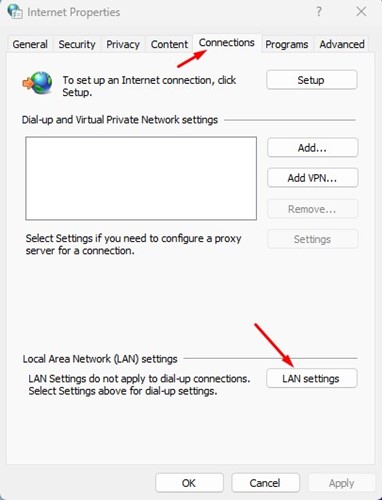
3. Switch to the Connections tab and click the LAN settings.
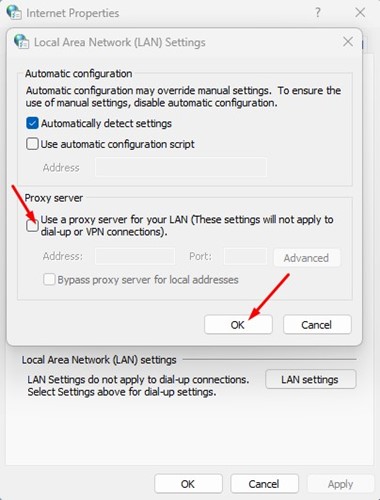
4. Ensure that the use of a proxy server for your LAN option is unchecked in the LAN settings. Once done, click the Ok button and close the Internet Properties app.
After making the changes, restart your Windows 11 computer and check whether the issue has been fixed.
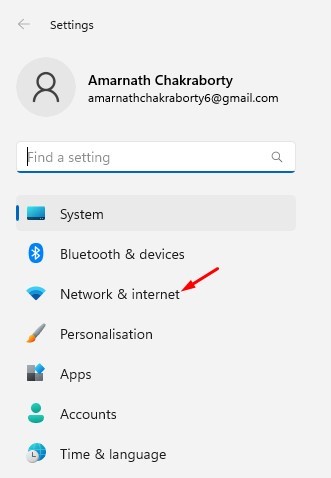
9. Perform Network Reset
If nothing worked for you, the ultimate option is to perform a network reset. This will replace all user-made settings with the default ones.
1. Click the Windows 11 Start button and select Settings.
2. Switch to the Network & Internet.
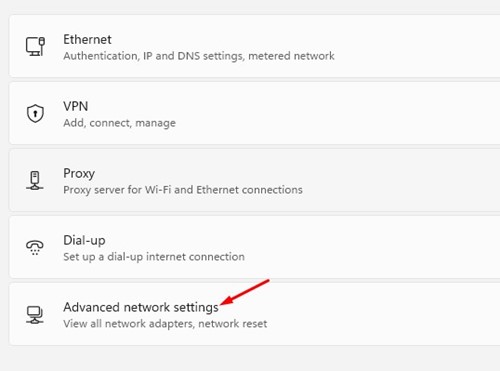
3. Click on Advanced Network Settings.
4. Click on Network Reset.

5. Click the Reset Now button to reset all your Network adapters.
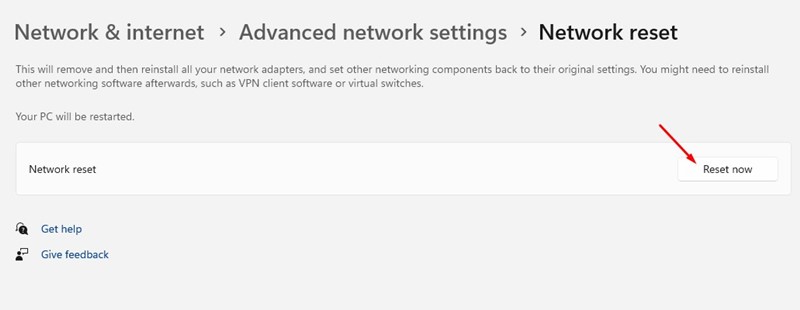
After the reset, make sure to reboot your computer. This will possibly resolve the Ethernet not working in Windows 11 problem.
Also read: Windows 11 ISO Free Download Full Version
These are the best ways to fix the Ethernet not working issue in Windows 11. If you need more help resolving Ethernet issues on Windows 11, let us know in the comments below.
The post 9 Best Ways to Fix Ethernet Not Working in Windows 11 appeared first on TechViral.
from TechViral


0 Comments