
Many users have also claimed that ejecting their pendrives shows an error message that reads ‘Problem Ejecting USB Mass Storage Device’. Here’s why you get the error.
Why did Windows 11 fail to eject the external hard drive/Pendrive?
Windows 11 usually fails to eject the external hard drive or a pen drive for these reasons:
- The drive you are trying to eject is still in use.
- The USB drivers on your device are outdated.
- Corrupted device drivers.
- Malware is preventing Windows 11 from ejecting the Pendrive.
- Corrupted system files.
Now that you know the prominent reasons, here’s what you can do to resolve them.
1. Make sure the USB device is not in use
You need to ensure your USB flash drive is not in use. Maybe you are transferring files to/from the drive, preventing the eject function.
Double-check that your USB device is not in use by any programs while you eject it.
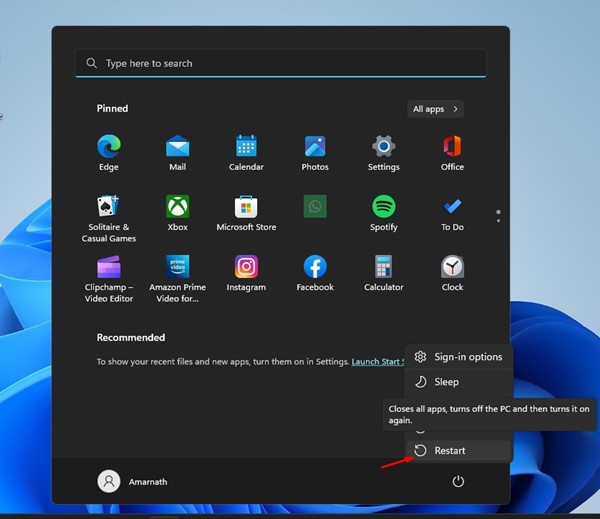
2. Restart your computer
While you can remove the external drive without using the eject option, data loss is possible. To remain on the safe side, you can restart your computer.
Once your computer restarts, you can eject your external hard drive or a pen drive. You can shut down your computer and eject the connected drive since shutting down closes all applications and third-party processes.
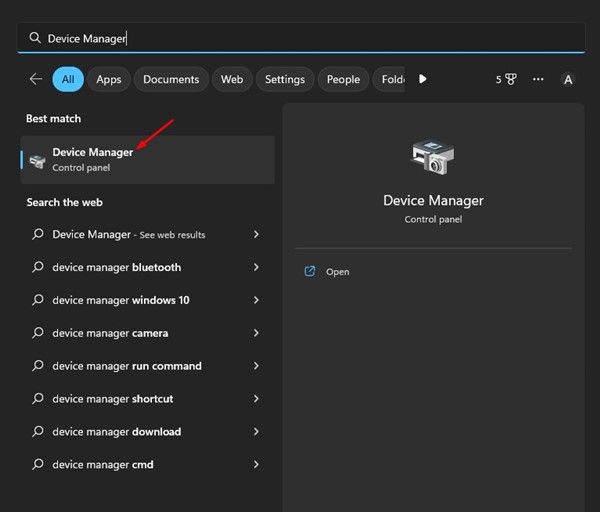
3. Update the USB Drivers
If you often see the Problem Ejecting USB Mass Storage Device error message on Windows 11, you should update the USB drivers.
1. Open Device Manager from the Windows Search.
2. Expand the Universal Serial Bus Controllers section.
3. Right-click on every entry with a yellow exclamation mark and select Update driver.
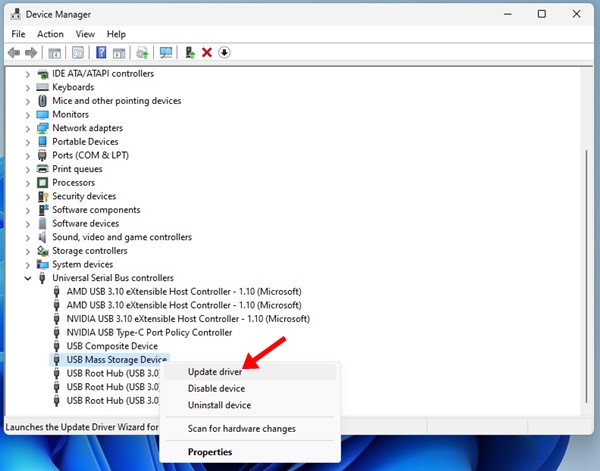
You will be asked to pick where you want Windows 11 to search for the driver or add your own. Select the first one and follow the on-screen instructions to finish the process.
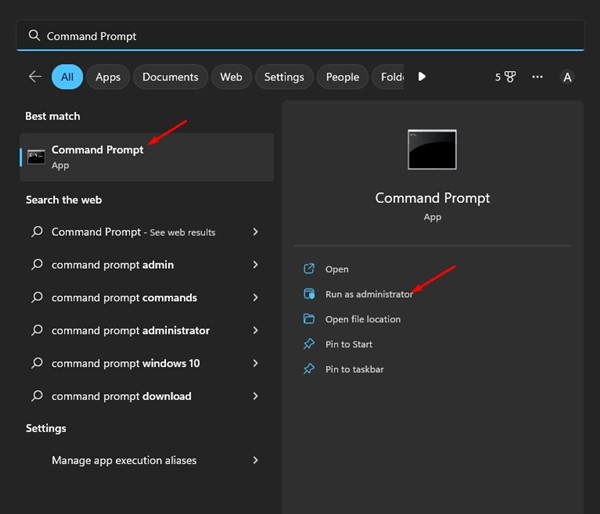
4. Run Windows Hardware and Device Troubleshooter
If you still can’t eject the Pendrive on Windows 11, try running the Windows Hardware and Devices troubleshooter.
1. Click on the Windows search and type in CMD. Right-click on the CMD and select Run as administrator.
2. Paste the following command and hit Enter.
msdt.exe -id DeviceDiagnostic
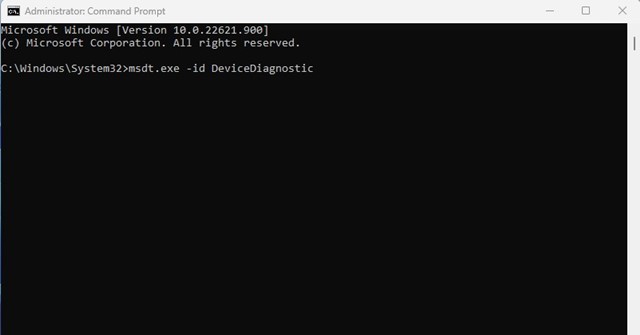
3. This will launch the Hardware and Devices troubleshooter. Click on the Next button and follow the on-screen instructions.
5. Close Unnecessary Tasks
If you suspect an app prevents your Pendrive or external hard drive from ejecting, close it and all its processes from the Task Manager.
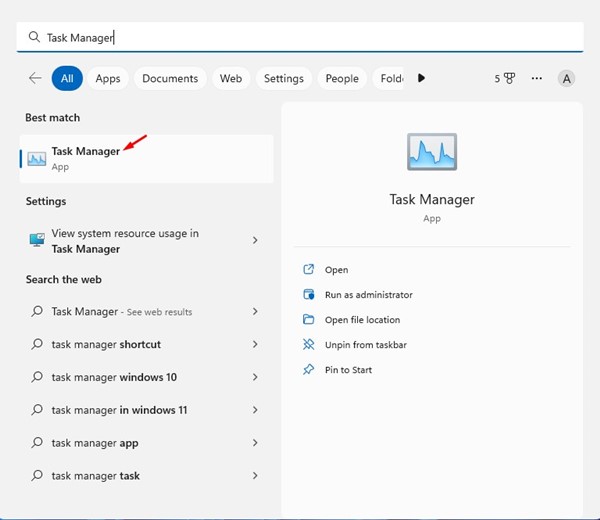
1. Open Task Manager from the Windows Search.
2. Find the app that you suspect. Right-click the entire branch and select End Task.
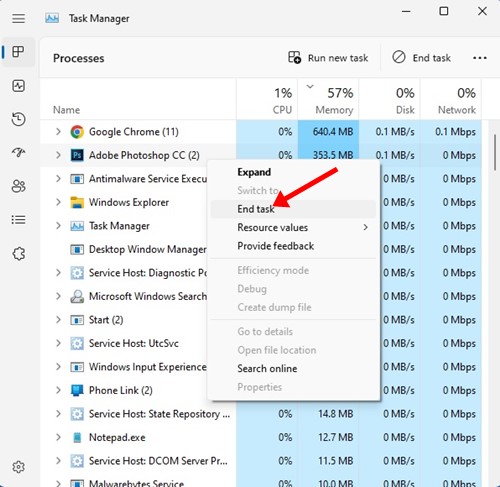
Repeat the steps to close every app that you feel is preventing the Windows 11 USB eject feature from functioning correctly.
6. Access the Safely Remove Hardware utility via CMD
You can access the Safely Remove Hardware utility via CMD. This will open the Disk Management utility, where you can safely eject your external hard drive.
1. Open Command Prompt from the Windows 11 Search. Make sure to run it with admin rights.
2. Execute the given command and hit Enter:
RunDll32.exe shell32.dll,Control_RunDLL hotplug.dll
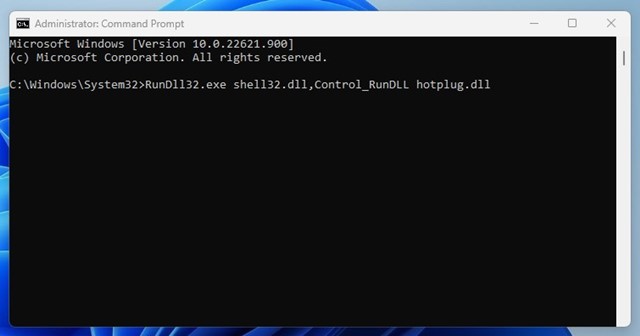
3. You will see the Safely Remove Hardware utility. Select the drive you want to eject and click on Stop.

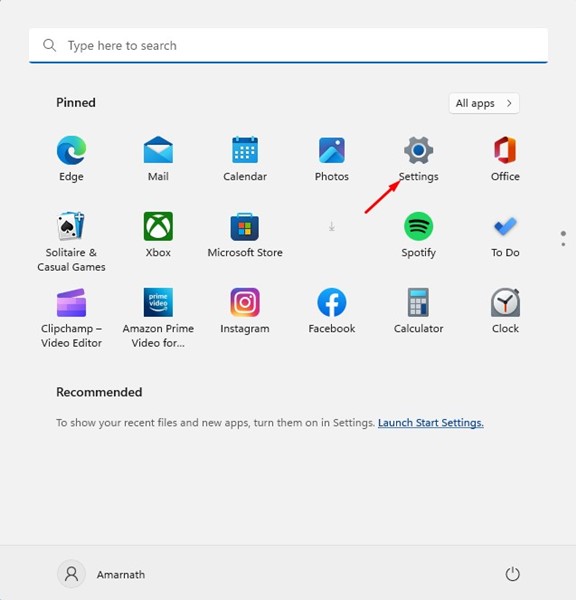
7. Eject the USB Drive using Settings
There are many ways to eject a USB drive on Windows 11. You can use the Settings app if you can’t eject the drive from the system tray.
1. Click on the Windows 11 search and select Settings.
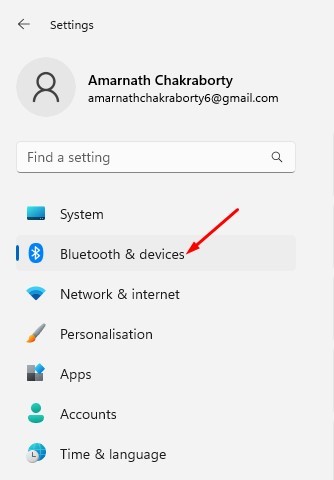
2. Switch to the Bluetooth & Devices.
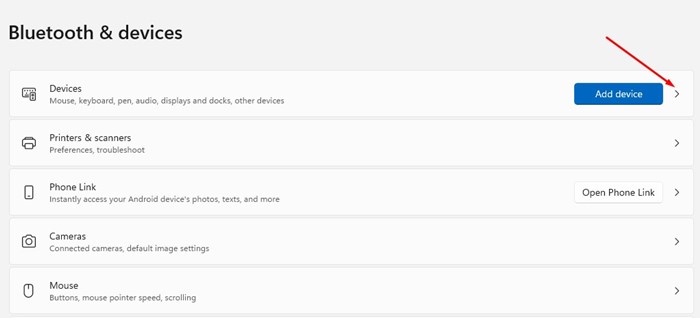
3. Click Devices.
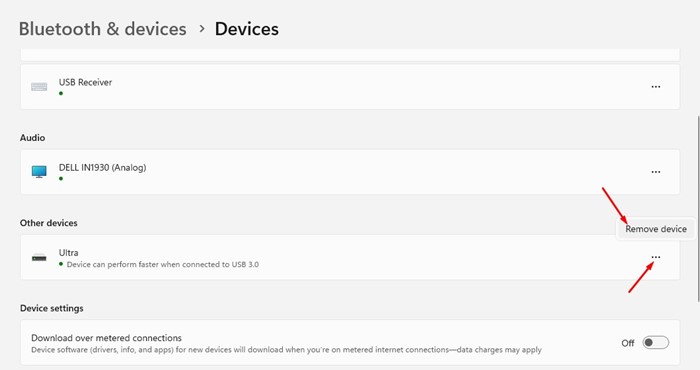
4. Find your USB drive and click on the three dots beside it. Select Remove device.
8. Update Windows 11
Beta and Dev builds of Windows 11 can have bugs that can prevent your USB drives from being ejected. You can eliminate such bugs by updating your Windows 11.
1. Click the Windows 11 Start button and select Settings.
2. Switch to the Windows Update tab.
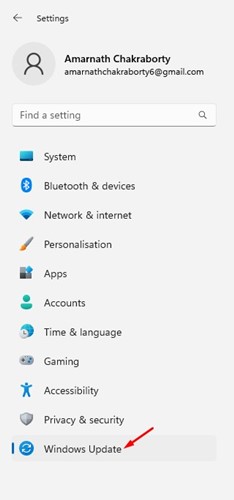
3. On the right side, click Check for Updates.

Now, Windows 11 will search for all available updates. If an update is available, it will download and install automatically on your device.
9. A few other things you can try
If you still get the error while ejecting a USB or external hard drive, you need to shut down your PC and disconnect the external drive. Once done, turn on your PC, reconnect that drive, and don’t access any files. Then, try to eject the hard drive from the system tray.
If you get the error, it’s possible that Windows is indexing your external hard drive or that the Windows security app is accessing the drive for scanning purposes.
You can try disabling indexing for the external hard drive, stopping all ongoing scans on the security programs, and then ejecting the drive.
Frequently Asked Questions:
Why can’t I eject my hard drive in Windows 11?
If you can’t eject your hard drive on Windows 11, the drive may be actively in use. Otherwise, the drive may be experiencing problems due to outdated or corrupted drivers.
What do I do if my external hard drive won’t eject?
If you can’t eject your external hard drive on Windows, the easiest fix is to reboot or turn off the computer.
How to know which program is using my external hard drive?
Knowing which program is using your external hard drive is complicated. The fastest way to resolve the can’t eject hard drive error is to log out, log back in, and safely remove the storage unit.
How do I force eject a USB device in Windows 11?
You can force eject a USB device in Windows 11 by following the steps shared in methods 6 and 7. Otherwise, log out, log back in, and remove the connected drive from the system tray.
Also read: 10 Best Bootable USB Tools For Windows 10/11
These simple methods can fix the problem of can’t eject a USB drive on Windows 11. If you need more help safely ejecting a USB drive on Windows 11, let us know in the comments below.
The post Windows 11 Won’t Eject External Hard Drive? 9 Best Fixes appeared first on TechViral.
from TechViral


0 Comments