
Both Windows 10 and Windows 11 ship with a feature called ‘Backup and Restore (Windows 7)’ that allows you to create a complete system backup. The backup & restore utility in Windows uses the ‘Shadow copy’ feature to create a system image that provides an identical copy of the installed apps, files, and settings. You can use the same tool to back up your Windows 11 data to an external drive.
This article will show you how to create a full backup of Windows 11 to an external drive.
1. Create System Image Backup via Backup and Restore
We will be using the Backup and Restore feature to back up Windows 11 to an External drive.
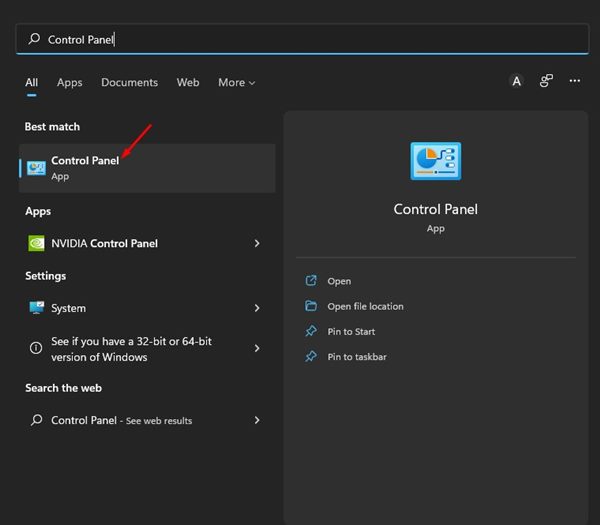
1. Click on the Windows 11 search and type in Control Panel. Next, open the Control Panel app from the list.
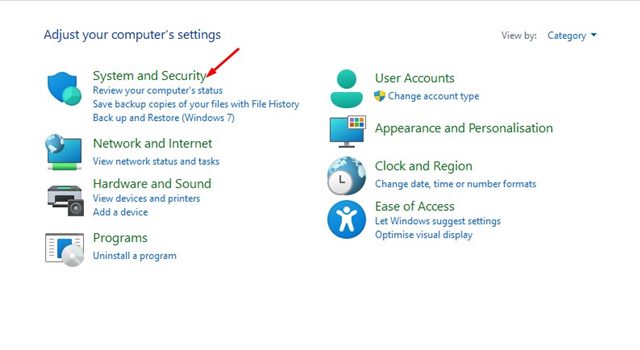
2. Click on System and Security.
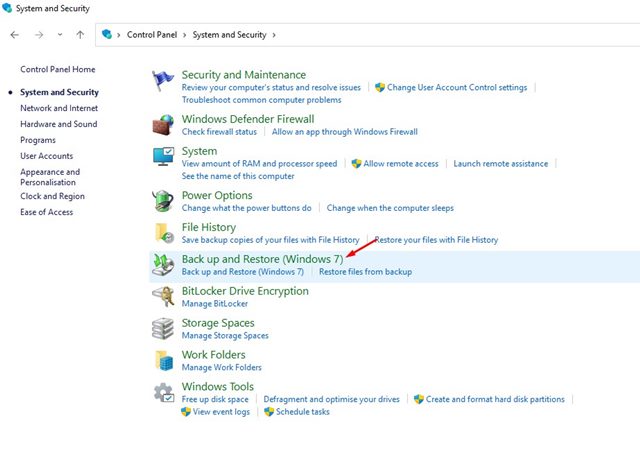
3. Scroll down and click on Backup and Restore (Windows 7).
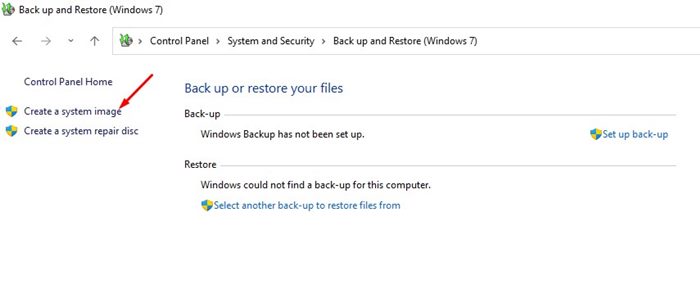
4. Click on the Create a system image link.
5. On the Where you want to save the backup page, select the ‘On a hard disk’ option and click on the drop-down menu. On the drop-down menu, select your external drive.
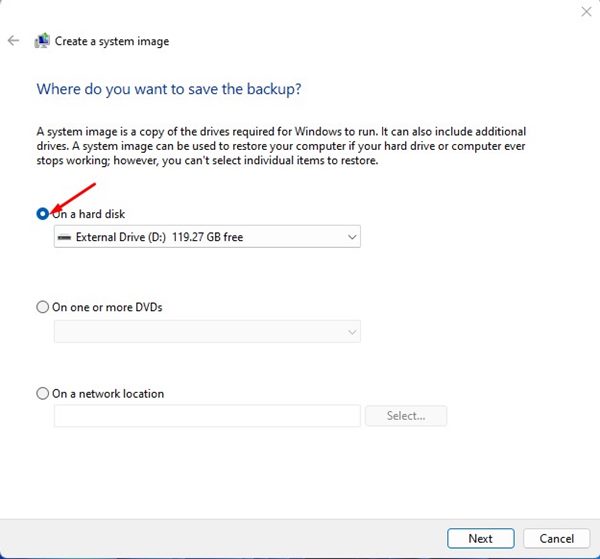
Important: The external drive should have enough storage and use the NTFS file system.
6. Select your external drive on the drop-down and click Next.
7. Select the drives you want to include in the backup. Once done, click Next.
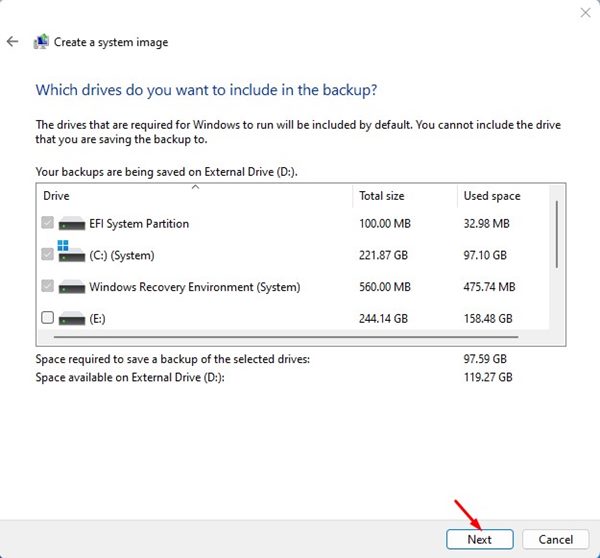
8. Click Start backup.
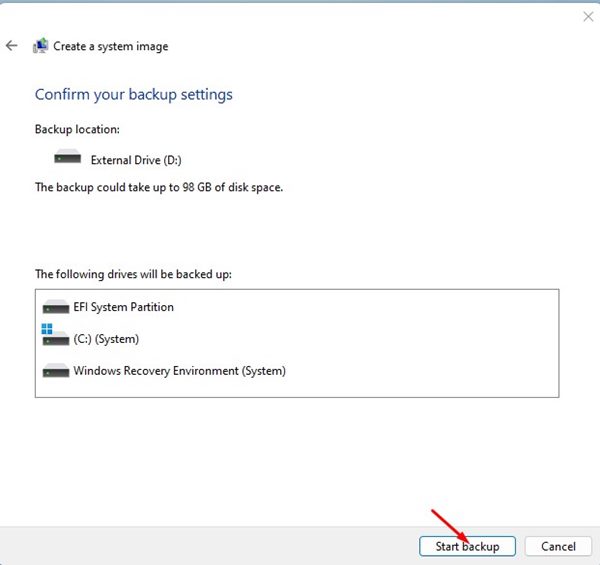
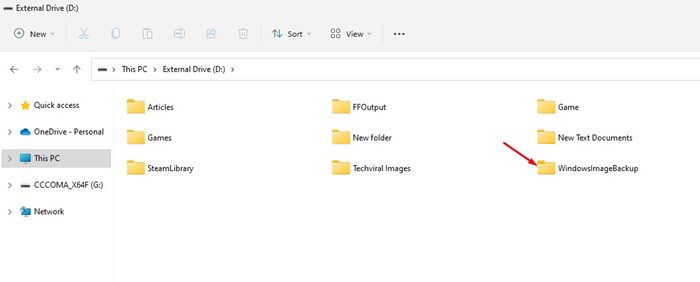
9. Wait for a few minutes until the tool creates the system image backup. Once created, open your external drive; you will find a new folder, ‘WindowsImageBackup’. This is the folder where the backup image is stored.
2. Back up Windows 11 to an External Drive via File History
Unlike the Backup & Restore, which creates and saves a full system image, the File history will only backup a few essential folders such as documents, music, pictures, videos, and desktop folders.
1. Click on the Windows 11 Search and type in Control Panel. Next, open the Control Panel app from the list.
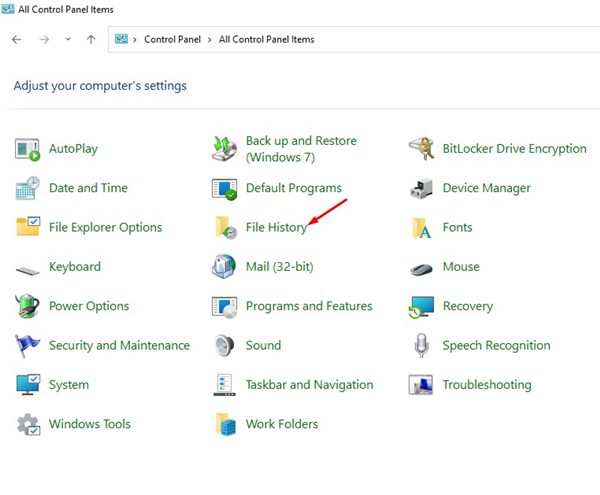
2. In Control Panel, click on File History.
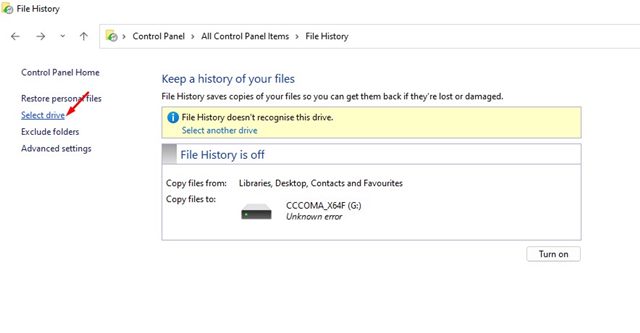
3. On the left sidebar, select the Select Drive link.
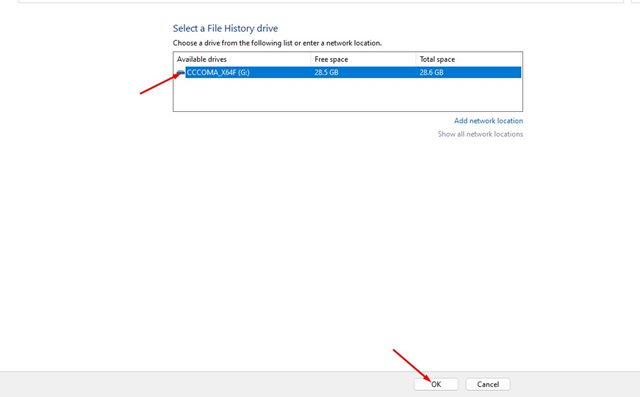
4. Select your external drive where you want to back up Windows 11 files & folders on the next screen. Once done, click on the Ok button.
5. Now go back to the previous page and click on Turn on.
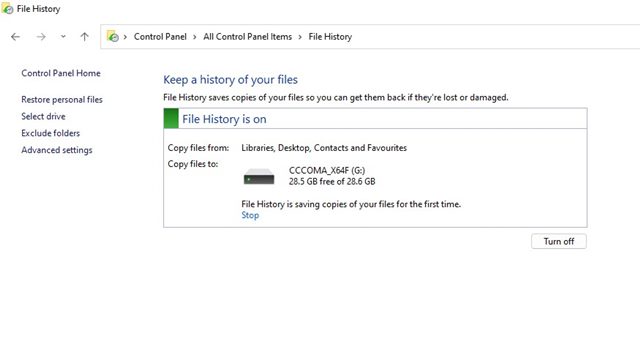
The File History tool will save copies of your files for the first time on your external drive. Open the External drive and select the File History folder to access the backup files. You will find your libraries, desktop, contacts, and favorites folders there.
That’s all about how to back up Windows 11 to an external drive without using any third-party tool. If you are looking for more ways to back up & restore Windows 11, you need to start using third-party backup & restore tools for Windows.
The post How to Backup Windows 11 to an External Drive appeared first on TechViral.
from TechViral


0 Comments