

Controlled Folder Access is a feature that protects your PC from ransomware attacks. With Controlled Folder Access, you can lock folders you don’t want softwares to modify. Here’s a detailed guide on enabling and using Controlled Folder Access.
How to Enable Controlled Folder Access?
To enable Controlled Folder Access on Windows 11, you will have to make a few changes to the Windows Security app.
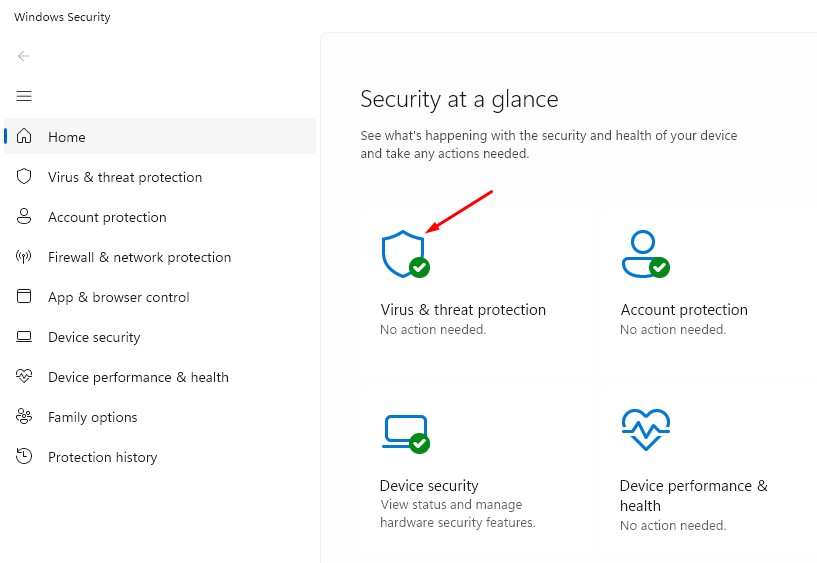
1. Launch the Windows Security app.
2. Switch to Virus & Threat Protection.
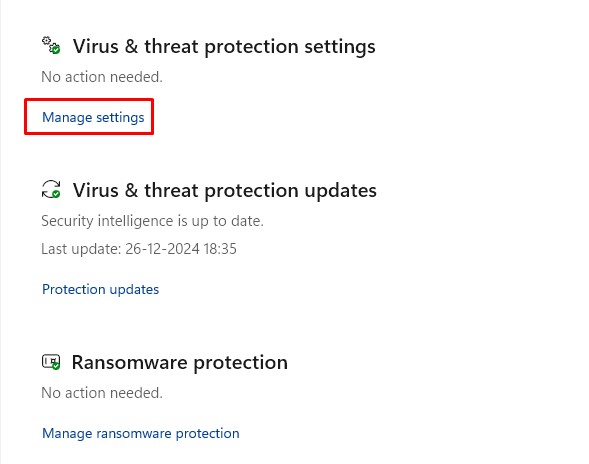
3. Click Manage Settings.
4. Scroll down to Controlled Folder Access and enable the toggle for it.
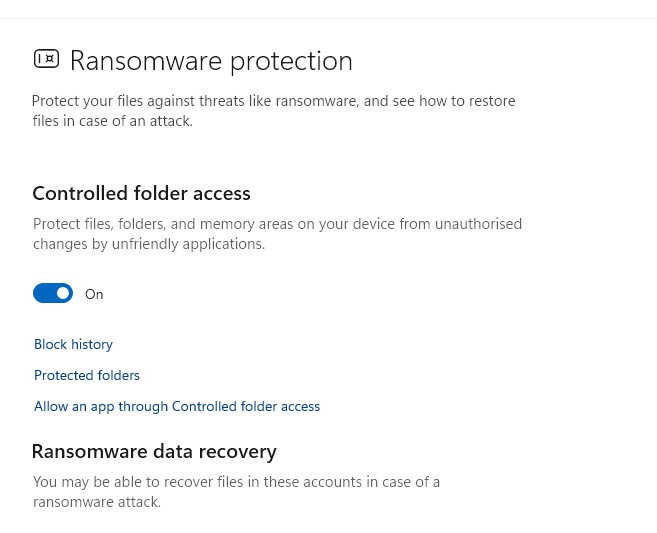
How to Manage the Blocked Files?
You can also check which files are blocked using the Controlled Folder Access feature. If you want, you can manually remove the block as well.
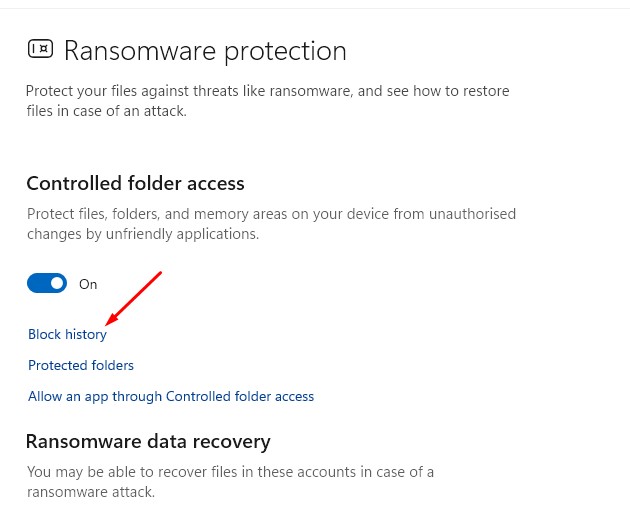
1. Navigate to the Controlled Folder Access screen.
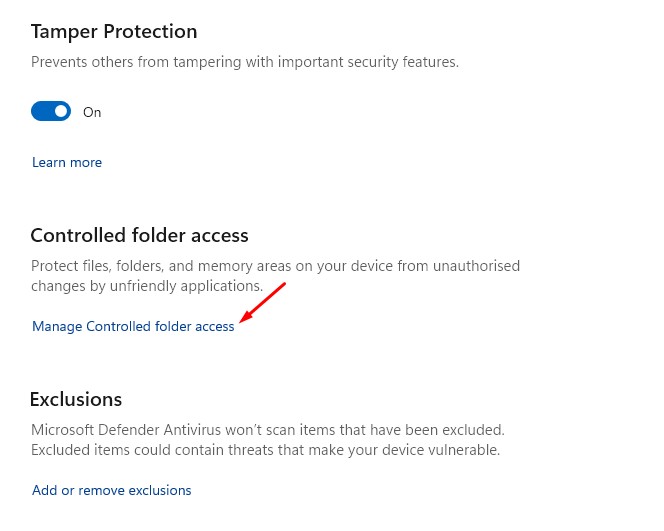
2. Click on Block History.
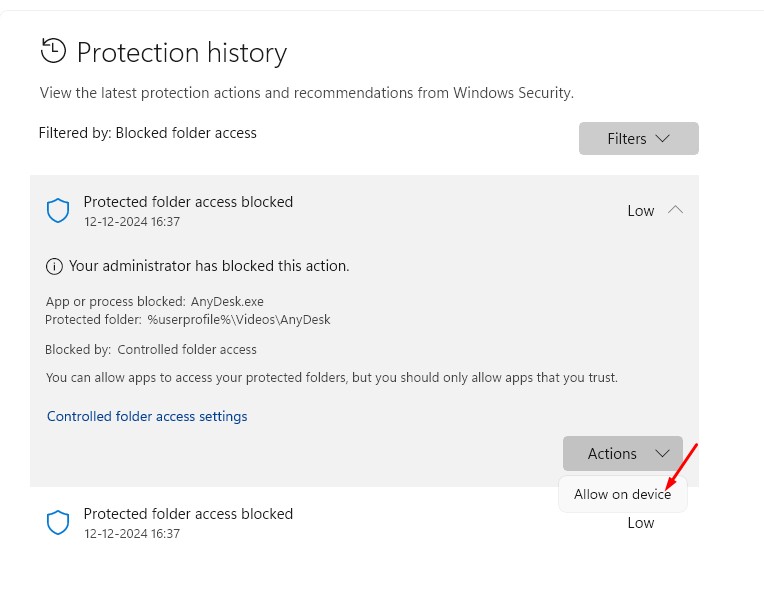
3. You will find all the files that were blocked. To allow the files, click the Actions drop-down and select Allow on Device.
How to Add or Remove a Folder on Controlled Folder Access
You can also add additional protected folders by following these steps.
1. Navigate to the Controlled Folder Access Screen.
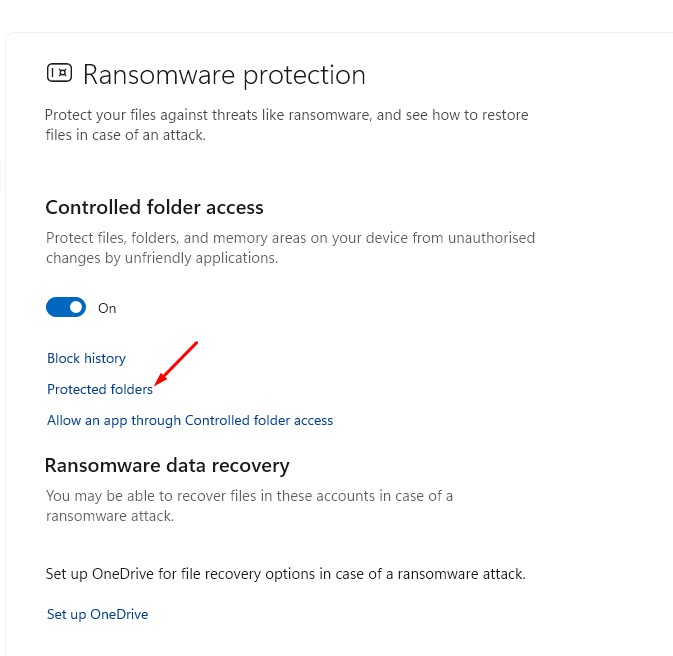
2. Click Manage Controlled Folder Access.
3. Click Protected Folders.
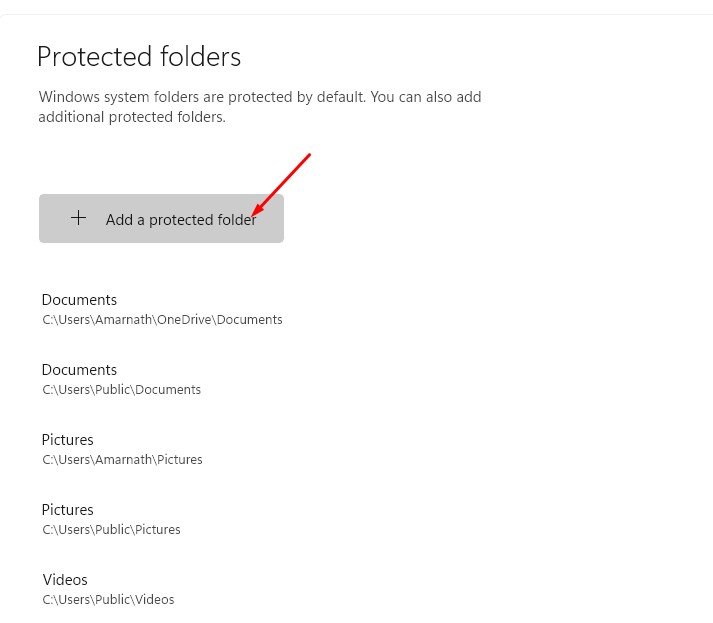
4. Click the Add a protected folder option and select the folder.
5. Select the folder and click Remove.

How to Allow Apps to Access the Protected Folders
Like the Protected Folders, the Windows Security app lets you block or allow apps to access them.
1. Navigate to the Controlled Folder Access screen and click Manage Controlled Folder Access.
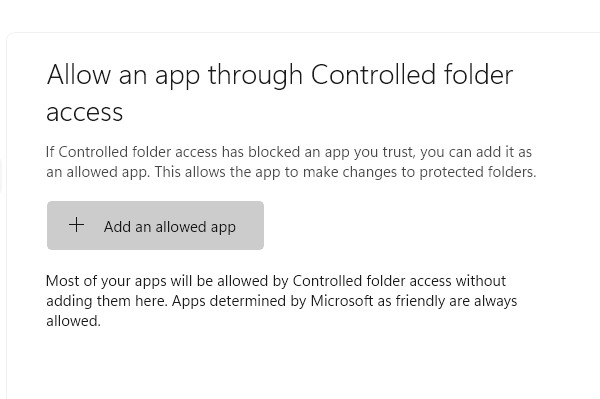
2. Select Allow an app through controlled folder access.
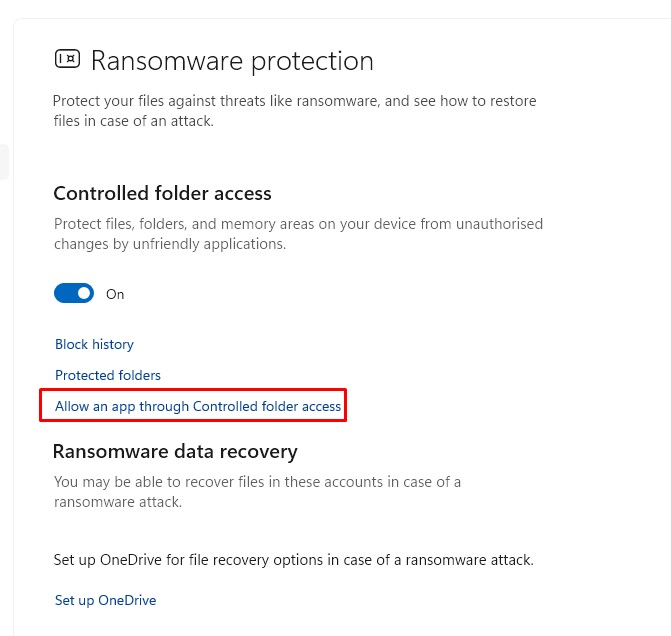
3. Click Add an allowed app and select the one you want to allow.
This guide explains Controlled Folder Access in Windows 11 and how to use it. Let us know if you need more help with this topic in the comments.
The post How to Enable and Use Controlled Folder Access in Windows 11 appeared first on TechViral.
from TechViral


0 Comments