
WiFi networks operate on three different frequency bands: 2.4 GHz, 5GHz, and 6GHz. The higher the frequency, the higher the speed, though this does affect the range. Most routers available these days support 5GHz WiFi; the only thing you have to configure to get faster WiFi speed is to force Windows 11 to connect to 5GHz WiFi only. Here’s how you can force it.
How to Force 5GHz WiFi on Windows 11
If your Windows 11 PC/Laptop’s WiFi speed is slow and you want to improve it, you can force your PC to connect to 5Ghz WiFi only.
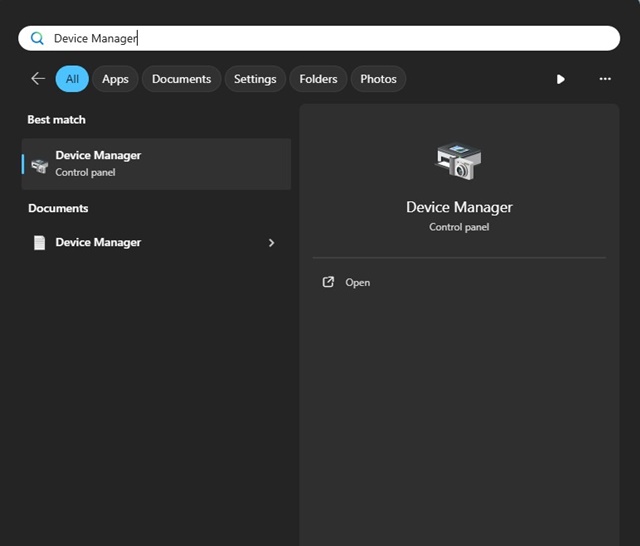
1. Open Device Manager from the Windows Search.
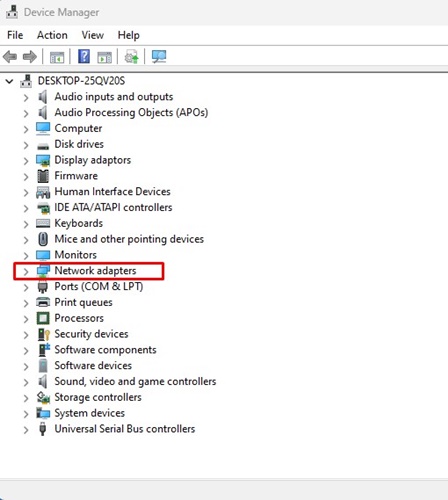
2. Expand Network adapters.
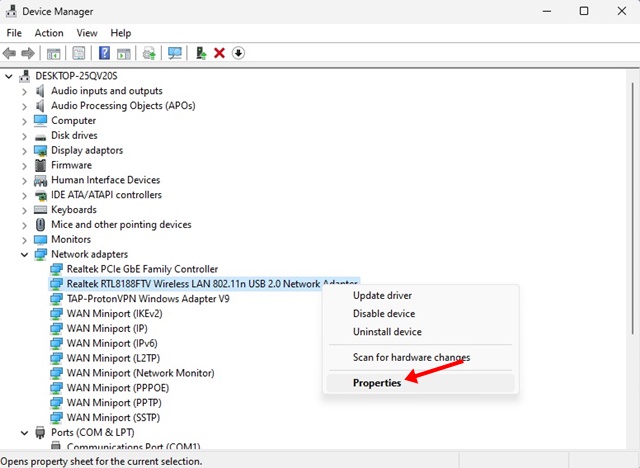
3. Right-click on your WiFi card or the WiFi device and select Properties.
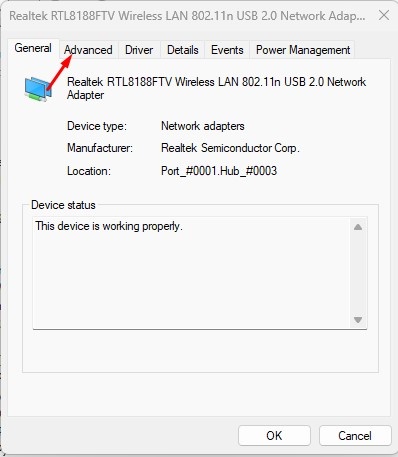
4. Switch to Advanced.
5. Find & select Preferred Band.
6. Select Prefer 5GHz band.
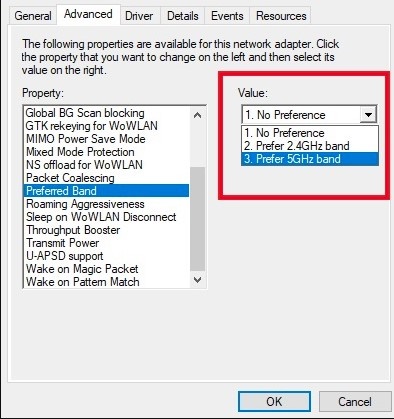
7. Click OK.
Important: If you have an older device, you need to find the Wireless Mode option in the Property and set it to use a 5GHz-compatible standard, such as 802.11ax (preferred), 802.11ac, or 802.11n.
Windows 11 Not Showing 5Ghz WiFi Connections?
Windows 11 can fail to detect the 5Ghz WiFi Connection for several reasons. Below are a few common reasons.
- Your WiFi router is not working properly.
- Your PC fails to detect the 5GHz band due to incompatible or outdated drivers.
- Neither end of the connection don’t support 5Ghz connections.
These are the most common reasons Windows 11 does not show a 5Ghz WiFi connection. Make sure to rule out these issues.
This guide is about forcing 5Ghz WiFi on Windows 11 computers. By switching to a 5GHz band, you will get faster internet speed. Let us know if you need more help forcing 5Ghz WiFi Mode on Windows 11.
The post How to Force 5GHz WiFi on Windows 11 appeared first on TechViral.
from TechViral


0 Comments