
If you have just performed a clean installation of Windows 11, a random name might appear on your PC. This random name can make it difficult to find your device on a network. If you want, you can rename your Windows 11 PC by following these methods.
1. Using System Settings
We will use the System Settings page to rename Windows 11.
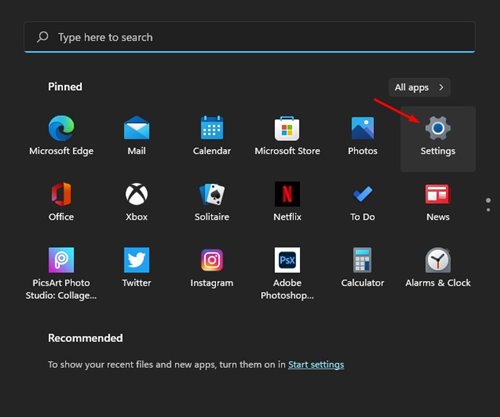
1. Click on the Start button and select Settings.
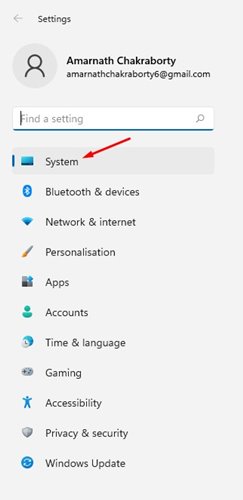
2. Click System.
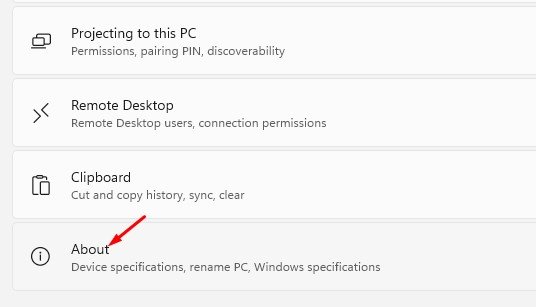
3. Scroll down and click About.
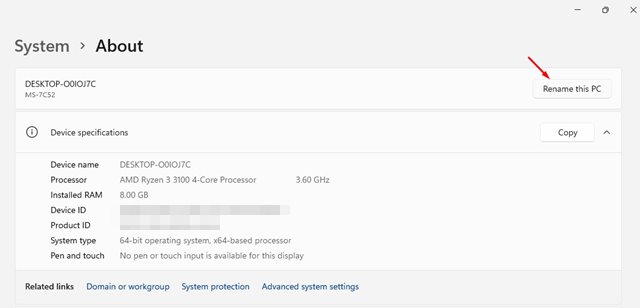
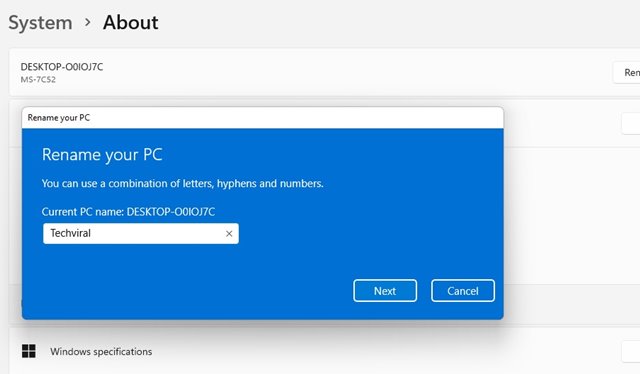
4. Click Rename this PC.
5. Enter the PC name and click Next.
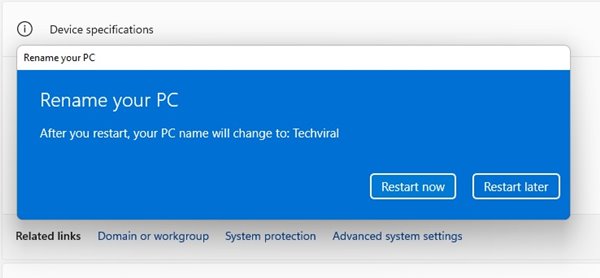
6. Click Restart Now.
2. Rename Windows 11 PC via Command Prompt
You can also use the Command Prompt utility to rename Windows 11.
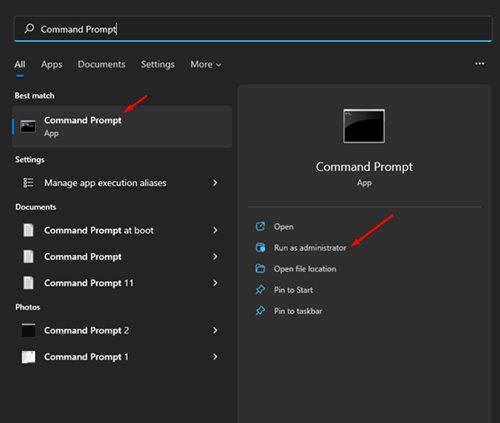
1. Open Windows Search and type in Command Prompt. Right-click on the CMD and select Run as administrator.
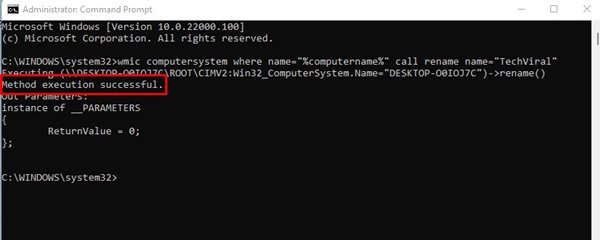
2. Enter the following command:
wmic computersystem where name="%computername%" call rename name="NewPCName"
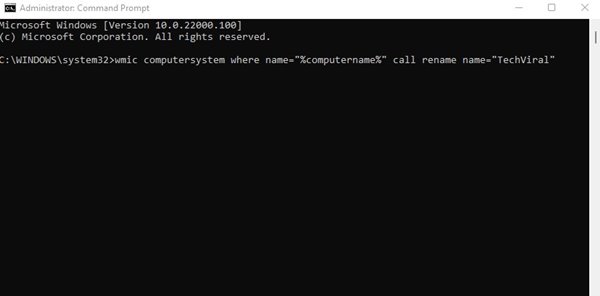
Important: Replace the NewPCName with the new name for your PC.
3. Command Prompt will display the success message. It should display Method Execution Successful.
3. Rename Windows 11 PC via System Properties
It’s easy to rename your PC via System Properties as well. Here’s what you need to do.
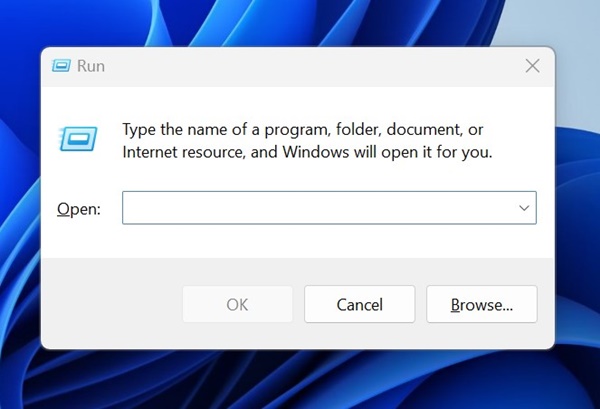
1. Press the Windows Key + R button to open the RUN dialog box.
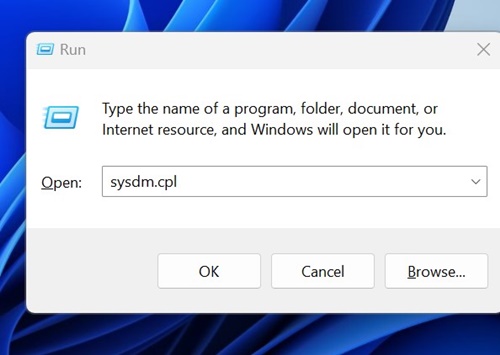
2. Type sysdm.cpl and press Enter.
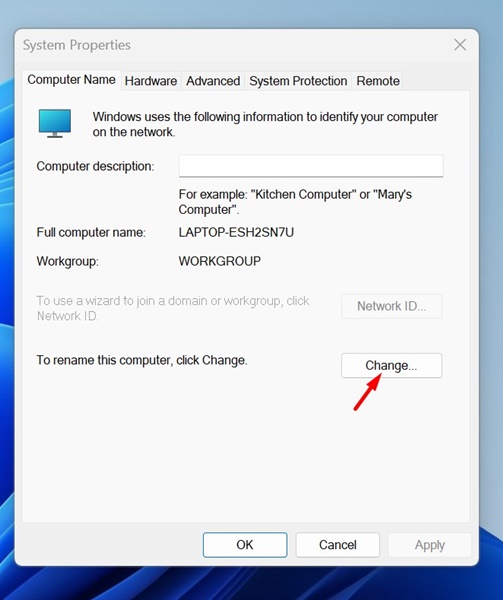
3. Switch to the Computer Name tab and click Change.
4. Type the new name you want to assign and click OK.
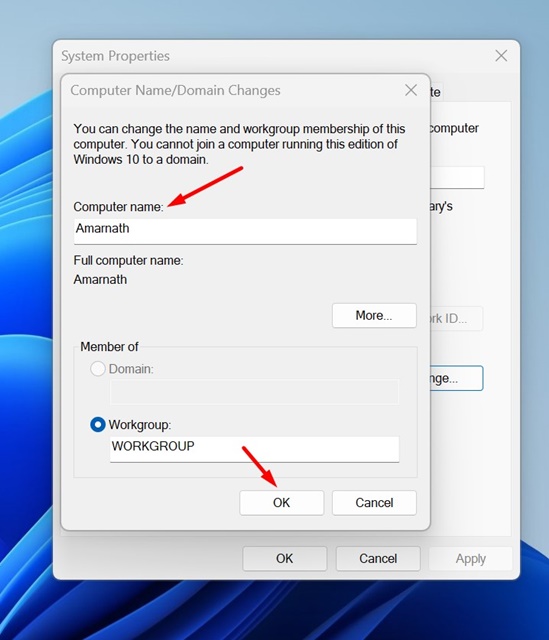
5. After making the change, restart your Windows 11 PC.
This guide explains how to rename your Windows 11 PC. If you have any questions, let us know in the comment box below.
The post 3 Ways to Rename Your Windows 11 PC appeared first on TechViral.
from TechViral


0 Comments