
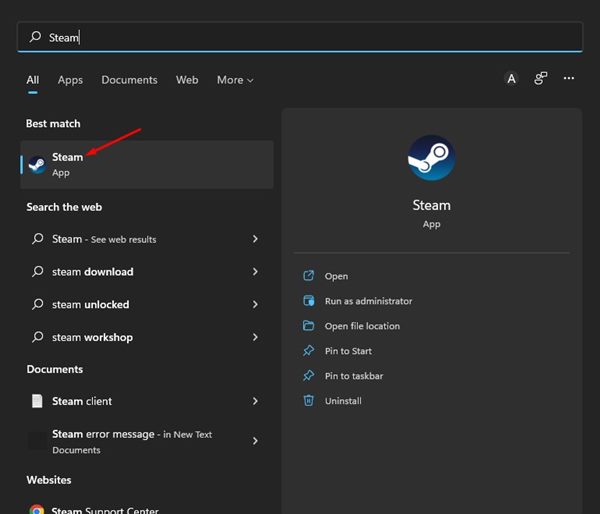
When you launch the Steam Client for the first time after a restart, the Steam Client WebHelper will likely spike your CPU usage since it loads the Steam Store, Game Library, Community tab, and others.
Usually, CPU usage goes down when all Steam components fully load. But if the Steam Client WebHelper fails to set up the display needed for the Steam Store game library, it will run in the background and constantly attempt to set it up, which spikes CPU Usage.
Anyways, if you’re experiencing a problem with Steam Client WebHelper high CPU usage, here’s what you should do.
1. Disable the Animated Avatars
The Steam Client WebHelper controls the Animated Avatars feature, and when it fails to load the Animated Avatars, it triggers high CPU usage on Windows 11. You could try disabling the Animated Avatars & Animated Avatar Frames.
1. Open the Steam desktop client.
2. Click the Friends tab on the top menu and select View Friends List.

3. Click on Settings.

4. Turn off Enable Animated Avatars & Animated Avatar Frames in your Friends List and Chat options.
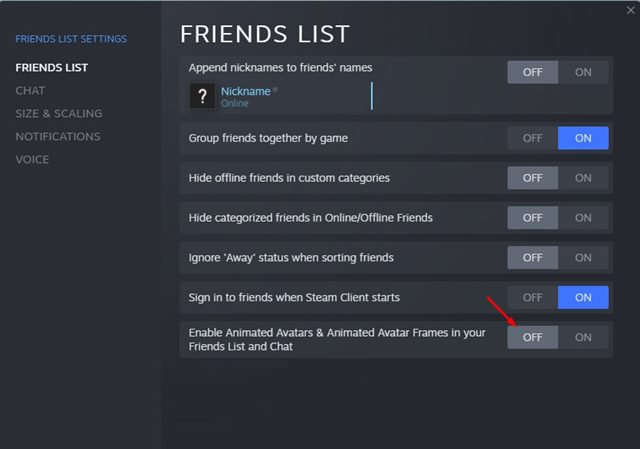
After making the changes, restart your Steam desktop client.
2. Disable Steam Overlay
Steam Overlay is also a part of Steam’s user interface, which the WebHelper tries to load. If the Steam Client WebHelper fails to load the Steam Overlay, it triggers High CPU usage.
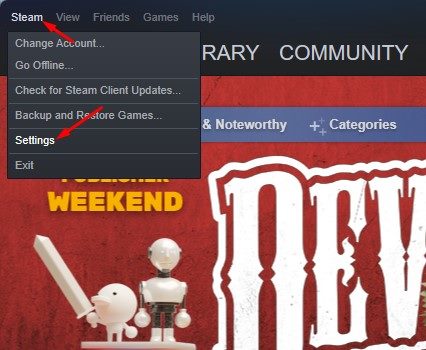
1. Open the Steam client on your PC. Click on Steam > Settings.
2. Click the In-Game option on the right pane.
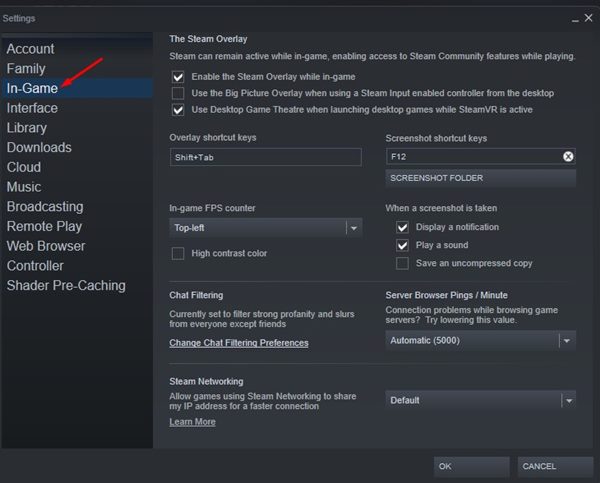
3. Uncheck the Enable the Steam Overlay while in-game option. Click OK
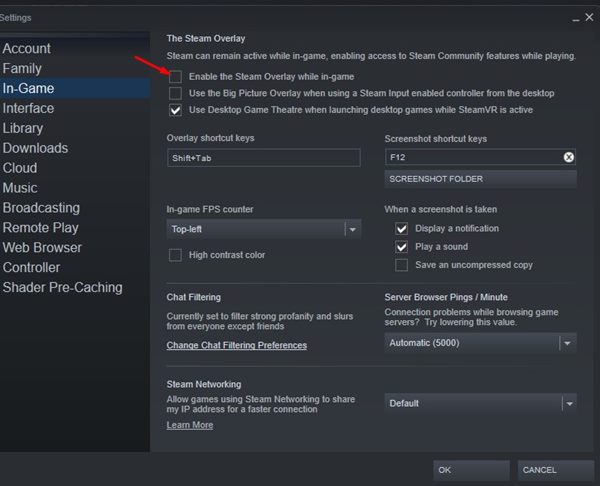
After making the above changes, restart your Steam client.
3. Disable Other Visual Elements of the Steam Client
Apart from the Steam Overlay, you can also turn off other options in the Interface settings to fix this problem. Here’s what you can disable.
1. Open the Steam Desktop client and select Steam > Settings.
2. Switch to the Interface.
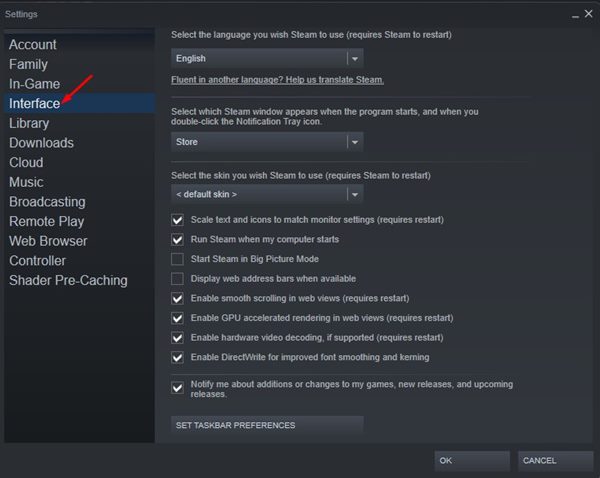
3. Turn off these three options:
- Enable smooth scrolling in web views.
- Enable GPU accelerated rendering in web views
- Enable Hardware video decoding
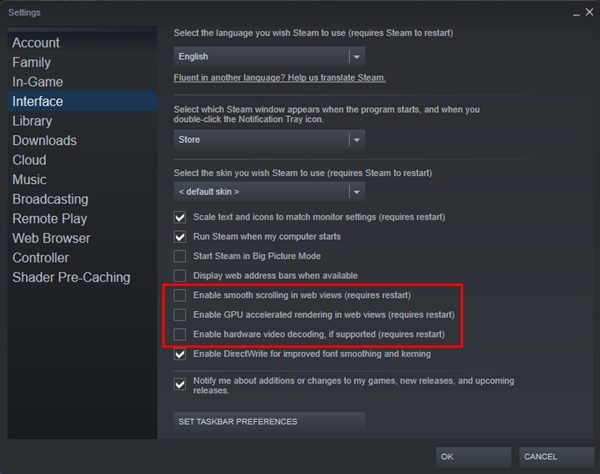
4. You need to uncheck these three options to turn off the features. Once done, click on the OK button.
4. Run Steam Without WebHelper
Since the Steam WebHelper increased CPU usage on your Windows computer, you can disable the WebHelper altogether. If you turn this off, many important visual elements of Steam might not load, but it will boost the in-game FPS.
1. Close the Steam client and end the Task and all its related processes from the Task Manager.
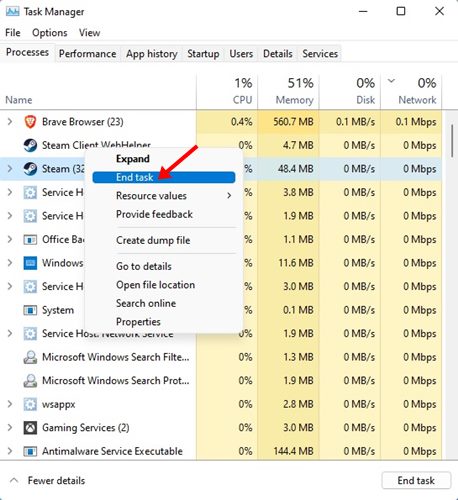
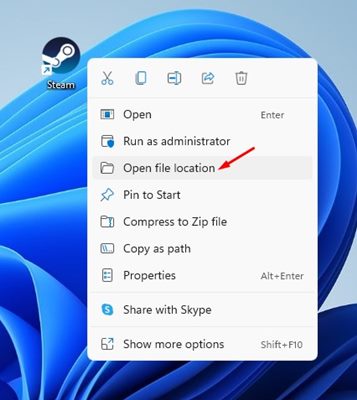
2. Right-click on the Steam desktop shortcut and select Open File Location.
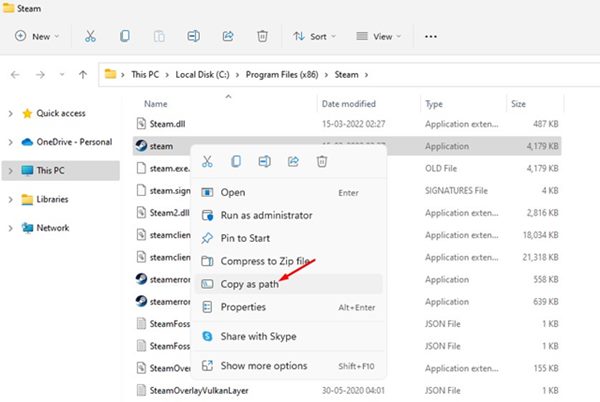
3. In the Steam folder, locate the steam.exe file. Right-click on steam.exe and select the Copy as path option.
4. Press the Windows key + R button on your keyboard. In the Run dialog box, paste the file path you copied in the above step and append the line -no-browser +open steam://open/minigameslist
5. The whole command will be something like:
"C:\Program Files (x86)\Steam\steam.exe" -no-browser +open steam://open/minigameslist
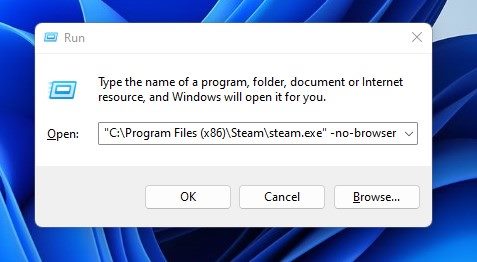
6. Click OK.
This will launch the Steam Desktop client on your PC without the WebHelper.
What won’t work after disabling Steam WebHelper?
You can start your Steam client without the browser (WebHelper), but certain features will not work. With the WebHelper disabled, you can still view your game library, install games, launch games, etc. However, you won’t be able to uninstall the games.
Disabling the Steam Webhelper also means you can’t view your achievements, access the community features, purchase games, etc.
5. Uninstall Recent Windows Updates
Sometimes, Windows Updates cause more problems for the operating system. In the past, users have reported that the Steam Client does not work after installing Windows updates.
If the issue is still unresolved, the recent Windows updates you installed may be problematic. You can try uninstalling the last Windows Update and see if it helps.
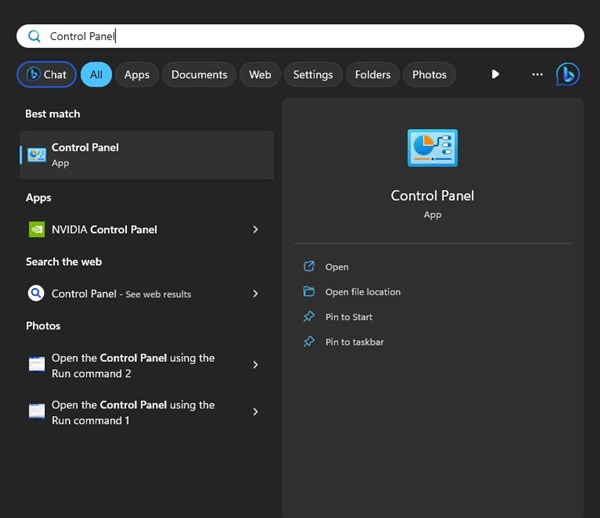
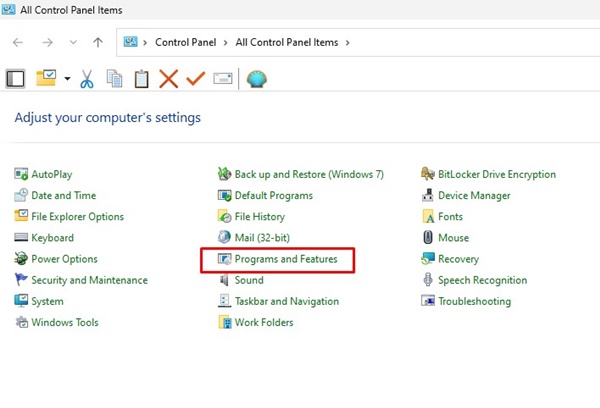
1. Open the Control Panel app from the Windows Search.
2. Click Programs and Features.
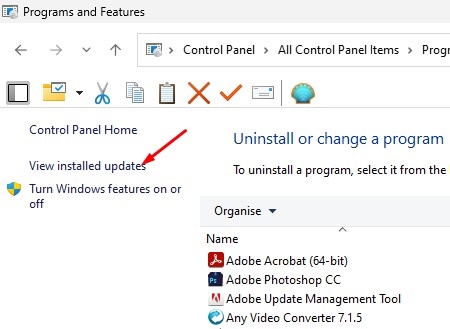
3. Click on View Installed Updates.
4. Click Uninstall.
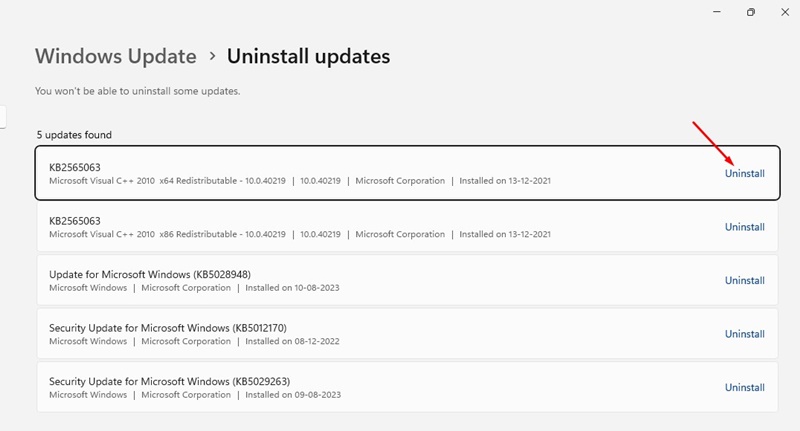
After making the changes, restart your computer. This will possibly resolve the Steam high CPU usage problem.
6. Update the Windows Operating System
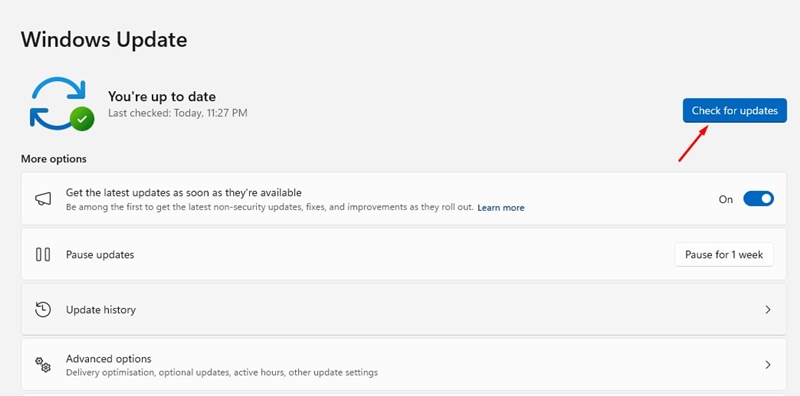
If the Steam Client Webhelper high CPU usage isn’t fixed yet, you need to update the Windows operating system to the latest version. This isn’t a sure-shot fix to the problem, but it’s still helpful.
The version of Windows you are using may have a few bugs that may be triggering high CPU usage on the Steam Client webhelper. To update your Windows operating system, head to Settings > Windows Update. On the right side, click Check for Updates.
7. Reinstall Steam Client
If all the methods fail to fix the problem, you must reinstall the Steam Client. The Steam Client WebHelper may use more CPU resources due to incorrect settings or corrupted Steam files.
If everything else fails, it’s a good idea to reinstall the Steam desktop client. This may fix Steam Client WebHelper’s high CPU usage on Windows 11.
Frequently Asked Questions:
How to stop Steam Client WebHelper from eating CPU?
The easiest way to stop the Steam client web helper from eating your CPU resources is to disable the Steam Overlay while in-game.
Can I shut down Steam Client WebHelper?
You can use the Task Manager to kill the Steam Client WebHelper and all related processes, but it will break some elements in the Steam Client.
Is the Steam Client WebHelper necessary?
You can start the Steam Client without the web browser. If you disable the Steam Client WebHelper, you can still view your game library, install games, launch games, etc.
What if I disable Steam WebHelper?
If you disable the Steam WebHelper, you won’t be able to uninstall the games. You won’t be able to view your achievements, access the community features, purchase games, etc.
These are the best methods to fix Steam Client WebHelper’s high CPU usage on Windows. If you need more help with this topic, let us know in the comments.
The post 7 Ways to Fix Steam Client WebHelper High CPU Usage appeared first on TechViral.
from TechViral


0 Comments