
Whenever Windows 11 encounters a Blue or Black Screen error, it creates a crash dump file and saves it on your hard drive. The crash dump files in Windows 11 are created to help developers find & troubleshoot the actual cause of the errors. However, it’s best to delete those files if you are not a developer and never share your crash dump report with any developers or tech experts.
Disable Crash Dump Creation on Windows 11
Crash dump files on the Windows operating system can waste lots of hard drive space and affect your PC’s performance. So, if you have limited storage on your system, it’s best to disable the Crash dumps creations.
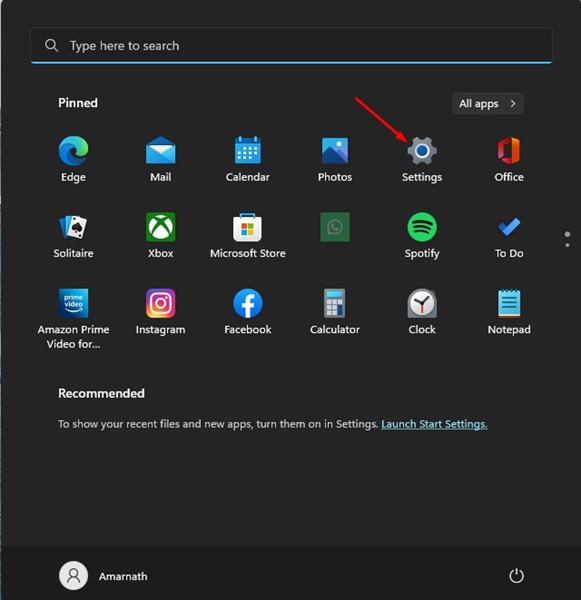
1. Click on the Windows 11 Start button and select Settings.
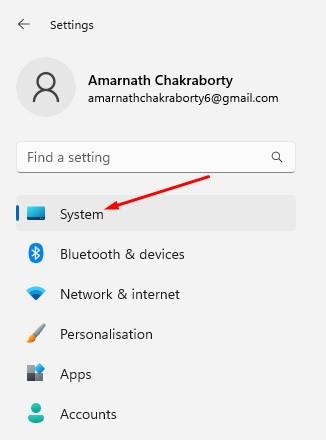
2. Click on the System tab.
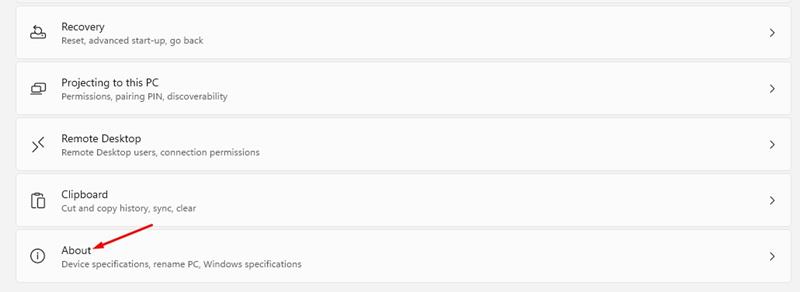
3. Scroll down to the end and click on About.
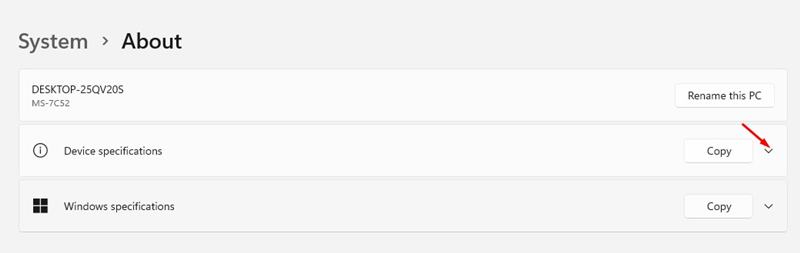
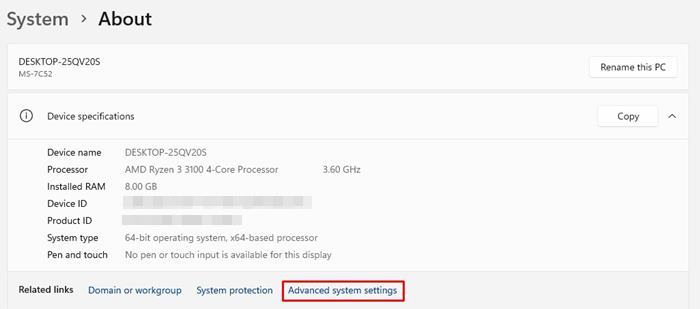
4. Expand the Device Specifications section, as shown in the screenshot below.
5. You will see a few details of your PC. Click on Advanced system settings.
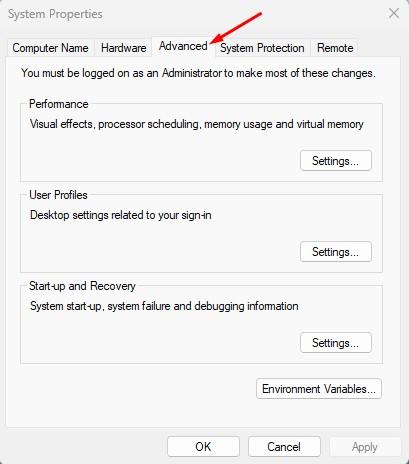
6. This will open the System Properties Window. You need to switch to the Advanced tab.
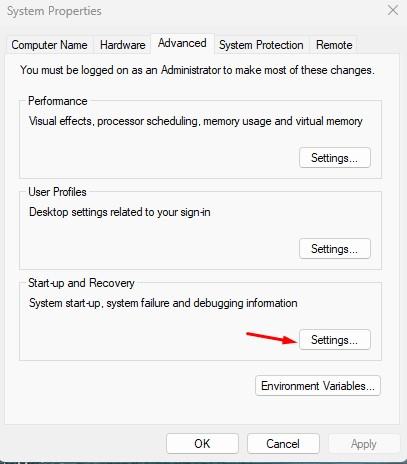
7. Click on the Settings button beneath Startup and Recovery.
8. On the Startup and Recovery screen, click on the drop-down menu for Write debugging information and select None.
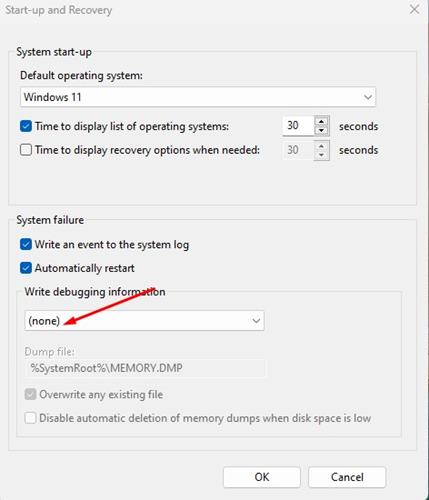
9. Once done, click Ok.
You shouldn’t disable creating crash dumps if your PC has sufficient storage, since you never know when you may need it. Apart from disabling crash dump creation, you can configure Storage Sense on Windows 11 to free up some more storage space.
The post How to Disable Crash Dumps Creation on Windows 11 appeared first on TechViral.
from TechViral


0 Comments