
When you password-protect your Windows PC, you must enter your password every time it wakes from sleep mode. This greatly reduces the risk of unauthorized activity and hacking. However, if you never share your laptop/computer with anyone and only use your PC, the password login might irritate you. In such a case, you can opt to enable Windows Auto Login. Below, we have shared ways to enable auto login in Windows. Let’s get started.
1. Enable Auto Login from User Accounts Settings
In this method, we will make some changes to the User Accounts settings of Windows 10 to enable the auto-login feature. Here’s how to enable auto-login on Windows via User Account Settings.
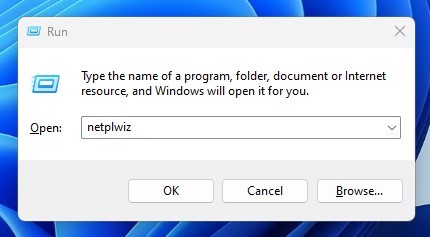
1. First, press the Windows Key + R on your keyboard. This will open the RUN dialog box.
2. On the RUN dialog box, type netplwiz and hit the Enter button.
3. This will open the User Accounts dialog box.
4. Select the user account where you want to enable auto-login. Once selected, uncheck the option ‘Users must enter a user name and password to use this computer‘.
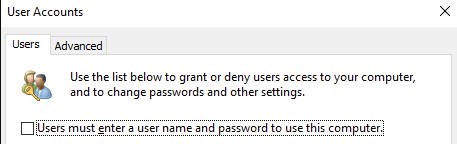
5. After making the changes, click on the Ok button and close the RUN dialog box.
2. Enable Auto Login in Windows using the Registry Editor
If you cannot use the first method, you need to follow this one. Here we will make some changes to the Windows Registry to enable Auto Login.
1. Press the Windows Key + R to open the RUN dialog box. In the RUN dialog box, type regedit and press Enter.
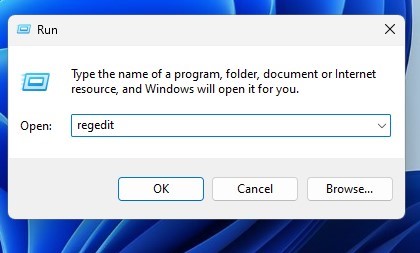
2. This will open the Registry Editor. You need to navigate to the following path:
HKEY_LOCAL_MACHINE\SOFTWARE\Microsoft\Windows NT\CurrentVersion\Winlogon
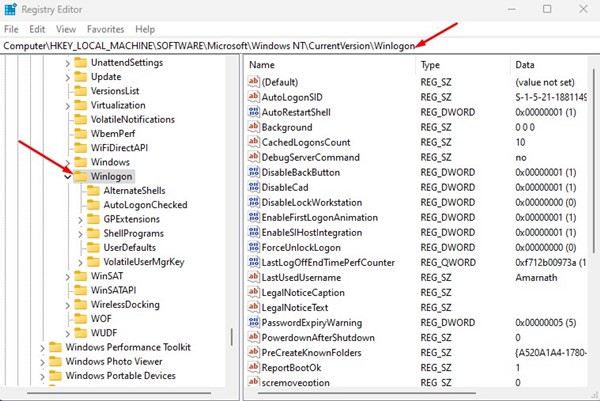
3. Right-click on Winlogon and select New > DWORD (32-bit) Value. Name the new value AutoAdminLogon.
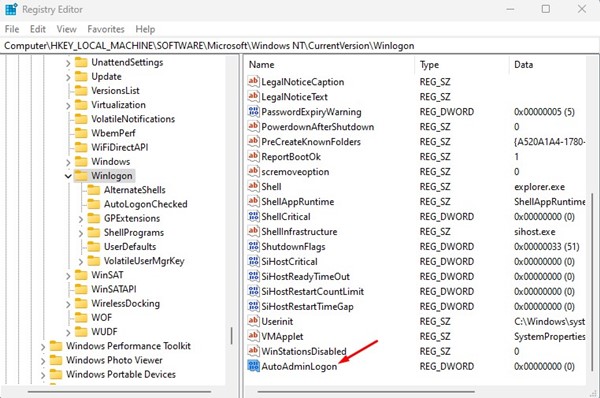
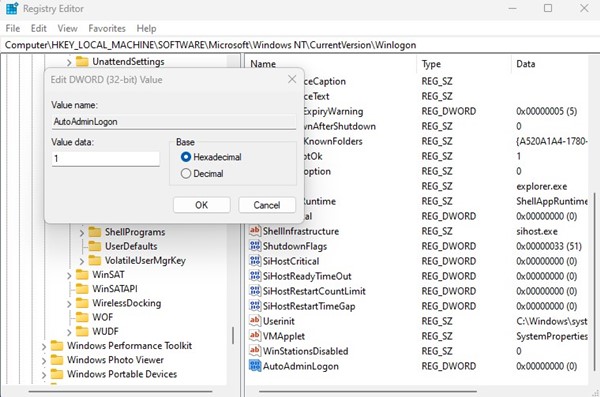
4. Double-click on AutoAdminLogon and set 1 in the Value field.
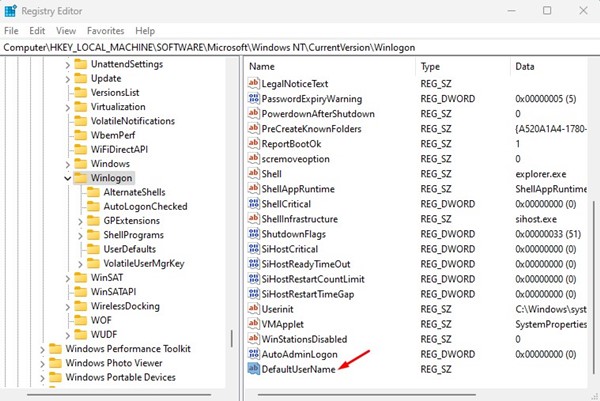
5. Right-click on Winlogon and select New > String Value. Name the new String Value as DefaultUserName.
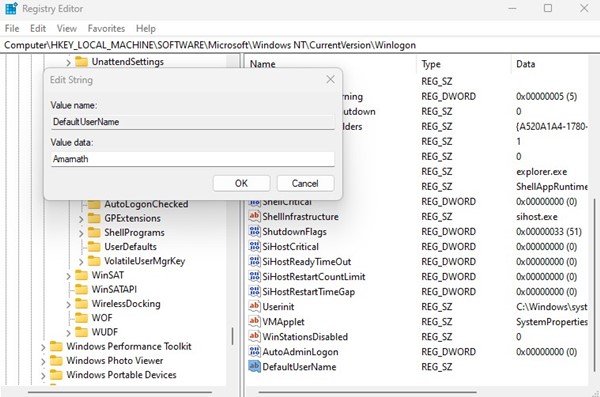
6. Enter your User Name on the Value data field and click Ok.
7. Right-click on Winlogon and select New > String Value. Name the new String Value as DefaultPassword.
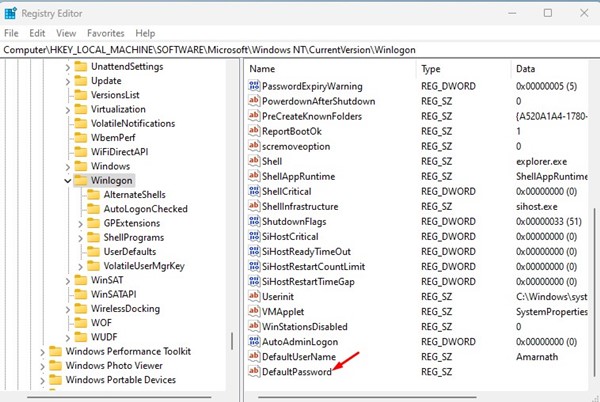
8. Double-click on the DefaultPassword and enter your password under the Value Data field. Once done, click Ok.
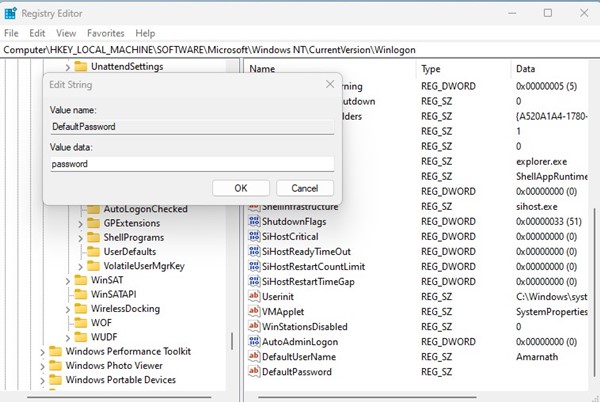
To disable the auto login, you must delete the AutoAdminLogon, DefaultUsername, and DefaultPassword.
3. Enable Auto Login via Settings on Windows 11
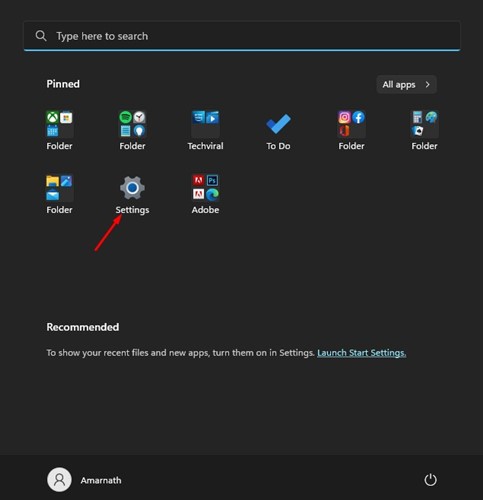
1. First, click on Windows Start and select Settings.
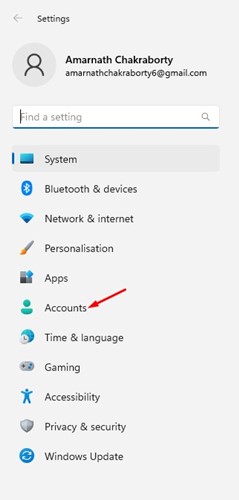
2. In Settings, switch to the Accounts tab on the left pane.
3. On the right side, scroll down and click on Sign-in options.

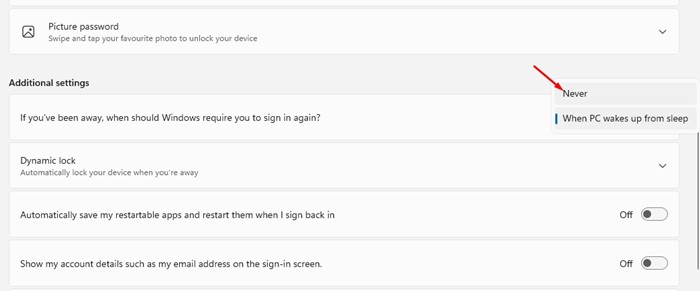
4. Now scroll down to the Additional Settings section. Now, on the option for ‘If you’ve been away, when should Windows require you to sign in again?’, here select ‘Never‘
Also Read: Windows 11 ISO Free Download Full Version
These are some of the best ways to enable auto-login on a Windows PC. The shared methods work with all versions of Windows, including Windows 11. If you need more help enabling auto-login on Windows 10, let us know in the comments below.
The post How to Enable Auto Login in Windows appeared first on TechViral.
from TechViral


0 Comments